© 2014 MIMAKI ENGINEERING CO.,LTD.
7.3
P.5
7.3 Performing the Initial Ink Fill
R.1.2
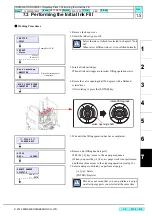
8. Press the ENTER key to move the carriage on the wiper.
The head corresponding to the damper selected in 7.moves on
the wiper.
9. Wait for a while until the machine is ready for opening the port.
10. Prepare the ink filling jig and press the [ENTER] key.
11. Inset the ink filling jig into each port in order and flow a certain
amount of ink.
*For reference: Amount shall be about 10cm-flowing on the
jig.
1). After flowing ink from all ports of the damper selected in
7., press the [ENTER] key to stop sending ink.
2). Remove the ink filling jig and close the cap.
12. Press the [ENTER] key to return the carriag to the position that
close the cap.
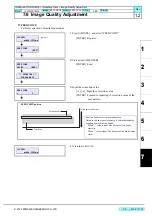
AIR PG POSITION
MOVE START [ENT]
PLEASE WAIT
PREPARING
PLEASE WAIT
AIR PG
START [ENT]
Do not remove the cap of the damper’s port that is
not selected.
AIR PG
COMPLETED [ENT]
Use the ink filling jig.
Connect the top edge of the ink filling jig with the “Fitting” on the carriage front surface.
Ink filling jig
(Connect the top edge.
)
Ink filling jig
CAPPING POSITION
MOVE START [ENT]
INSTALLATION GUIDE > Outputting Plots > Performing the Initial Ink Fill
Model
JV400-130/160LX
Issue 2011.02.15 Revised 2012.10.15 F/W ver.
1.00
Remark
1.2
Содержание JV400-130LX
Страница 49: ......
Страница 50: ...D500698 22 30042014 2013 MIMAKI ENGINEERING CO LTD KF FW 2 50...

