


LOGGING
55
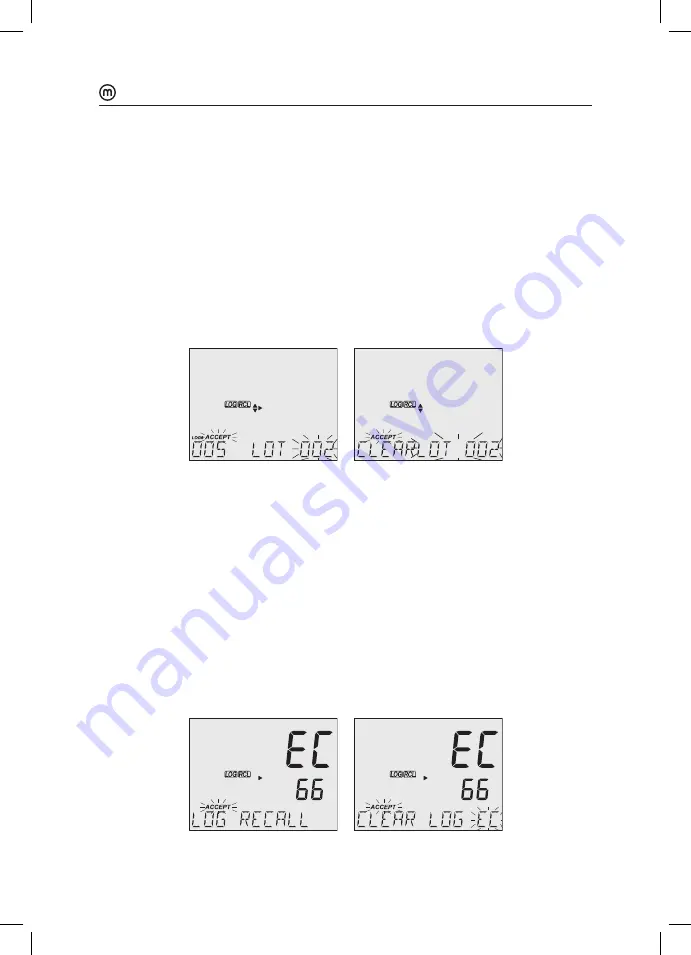
The LOG ### LOT ### screen displays selected lot number (bottom right) and total
logs stored in lot (bottom left).
5. Press GLP/ACCEPT to confirm (to exit, press ESC or CAL/EDIT or LOG/CLEAR).
6. With the lot selected, press LOG/CLEAR to delete entire lot.
“CLEAR” is displayed with ACCEPT tag and lot name blinking.
Note:
Use
keys to select a different lot number.
7. Press GLP/ACCEPT to confirm (to exit, press ESC or CAL/EDIT or LOG/CLEAR).
“PLEASE WAIT” with ACCEPT tag blinking is displayed, until the lot is deleted.
After the lot has been deleted “CLEAR DONE” message displays briefly.
Display shows the previous lot ###.
Delete All
1. Press RCL to access the logged data.
LCD displays “PLEASE WAIT” followed by “LOG RECALL PH” or “LOG RECALL EC” with
ACCEPT tag and either “PH” or “EC” blinking and the number of stored logs.
2. Use
keys to select between log storage locations “PH” or “EC”.
3. Press LOG/CLEAR to delete all logs from the selected location.
“CLEAR LOG PH” or “CLEAR LOG EC” is displayed with ACCEPT tag and PH/EC blinking.
4. Press GLP/ACCEPT to confirm (to exit, press ESC or CAL/EDIT; or LOG/CLEAR).
“PLEASE WAIT” is displayed with a percentage counter, until all logs are deleted.
After all logs have been deleted “CLEAR DONE” message displays briefly.
Display returns to the log recall screen.


