background image

25

2     Moniteur sans fil M18™

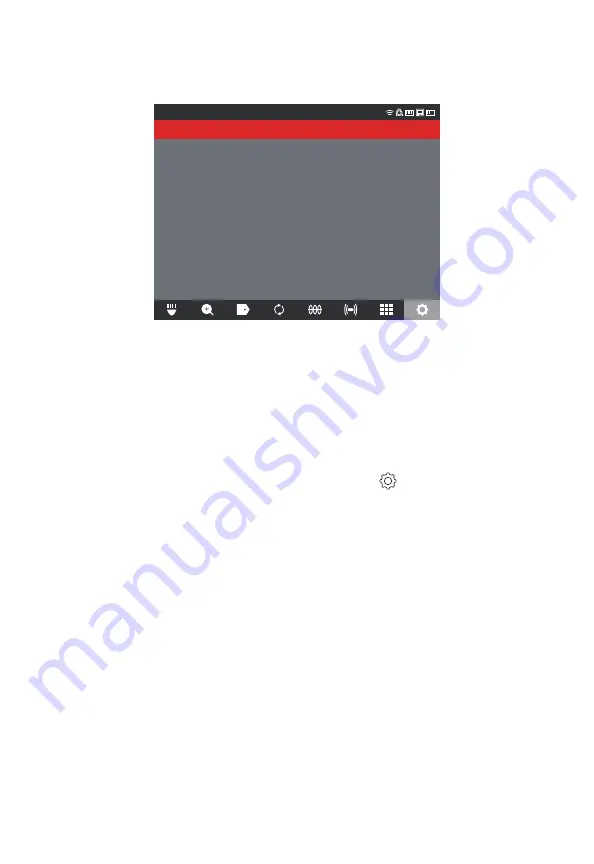
4.  Une fois choisie la résolution de 1080 p, 720 p ou 480 p, le prochain écran vous 

demandera de sélectionner entre 30 images par seconde ou 15 images par seconde. 

Sélectionner l’option désirée et appuyer sur le cadran de navigation.

Paramètres

30FPS

15FPS


5. 

Une fois choisie l’option d’images par seconde, le système reviendra au menu « 

Paramètres ».

Paramètres de l’image

Cette option de paramètres vous permettra de sélectionner les dimensions de l’image. 

Ces dimensions affecteront la qualité de l’image, ce qui affectera la taille du fichier image.

Options de paramètres de l’imagerie :

 1920 x 1080, 1280 x 720 ou 640 x 480 

Tourner le cadran de navigation vers l’option 

« Paramètres » 

 et appuyer sur lui.

Tourner le cadran de navigation vers l’option 

« Paramètres de l’image »

 et appuyer sur lui 

pour entrer dans le submenu.

Utiliser le cadran de navigation pour passer entre toutes les options de dimensions. 

Sélectionner 1920 x 1080, 1280 x 720 ou 640 x 480 et appuyer sur le cadran de navigation.

Une fois choisis les paramètres de l’imagerie, le système reviendra au menu 

« Paramètres »

.

2.2.10   Paramètres de connexion

La méthode de connexion préétablie pour le moniteur sans fil M18™ et le Smart Hub de 

500 Go M18™ est connexion WIFI. La plage sans fil entre les deux unités est de 60,9 

m (200’). Si un Smart Hub se trouve dans la plage de 60,9 m (200’), il s’affichera dans 

la liste des centres de commande. Il est possible de connecter le moniteur sans fil et le 

Smart Hub à l’aide du câble USB en tant que ressource de sauvegarde.

Premier jumelage du moniteur sans fil

• 

S’il n’y a qu’un seul Smart Hub à proximité, le moniteur sans fil forcera automatiquement 

son jumelage sans nécessitant aucune interaction de la part de l’utilisateur.

• 

S’il y a plus qu’un Smart Hub à proximité, la liste de centres de commande s’affichera 

sur le moniteur sans fil ou l’appli d’inspection de tuyaux Milwaukee

®

 pour que 

l’utilisateur puisse choisir le Smart Hub désiré.

• 

Si vous êtes demandé de saisir un mot de passe, veuillez saisir : 29702000 

Содержание 2973-20

Страница 1: ...99 m 325 48 53 2970 Support pour tablette 2970 20 Smart Hub de 500 GB M18 2971 20 Monitor inal mbrico M18 2973 20 Tiral neas de inspecci n de tuber as de rigidez media de 36 5 m 120 2974 20 Tiral neas...

Страница 2: ......

Страница 3: ...ol Hub 2971 20 M18 Wireless Monitor 2973 20 120 Mid Stiff Pipeline Inspection Reel 2974 20 200 Stiff Pipeline Inspection Reel 2975 20 200 Mid Stiff Pipeline Inspection Reel 2976 20 325 Stiff Pipeline...

Страница 4: ......

Страница 5: ...ng pulling or unplugging the power tool Keep cord away from heat oil sharp edges or moving parts Damaged or entangled cords increase the risk of electric shock When operating a power tool outdoors use...

Страница 6: ...ng of moving parts breakage of parts and any other condition that may affect the power tool s operation If damaged have the power tool repaired before use Many accidents are caused by poorly maintaine...

Страница 7: ...ter to wash hands and other body parts exposed to drain contents This will help reduce the risk of health hazards due to exposure to toxic or infectious material Always check the work area before begi...

Страница 8: ...imits for a Class A digital device pursuant to Part 15 of the FCC Rules These limits are designed to provide reasonable protection against harmful interference when the equipment is operated in a comm...

Страница 9: ...r Solid Blue Wireless mode is active and ready to be configured via the ONE KEY app Blinking Blue Is actively communicating with the ONE KEY app Blinking Red Tool is in security lockout and can be unl...

Страница 10: ...r in liquid or allow a liquid to flow inside them CLEANING Clean dust and debris from any vents Keep tool clean dry and free of oil or grease Use only mild soap and a damp cloth to clean since certain...

Страница 11: ...maintenance or accidents Normal Wear Many power tools need periodic parts replacement and service to achieve best performance This warranty does not cover repair when normal use has exhausted the life...

Страница 12: ...THE EXCLUSION OR LIMITATION OF INCIDENTAL OR CONSEQUENTIAL DAMAGES SO THE ABOVE LIMITATION OR EXCLUSION MAY NOT APPLY TO YOU THIS WARRANTY IS EXCLUSIVE AND IN LIEU OF ALL OTHER EXPRESS WARRANTIES WRI...

Страница 13: ...Measure 17 2 2 7 Setting the Sonde Frequency 18 2 2 8 Setting the Company Name 19 2 2 9 Video and Image Settings 20 2 2 10 Connection Settings 21 2 2 11 M18 Battery 24 2 2 12 Setting the LCD Screen S...

Страница 14: ...eel 57 4 1 200 Mid Stiff 200 and 325 x Stiff Pipeline Inspection Reel Overview 57 4 2 120 Mid Stiff Pipeline Inspection Reel Overview 58 4 3 Installing the Backpack Plate 59 4 4 Mounting the M18 Wirel...

Страница 15: ...r in the recorded video and will show in the pictures along with the system time system date and distance of deployed push cable Note that the Wireless Monitor or tablet running the Milwaukee Pipeline...

Страница 16: ...nches 200 Mid Stiff Pipeline Inspection Reel Two to six inches All reels include push cable with a spring assembly that the self leveling camera head mounts on The M18 Wireless Monitor and M18 500GB C...

Страница 17: ...13 1 Introduction 120 Mid Stiff Pipeline Inspection Reel Overview Front view Rear view 200 Mid Stiff Pipeline Inspection Reel Overview Front view Rear view...

Страница 18: ...Inspection App must be connected to the M18 500GB Control Hub in order to create a video recording or capture pictures Both the video and picture files are stored in the Control Hub Internal Drive 1 2...

Страница 19: ...or by formatting the M18 500GB Control Hub Internal Drive The Pipeline Inspection Reel with camera does not need to be connected to for the first time setup These initial Wireless Monitor settings wi...

Страница 20: ...n the navigation dial and press on OK to start the Language change SETTINGS The Wireless Monitor language has been changed These changes will take effect only after the unit has been restarted Cancel...

Страница 21: ...ed to the Settings menu If using a tablet running the Milwaukee Pipeline Inspection App the Date Time are taken from the tablet 2 2 6 Setting the Units of Measure 1 Turn the navigation dial to Setting...

Страница 22: ...n the navigation dial to Settings press the navigation dial 2 Turn the navigation dial to Sonde Frequency press to enter the sub menu Settings 512Hz 640Hz 33kHz 3 Turn the navigation dial to select th...

Страница 23: ...2019 05 10 6 FILES Sonde Frequency 640Hz Image Settings 1920x1080 Connection Settings MTCAM_02938B284 Camera Settings Label Settings Format Disk Video Settings 1080P 30FPS Company Name Manage Jobs 202...

Страница 24: ...ation dial to Settings press the navigation dial 2 Turn the navigation dial to Video Settings press to enter the sub menu Settings MANAGE JOBS 2019 05 10 6 FILES MILWAUKEE Company Name Sonde Frequency...

Страница 25: ...n dial After the Image setting choice is selected the system will return to the Settings menu 2 2 10 Connection Settings The default connection method for M18 Wireless Monitor and M18 500GB Control Hu...

Страница 26: ...onnected by a USB cable Control Hub connection status and wireless signal strength This icon appears when the Control Hub is connected to the Wireless Monitor by Wi Fi Pipeline Inspection Reel icon ap...

Страница 27: ...Hub press to connect Settings Control Hub List Searching for nearby control hubs MTCAM_029383A7E MTCAM_029384BEA MTCAM_02938ED7A MTCAM_02938B284 4 After selecting the Control Hub you will be returned...

Страница 28: ...amera Light 9 3FT 2021 09 26 01 47 57 AM The above illustration shows the Wireless Monitor and Control Hub connected by USB cable with the M18 Battery removed from the Wireless Monitor The Wi Fi icon...

Страница 29: ...Nine hours on a fully charged battery Camera Light 2021 09 26 01 47 57 AM 9 3FT 2021_09_26_A Replace Control Hub battery or connect cable to Wireless Monitor immediately Time remaining 08 51 2 2 12 S...

Страница 30: ...ngs menu 3 Main viewing area 12 Distance out count 4 Camera Light 13 Wireless Monitor battery status 5 Zoom Pan 14 Wireless Monitor connection status icon 6 Labels 15 Control Hub battery status 7 Scre...

Страница 31: ...never the M18 500GB Control Hub is restarted turned off and on again When the Record button is pressed under the above situations the Select Job List will appear with options of New Job With Date And...

Страница 32: ...ew Job With Name 3 When finished entering the new job name use the navigation dial to Enter and press the dial MT2019_A Cancel Save 4 Use the navigation dial to select Save and press the navigation di...

Страница 33: ...ppear to route the recording record to the appropriate Job folder CAMERA LIGHT 2021 09 26 01 47 57 AM 9 3FT Settings Selete Job New Job With Date And Time New Job With Name Existing Job Cancel No job...

Страница 34: ...e the navigation dial to select Export press the dial 3 Use the navigation dial to select the export destination of Control Hub Thumb Drive press the navigation dial The progress indicator will appear...

Страница 35: ...the LCD s display brightness and contrast settings based on the light from the camera head 1 Turn the navigation dial to Camera Light press the navigation dial 2 Turn the navigation dial to reach the...

Страница 36: ...on dial Pan Horizontal and Vertical Panning horizontally moves the position in the image in right and left directions Panning vertically moves the position in the image in up and down directions In bo...

Страница 37: ...te CAMERA LIGHT 2021 09 26 01 47 57 AM 9 3FT 2021_09_26_A Rotate CAMERA LIGHT 2021 09 26 01 47 57 AM 9 3FT 2021_09_26_A 180 degree position 270 degree position Note The screen will remain in a Rotate...

Страница 38: ...t Off and press 2 3 9 Sonde Sonde activates the Sonde transmitter attached at the end of the Pipeline Inspection Reel termination spring to locate the approximate position of the Sonde in the pipe The...

Страница 39: ...are shown organized in folders and stored for reviewing editing exporting or deleting Gallery 202109211052c 202109211052b 202109211052a 202109260518c 202109260518b 202109260518a 2021_09_21 2021_09_26_...

Страница 40: ...e file RW FF Rewind and fast forward Trim Edits the video length by selecting portions of the video to keep and portions to trim Record Audio Add audio comments on top of video files Speaker Volume Ad...

Страница 41: ...n dial press the dial to start the playback Use the pause function to pause and resume playing the video file Viewing a picture file Select the picture file using the navigation dial and press the nav...

Страница 42: ...the advancement of the video to select the Trim starting point press the navigation dial CAMERA LIGHT 2021 09 26 01 47 57 AM 9 3FT 2019_10_23_SCREEN Trim Exit TRIM 00 00 00 40 Set desired beginning o...

Страница 43: ...ame navigate to Enter and press the navigation dial A B C D E F G H I J K L M N O P Q R S T U V W X Y Z Space 1 2 3 4 5 6 7 8 9 0 202109260515a0101 Enter Delete 7 Now select Save to save the new trimm...

Страница 44: ...ss Monitor and be in the range of 48 inches from it 5 Press the navigation dial again which is currently on Microphone to deactivate the microphone 6 Turn the navigation dial to select Save Exit press...

Страница 45: ...ge Job press the navigation dial 3 Turn the navigation dial to Delete Job press the navigation dial 4 Turn the navigation dial to select the Job to delete press the navigation dial 5 Acknowledge the d...

Страница 46: ...wn on the screen is the list of Frequently Used and All Labels After a label is used more than five times it will automatically be added to the Frequently Used list of labels Creating and saving a new...

Страница 47: ...the navigation dial to Labels Settings press the navigation dial to enter the sub menu 3 Select Edit Labels and press the navigation dial Settings Reset Frequently Used Labels List Edit Labels 4 Use...

Страница 48: ...ss the navigation dial 2 Turn the navigation dial to the Labels Settings option press the navigation dial to enter the sub menu Select Reset Frequently Used Labels List and press the navigation dial S...

Страница 49: ...electing OK Do you want to factory reset the Wireless Monitor Cancel OK The factory reset is now complete and the system is returned to the Factory Reset sub menu 2 4 2 Firmware Updates M18 Wireless M...

Страница 50: ...r the sub menu 8 Select Wireless Monitor and press the navigation dial The file name of the update should be seen in this window Press the navigation dial when the update file is highlighted in red to...

Страница 51: ...and to perform firmware updates 5b USB C port optional for supplying power and data between the Wireless Monitor and Control Hub 6 Grounding post to ground the Control Hub to earth while tracing push...

Страница 52: ...und is heard 6 Push the push cable and spring termination back into the Pipeline Inspection Reel until the spring lines up with the spring holder 7 Push the spring into the spring locking clip Service...

Страница 53: ...Control Hub The buttons on the Control Hub will illuminate showing that the power is on The Control Hub symbol will appear in the status bar of the M18 Wireless Monitor along with the Control Hub s ba...

Страница 54: ...le deployed is shown on the status bar of the Wireless Monitor in Feet and 10th of an inch or Meters and 10th of a meter When pulling back the push cable if the counter passes 0 it will begin to count...

Страница 55: ...lows the formatting of the M18 500GB Control Hub s Internal 500GB Drive or a USB thumb drive The system requires that USB thumb drives be formatted in the FAT32 file system Any new thumb drives should...

Страница 56: ...Drive 4 The selected drive will be formatted and the system will return to the Settings menu 5 Press the Back key to return to the main viewing screen Formatting USB thumb drives in a desktop PC or la...

Страница 57: ...et M18 500GB Control Hub Performing a factory reset will reset the M18 500GB Control Hub to the factory defaults In the Control Hub the functionality that will reset to the factory default will be Lab...

Страница 58: ...u and make a note of the current firmware revisions in the system Firmware updates can be performed with the M18 Wireless Monitor or tablet running the Milwaukee Pipeline Inspection App Firmware updat...

Страница 59: ...on dial to enter the submenu MANAGE JOBS 2019 05 10 6 FILES Settings Date Time Units Factory Reset About Language System Update Feet English Screen Settings Service Support 10 Select Control Hub and p...

Страница 60: ...he Control Hub is updating 58 13 A confirmation message will appear when the update is complete Select OK to reboot the system The Control Hub was successfully updated and it will be restarted OK 14 G...

Страница 61: ...rence Description 1 Retractable handle shown in the lowered position 2 Retractable handle lock and release button 3 Push cable drum and push cable 4 Vertical position feet 5 Wireless Monitor rotation...

Страница 62: ...5 7 4 9 8 8 3 Reference Description 1 Handle 2 Push cable drum and push cable 3 Vertical position feet 4 Wireless Monitor rotation lock 5 Wireless Monitor tilt lock 6 Wireless Monitor Tablet Mount con...

Страница 63: ...ng stairs or ladders Use care when transporting this tool when the reel and backpack are connected Tipping may occur 1 2 3 4 The rear of 120 Pipeline Inspection with backpack plate installed Backpack...

Страница 64: ...g plate into the reels top mounting receptacle 2 Now push the bottom of the backpack into the reel lining up the male mounting post 3 Push with the palm of the hand against the bottom of the backpack...

Страница 65: ...ical and horizontal positions To reduce the risk of short circuit when setting tool or battery down do not allow battery to contact corrosive or conductive fluid Mount receptacle on the bottom of Wire...

Страница 66: ...the reel in the horizontal position 4 5 Using the Pipeline Inspection Reel Use latex or rubber gloves goggles face shields protective clothing and respirator when chemicals bacteria or other toxic or...

Страница 67: ...using a degraded camera image or total image failure The push cable sections shown below are examples of badly worn jackets Push cable such as this should be replaced as soon as possible To reduce the...

Страница 68: ...ds are provided with a plastic protective cover Always use the protective cover while using the Pipeline Inspection Reel Face 34mm 25mm 1 2 1 2 1 Polycarbonate LED cover 2 Sapphire glass lens Body 34m...

Страница 69: ...moving and Installing the Camera Heads Avoid touching the green circuit board or gold pins on the spring assembly or camera head with bare hands Touching these will transfer oils from the fingers to t...

Страница 70: ...uching these will transfer oils from the fingers to these components which may lead to premature corrosion Wear clean rubber gloves if possible 5 4 1 Spring Assembly Removal Before removing the spring...

Страница 71: ...o longer visible Do not overtighten or use excessive force 5 5 Camera Skids and Protective Covers Protective Covers are covers that fit over the 25mm and 34mm camera heads The protective covers are pr...

Страница 72: ...he next tab to unlock it 3 Remove the top portion of the protective cover 5 5 3 Installing the Protective Covers 1 Place the rear half of the protective cover on the back of the camera head 2 Twist th...

Страница 73: ...and a 4 Star skid 25mm Barrel Skid 34mm Barrel Skid 34mm Star Skid 5 5 5 Installing the Barrel Skid 1 Fully open the camera skid place the spring into the skid Position the skid so that the camera is...

Страница 74: ...combined with the barrel skid 1 Fully open the star skid place the spring into the skid Position the skid so that the camera is level 2 Close the star skid and pinch the ends together while pushing t...

Страница 75: ...tem should require service you will find Milwaukee Tool s service page and support number in the Service Support directory 1 Turn the navigation dial to Settings press the navigation dial 2 Turn the n...

Страница 76: ......

Страница 77: ...973 20 Bobine d inspection de tuyaux rigidit moyenne de 36 5 m 120 2974 20 Bobine d inspection de tuyaux rigides de 60 9 m 200 2975 20 Bobine d inspection de tuyaux rigidit moyenne de 60 9 m 200 2976...

Страница 78: ......

Страница 79: ...ec des outils mis la terre Les fiches et prises non modifi es r duisent le risque de d charge lectrique viter tout contact avec des surfaces mises la terre comme des tuyaux des radiateurs des cuisini...

Страница 80: ...a entra ner des blessures graves UTILISATION ET ENTRETIEN DES OUTILS LECTRIQUES Ne pas forcer l outil lectrique Utiliser l outil appropri pour l application Un outil appropri ex cutera le travail mieu...

Страница 81: ...oser les blocs piles ni les outils au feu ou des temp ratures extr mes L exposition au feu ou des temp ratures qui d passent les 130 C 265 F pourra entra ner des explosions Suivre toutes les consignes...

Страница 82: ...de bon sens et proc der avec prudence lors de l utilisation d outils Il est impossible de pr voir toutes les situations qui pourraient entra ner des dangers Ne pas utiliser cet outil si vous ne compr...

Страница 83: ...diocommunications Le fait d utiliser cet quipement dans un secteur r sidentiel risque de produire un brouillage pr judiciable que l utilisateur devra liminer ses frais Ce dispositif est conforme la pa...

Страница 84: ...pli ONE KEY Bleu clignotant L outil tablit une communication active avec l appli ONE KEY Rouge clignotant L outil a un blocage s curitaire et ne pourra tre d bloqu que par le propri taire l aide de l...

Страница 85: ...trer aucun fluide l int rieur NETTOYAGE Nettoyer les vents de l outil pour retirer tout d bris Maintenir l outil propre sec et exempt de la graisse et de l huile Utiliser uniquement un savon doux et u...

Страница 86: ...ormale une carence d entretien ou les accidents Usure normale Par rapport plusieurs outils lectriques il faut remplacer et entretenir leurs pi ces afin d achever leur rendement optimal Cette garantie...

Страница 87: ...T R TS PUNITIFS OU DE TOUTE D PENSE D HONORAIRES D AVOCATS DE FRAIS DE PERTE OU DE D LAIS ACCESSOIRES TOUT DOMMAGE D FAILLANCE OU D FAUT DE TOUT PRODUIT Y COMPRIS NOTAMMENT LES PERTES DE PROFIT CERTAI...

Страница 88: ......

Страница 89: ...2 2 2 8 D finition du nom de la soci t 23 2 2 9 Param tres de la vid o et de l image 24 2 2 10 Param tres de connexion 25 2 2 11 Bloc piles M18 29 2 2 12 Configuration des param tres de l cran ACL 30...

Страница 90: ...d inspection de tuyaux 64 4 1 Aper u de la bobine d inspection de tuyaux rigidit moyenne de 60 9 m 200 et de tuyaux rigides de 60 9 m 200 et 99 m 325 64 4 2 Aper u de la bobine d inspection de tuyaux...

Страница 91: ...5 5 6 Installation du patin type toile 78 6 Service et assistance 79...

Страница 92: ......

Страница 93: ...enregistr e et seront montr s sur les images accompagn s par l heure et la date du syst me ainsi que la distance du c ble poussant d ploy Veuillez noter que le moniteur sans fil ou la tablette ayant...

Страница 94: ...tion de tuyaux rigidit moyenne de 60 9 m 200 Deux six pouces Toutes les bobines comportent le c ble poussant muni d un assemblage de ressort sur lequel la t te de cam ra est mont e Le moniteur sans fi...

Страница 95: ...Introduction Aper u de la bobine d inspection de tuyaux rigidit moyenne de 36 5 m 120 Vue avant Vue derri re Aper u de la bobine d inspection de tuyaux rigidit moyenne de 60 9 m 200 Vue avant Vue derr...

Страница 96: ...oivent tre connect s au Smart Hub de 500 Go M18 pour cr er un enregistrement vid o ou prendre des images Les fichiers vid o et image seront sauvegard s dans le disque interne du Smart Hub 1 2 10 3 4 5...

Страница 97: ...rs du formatage du disque interne du Smart Hub de 500 Go M18 Il n est pas n cessaire de connecter la bobine d inspection de tuyau avec la cam ra pour effectuer la configuration initiale Ces param tres...

Страница 98: ...tion OK pour changer la langue SETTINGS La langue du moniteur sans fil a t modifi e Ces modifications ne prendront effet qu apr s le red marrage de l appareil Annuler OK 5 Le syst me se r initialisera...

Страница 99: ...rez au menu Param tres Si vous utilisez une tablette ayant l appli d inspection de tuyaux Milwaukee la date et l heure prises seront celles dans la tablette 2 2 6 Configuration des unit s de mesure 1...

Страница 100: ...ion vers l option Param tres et appuyer sur lui 2 Tourner le cadran de navigation vers l option Fr quence de la sonde et appuyer sur lui pour entrer dans le submenu Param tres 512Hz 640Hz 33kHz 3 Tour...

Страница 101: ...quence De La Sonde 640Hz Param tres De L Image 1920x1080 Param tres De Connexion MTCAM_02938B284 Param tres De La Cam ra Param tres De L tiquette Formater Le Disque Param tres De La Vid o 1080P 30FPS...

Страница 102: ...r seconde ou 15 images par seconde 1 Tourner le cadran de navigation vers l option Param tres et appuyer sur lui 2 Tourner le cadran de navigation vers l option Param tres de la vid o et appuyer sur l...

Страница 103: ...de dimensions S lectionner 1920 x 1080 1280 x 720 ou 640 x 480 et appuyer sur le cadran de navigation Une fois choisis les param tres de l imagerie le syst me reviendra au menu Param tres 2 2 10 Param...

Страница 104: ...nect s l aide d un c ble USB tat de la connexion du Smart Hub et puissance de r ception sans fil Cette ic ne s affichera lorsque le Smart Hub est connect au moniteur sans fil par WIFI Ic ne de la bobi...

Страница 105: ...De La Vid o 1080P 30FPS G rer Les T ches 2021_09_26_A 3 Utiliser le cadran de navigation pour s lectionner le Smart Hub disponible d sir et appuyer sur lui pour le connecter Param tres Liste des Smar...

Страница 106: ...le c ble USB fourni pour le relier au Smart Hub par un bout pendant que l autre bout est reli au moniteur sans fil 2 Confirmer la connexion USB en v rifiant les ic nes dans la barre d tat droite Lors...

Страница 107: ...500 Go M18 Le Smart Hub fonctionne gr ce son bloc piles M18 qui est rempla able chaud Si le bloc piles est retir d un Smart Hub en cours d utilisation le message suivant s affichera pour vous pr veni...

Страница 108: ...ran et appuyer sur lui pour entrer dans le submenu Teinte Luminosit Contraste Saturation R tro clairage 50 50 50 50 8 Annuler OK 3 Utiliser le cadran de navigation pour passer entre toutes les options...

Страница 109: ...09 26 01 47 57 AM 9 3FT 2021_09_26_A 4 1 2 12 3 5 6 7 8 9 10 11 13 14 15 16 17 18 No de r f Description No de r f Description 1 Barre d tat 10 Galerie 2 Horodatage 11 Menu Param tres 3 Aire de visionn...

Страница 110: ...rera un conteneur dossier o les fichiers vid o ou image seront sauvegard s La fonction Reprendre une t che pr c dente transf rera les enregistrements vers un dossier de t ches d j en existence Le syst...

Страница 111: ...registr es dans la m moire et le syst me reviendra l cran de visualisation principale Cr ation d une nouvelle t che 1 D s le submenu T che utiliser le cadran de navigation pour s lectionner l option N...

Страница 112: ...chier aura le format suivant 2019_10_01_ NOMDELAT CHE_1 2019 Ann e _10 Mois _01 Jour _NOMDELAT CHE et_3 troisi me fichier cr Si un fichier a t enregistr en tant que vid o saillante le nom de la vid o...

Страница 113: ...fichier vid o 2 3 3 Export de la t che La fonction Exporter la t che permet de copier des fichiers du disque interne du Smart Hub de 500 Go M18 la cl USB du Smart Hub Il est possible d exporter des fi...

Страница 114: ...rter la t che et appuyer sur lui 4 Tourner le cadran de navigation pour s lectionner la t che exporter et appuyer sur lui La destination de l export de la cl USB du Smart Hub s affichera 5 Appuyer sur...

Страница 115: ...our se poser sur l chelle d am lioration de l image et s arr ter dans le meilleur r sultat Appuyer sur le cadran de navigation pour confirmer la s lection 5 Appuyer sur la touche Quitter pour quitter...

Страница 116: ...trouvez sur l image 2019_10_23_SCREEN Panaramique Horiz Gauche Droite R f rence de l emplacement panoramique CAMERA LIGHT 2021 09 26 01 47 57 AM 9 3FT 2019_10_23_SCREEN Zoom Et Panoramique Panaramiqu...

Страница 117: ...ivi du c ble Cette fonction active le transmetteur interne pour mettre un signal de localisation travers du c ble poussant La longueur du c ble poussant d ploy est donc rendue trouvable et tra able en...

Страница 118: ...ner le cadran de navigation vers l option Suivi du c ble appuyer sur lui s lectionner l option Arr t et appuyer sur le cadran nouveau 2 3 9 Sonde Sonde Ceci active le transmetteur de la sonde fix au b...

Страница 119: ...ERA LIGHT 2021 09 26 01 47 57 AM 9 3FT 2021_09_26_A Sonde 640Hz b Pour d sactiver la sonde appuyer sur le cadran de navigation lorsque l ic ne de sonde est surlign e 2 3 10 Aper u de la galerie Le men...

Страница 120: ...vid o Un fichier vid o enregistrement standard Fichier vid o l ments saillants Un fichier vid o comportant des l ments saillants Fichier JPEG Un fichier d image en format JPEG Les options disponibles...

Страница 121: ...vid os et visionnement des images 1 Tourner le cadran de navigation vers l option Galerie et appuyer sur lui pour visionner le submenu Quitter 00 00 00 40 Submenu de Galerie 2 Tourner le cadran de nav...

Страница 122: ...epuis le dossier de T che dans la Galerie utiliser le cadran de navigation pour s lectionner le fichier vid o rogner et ensuite appuyer sur le cadran de navigation 2 S lectionner l option Rogner dans...

Страница 123: ...18 00 36 Confirmez le rognage Cela va cr er un nouveau fichier Annuler Rogner 6 Utiliser le clavier virtuel pour saisir le nom du nouveau fichier Une fois termin de saisir le nom du nouveau fichier pa...

Страница 124: ...id o laquelle vous voulez ajouter des notes 2 S lectionner l option LECTURE pour visionner la vid o Appuyer sur l option Pause dans la section o vous voulez ajouter des notes Utiliser la fonction RR A...

Страница 125: ...ionner le dossier vid o d sir dans la t che 2 Utiliser le cadran de navigation pour s lectionner l option Supprimer et appuyer sur lui 3 Confirmer le message contextuel de suppression en appuyant sur...

Страница 126: ...s e RACCORD DE TUYAU D CAL D SALIGN RACCORD DE TUYAU TABLI RACINES TUYAU AFFAISS TUYAU FISSUR T Toutes Les tiquettes RACCORD DE TUYAU D CAL D SALIGN RACCORD DE TUYAU TABLI RACINES TUYAU AFFAISS TUYAU...

Страница 127: ...B C D E F G H I J N O P Q R S T U V W X Y Z K L M BELLIED PIPE_A Espace Supprimer Entr e 0 1 2 3 4 5 6 7 8 9 6 S lectionner l option Enregistrer ou Annuler dans le message de confirmation et appuyer s...

Страница 128: ...er les modifications naviguer vers la touche Confirmer appuyer sur le cadran de navigation et ensuite s lectionner l option Enregistrer pour enregistrer les modifications effectu es dans l tiquette Su...

Страница 129: ...s d usine et mises jour du micrologiciel Moniteur sans fil M18 2 4 1 R initialisation aux param tres d usine Moniteur sans fil M18 Effectuer une r initialisation aux param tres d usine r initialisera...

Страница 130: ...5 10 6 FILES Date Et Heure Unit s Param tres D Usine Info Langue Mise Jour Du Syst me Pieds Fran ais Param tres De L cran Service Et Assistance Num ro De S rie Du Moniteur Sans Fil Version Du Microlog...

Страница 131: ...cer la mise jour Param tres MTCam_monitor bin Mise jour des fichiers dont l extension finit par bin 9 Veiller lire et confirmer le message d avertissement en s lectionnant l option OK S lectionnez OK...

Страница 132: ...s images ainsi que pour effectuer les mises jour du micrologiciel 5b Port USB C Il s agit d un port facultatif qui sert alimenter de l nergie et des donn es entre le moniteur sans fil et le Smart Hub...

Страница 133: ...pour constater le verrouillage 6 Pousser le c ble poussant et le bout du ressort pour les remettre dans la bobine d inspection de tuyaux jusqu ce que le ressort s aligne avec le porte ressort 7 Pouss...

Страница 134: ...ur la touche de d verrouillage et enlever 3 3 Utilisation du Smart Hub de 500 Go M18 Recharger uniquement l aide du chargeur particuli rement sp cifi pour le bloc piles Pour prendre connaissance des i...

Страница 135: ...t Hub de 500 Go M18 sans n cessitant une connexion WIFI Alimenter le Smart Hub de 500 Go M18 depuis le moniteur sans fil lorsqu il n y a pas de bloc piles dans le centre ou vice versa 3 3 3 Poteau de...

Страница 136: ...0 3 3 5 Port de test de cam ra Il y a un port de test de cam ra dans la partie arri re du Smart Hub de 500 Go M18 qui sert en tant qu outil de d pannage Si un probl me survient dans la t te de cam ra...

Страница 137: ...er la fin de cette section pour en savoir plus sur les tapes suivre pour le faire Formatage du Smart Hub M18 ou des cl s USB 1 Tourner le cadran de navigation vers l option Param tres et appuyer sur l...

Страница 138: ...itter cliquer sur ANNULER Cancel OK 5 Le formatage du fichier commencera et aura termin quand le message Formatage Termin s affichera Format USB F Formatage Termin OK 3 5 R initialisation d usine et m...

Страница 139: ...fo Langue Mise Jour Du Syst me Pieds Fran ais Param tres De L cran Service Et Assistance 2 S lectionner l option Param tres d usine du Smart Hub et appuyer sur le cadran de navigation Param tres Param...

Страница 140: ...LOGICIEL et ensuite cliquer sur ALLER 4 Faire glisser le fichier de mise jour du micrologiciel t l charg vers une cl USB ou cliquer avec le bouton droit et s lectionner l option Copier et ensuite coll...

Страница 141: ...ement en s lectionnant l option OK S lectionnez OK pour mettre jour le micrologiciel sur le Smart Hub Veuillez ne pas interrompre le processus de mise jour apr s son d marrage Annuler OK 12 Une barre...

Страница 142: ...e r tractable illustr e dans la position abaiss e 2 Touche de verrouillage et d verrouillage de la poign e r tractable 3 C ble poussant et bobine de c ble poussant 4 Pieds de position verticale 5 Ver...

Страница 143: ...Description 1 Poign e 2 C ble poussant et bobine de c ble poussant 3 Pieds de position verticale 4 Verrou de rotation du moniteur sans fil 5 Verrou inclinable du moniteur sans fil 6 Connecteur de mont...

Страница 144: ...les escaliers et les chelles Veuillez prendre soin lors du transport de cet outil si la bobine et le sac dos sont connect s Le basculement peut survenir 1 2 3 4 La partie arri re d inspection de tuya...

Страница 145: ...plaque de montage 1 Pousser la plaque de montage sup rieure sur le r ceptacle de montage sup rieur de la bobine 2 Pousser la partie inf rieure du sac dos sur la bobine en l alignant avec le poteau de...

Страница 146: ...orizontal Afin de minimiser le risque de court circuit au moment o vous posez l outil ou le bloc piles ne pas laisser le bloc piles entrer en contact avec de fluides conductifs ou corrosifs Le r cepta...

Страница 147: ...ajustage en le tournant gauche jusqu ce qu il serre Ajustage de l angle d inclinaison de l CRAN SANS FIL 1 Appuyer sur le bouton d inclinaison de verrouillage jusqu ce que le bloc d ajustage soit d v...

Страница 148: ...ller avec le c ble poussant sans qu il y ait de mou par terre Utiliser le frein de friction pour ralentir le mouvement de la bobine du c ble poussant si n cessaire L utilisation de la bobine d une pos...

Страница 149: ...rincer la t te de cam ra et laver toute salet et tout d bris y accumul s qui pourront tre attrap s dans le ressort Agiter en sec ou bien utiliser de l aire basse pression pour souffler l exc s d eau e...

Страница 150: ...vement Les deux t tes de cam ra sont munies d une garde en plastique Toujours utiliser la garde lors de l utilisation de la bobine d inspection de tuyaux Face 34mm 25mm 1 2 1 2 1 Garde DEL en polycar...

Страница 151: ...25 Bout de cam ra 5 3 Installation et enl vement des t tes de cam ra viter de toucher main nue le circuit imprim vert ou les broches dans l assemblage de ressort ou la t te de cam ra Les toucher trans...

Страница 152: ...ans les doigts vers ces composants ce qui causera une corrosion pr coce Porter des gants en caoutchouc propres si possible 5 4 1 Enl vement de l assemblage de ressort Avant d enlever l assemblage de r...

Страница 153: ...r une force excessive 5 5 Patins de cam ras et gardes protectrices Gardes protectrices Il s agit de gardes que conviennent aux t tes de cam ra de 25 mm et 34 mm Les gardes protectrices sont fournies a...

Страница 154: ...er la partie sup rieure de la garde protectrice 5 5 3 Installation des gardes protectrices 1 Mettre la moiti derri re de la garde protectrice dans l arri re de la t te de cam ra 2 Tourner la cam ra en...

Страница 155: ...4 Patin type tonneau de 25 mm Patin type tonneau de 34 mm Patin type toile de 34 mm 5 5 5 Installation du patin type tonneau 1 Ouvrir totalement le patin de cam ra et mettre le ressort dans le patin...

Страница 156: ...tin type tonneau 1 Ouvrir totalement le patin type toile et mettre le ressort dans le patin Positionner le patin d une fa on telle que la cam ra soit nivel e 2 Fermer le patin type toile et pincer les...

Страница 157: ...rt dans le r pertoire d Entretien et D pannage 1 Tourner le cadran de navigation vers l option Param tres et appuyer sur lui 2 Tourner le cadran de navigation vers l option Service et assistance et ap...

Страница 158: ......

Страница 159: ...eas de inspecci n de tuber as de rigidez media de 36 5 m 120 2974 20 Tiral neas de inspecci n de tuber as r gidas de 60 9 m 200 2975 20 Tiral neas de inspecci n de tuber as de rigidez media de 60 9 m...

Страница 160: ......

Страница 161: ...ctrica Evite que el cuerpo est en contacto con superficies aterrizadas tales como tuber as radiadores estufas y refrigeradores Existe un riesgo mayor de descarga el ctrica si su cuerpo est aterrizado...

Страница 162: ...l ctrica correcta har el trabajo mejor y en forma m s segura a la velocidad para la cual fue dise ada No utilice la herramienta el ctrica si el interruptor no la enciende y la apaga Cualquier herramie...

Страница 163: ...a temperatura excesiva La exposici n a fuego o temperaturas superiores a 130 C 265 F puede causar explosiones Siga todas las instrucciones de carga y no cargue la bater a o la herramienta fuera del ra...

Страница 164: ...tuito Algunos polvos generados por el lijado el ctrico aserrado pulido taladrado y otras actividades de construcci n contienen qu micos conocidos por ser causantes de c ncer defectos cong nitos u otro...

Страница 165: ...mendada 0 F a 125 F BATER AS M18TM Recargue nicamente con el cargador espec fico para la bater a Para m s informaci n acerca de las instrucciones de carga lea el manual del operador que viene incluido...

Страница 166: ...vo hacia arriba 5 Cierre la puerta de la bater a y apriete bien el tornillo MANTENIMIENTO Para reducir el riesgo de lesiones siempre desconecte el cargador y retire la bater a del cargador o herramien...

Страница 167: ...luida ONE KEY De conformidad con la parte 15 21 del Reglamento de FCC no modifique este producto La modificaci n podr a ocasionar que se anulara su autorizaci n para operar el producto Es dispositivo...

Страница 168: ...2 producto reacondicionado y productos de prueba y medici n Est n disponibles distintas garant as independientes para estos productos La vigencia de la garant a para los radios para obra el puerto de...

Страница 169: ...STED PODR A ADEM S TENER OTROS DERECHOS QUE VAR AN SEG N EL ESTADO Esta garant a aplica nicamente a los productos vendidos en EE UU y Canad Consulte la pesta a B squeda de centro de servicio en la sec...

Страница 170: ...el ctricos CENTRO DE SERVICIO Y ATENCI N Llame al 55 4160 3547 IMPORTADO Y COMERCIALIZADO POR TECHTRONIC INDUSTRIES M XICO S A DE C V Miguel de Cervantes Saavedra No 301 Piso 5 Torre Norte 11520 Colo...

Страница 171: ...frecuencia de la sonda 22 2 2 8 Definici n el nombre de la empresa 23 2 2 9 Configuraci n de video e imagen 24 2 2 10 Configuraciones de la conexi n 25 2 2 11 Bater a M18 29 2 2 12 Definici n de las...

Страница 172: ...ci n de tuber as 63 4 1 Generalidades del tiral neas de inspecci n de tuber as r gidas de 60 9 m 200 y de rigidez media de 60 9 m 200 y 99 m 325 63 4 2 Generalidades del tiral neas de inspecci n de tu...

Страница 173: ...5 5 6 Instalaci n del pat n tipo estrella 77 6 Servicio y soporte 78...

Страница 174: ......

Страница 175: ...en las im genes al igual que la hora y la fecha del sistema as como la distancia del cable de empuje desplegado Cabe mencionar que el monitor inal mbrico o la tableta que tenga la aplicaci n de inspe...

Страница 176: ...os a seis pulgadas Tiral neas de inspecci n de tuber as de rigidez media de 60 9 m 200 Dos a seis pulgadas Todos los tiral neas incluyen un cable de empuje con un ensamble de resorte en el que se mont...

Страница 177: ...m 325 Vista delantera Vista trasera Generalidades del tiral neas de inspecci n de tuber as de rigidez media de 36 5 m 120 Vista delantera Vista trasera Generalidades del tiral neas de inspecci n de t...

Страница 178: ...ci n de tuber as Milwaukee deben conectarse al Smart Hub de 500 GB M18 para grabar videos o tomar fotograf as Tanto los archivos de video como los de imagen se guardan en el disco interno del Smart Hu...

Страница 179: ...o interno del Smart Hub de 500 GB M18 El tiral neas de inspecci n de tuber as con la c mara no necesita estar conectados para realizar la configuraci n inicial Estas configuraciones iniciales del moni...

Страница 180: ...navegaci n y oprima en OK para iniciar el cambio de idioma SETTINGS El idioma del monitor inal mbrico ha sido modificado Estos cambios ser n v lidos solo despu s de reiniciar el dispositivo Cancelar...

Страница 181: ...onfiguraci n Si usa una tableta con la aplicaci n de inspecci n de tuber as de Milwaukee la fecha y la hora ser n las mismas que tiene la tableta 2 2 6 Definici n de las unidades de medida 1 Gire el d...

Страница 182: ...co de navegaci n hacia la opci n Configuraci n y opr malo 2 Gire el disco de navegaci n hacia la opci n Frecuencia de la sonda y opr malo para entrar al submen Configuraci n 512Hz 640Hz 33kHz 3 Gire e...

Страница 183: ...Hz Configuraci n De Imagen 1920x1080 Configuraci n De La Conexi n MTCAM_02938B284 Configuraci n De La C mara Configuraci n De Marcados De Identificaci n Formatear El Disco Duro Configuraci n De V deo...

Страница 184: ...co de navegaci n hacia la opci n Configuraci n de video y opr malo para entrar al submen Configuraci n MANAGE JOBS 2019 05 10 6 FILES MILWAUKEE Nombre De La Empresa Frecuencia De Sonda 640Hz Configura...

Страница 185: ...tes de imagen el sistema regresar al men Configuraci n 2 2 10 Configuraciones de la conexi n El m todo predefinido de conexi n del monitor inal mbrico M18 y el Smart Hub de 500 GB M18 es por WIFI El r...

Страница 186: ...xi n de cable muestra que el monitor inal mbrico y el Smart Hub est n conectados por un cable USB Estatus de conexi n de Smart Hub y potencia de se al inal mbrica Este cono aparecer cuando el Smart Hu...

Страница 187: ...02938B284 Configuraci n De La C mara Configuraci n De Marcados De Identificaci n Formatear El Disco Duro Configuraci n De V deo 1080P 30FPS Gestionar Tareas 2021_09_26_A 3 Utilice el disco de navegaci...

Страница 188: ...arse 1 Conecte un extremo del cable USB incluido al Smart Hub y el otro al monitor inal mbrico 2 Para confirmar la conexi n USB revise los conos en la barra de estado que est a la derecha Cuando se co...

Страница 189: ...to el mensaje siguiente aparecer para alertar que el Smart Hub est funcionando con la bater a de respaldo interna durante nueve minutos Durante estos nueve minutos deber instalarse una bater a M18 car...

Страница 190: ...navegaci n hacia la opci n OK para aceptar los cambios 2 3 Uso del monitor inal mbrico M18 Muchas de estas instrucciones tambi n se aplican a la aplicaci n de inspecci n de tuber as de Milwaukee La a...

Страница 191: ...zoom de 4x con la panor mica vertical y horizontal de la se al del video 2 3 1 Uso de las tareas Antes de crear un archivo de video o imagen puede indicarle al sistema d nde guardar los archivos Esto...

Страница 192: ...lice el disco de navegaci n para pasar entre las distintas opciones del men Oprima el disco de navegaci n para entrar al submen deseado 4 Baje hasta el fondo del submen y oprima el disco de navegaci n...

Страница 193: ...no del Smart Hub y la memoria miniatura del Smart Hub Nombres de archivo Los nombres de los archivos los crear autom ticamente el sistema y constar n del a o el mes el d a la hora de creaci n as como...

Страница 194: ...do con la duraci n de la grabaci n del video expresada en minutos y segundos CAMERA LIGHT 2021 09 26 01 47 57 AM 9 3FT 2021_09_26_A Configuraci n 00 05 cono de grabaci n y duraci n del video Archivos...

Страница 195: ...exportaci n de la memoria miniatura del Smart Hub y opr malo El indicador de avance aparecer para mostrar el estado en curso Exportar Memoria USB Del Smart Hub 3 942GB 29 817GB Guardar PROJECTNAME Ca...

Страница 196: ...traste de la pantalla LCD seg n la luz que provenga del cabezal de la c mara 1 Gire el disco de navegaci n hacia la opci n Luz de la c mara y opr malo 2 Gire el disco de navegaci n hasta llegar al niv...

Страница 197: ...horizontal mueve la posici n dentro de la imagen hacia la derecha o la izquierda La panor mica vertical mueve la posici n dentro de la imagen hacia arriba y hacia abajo En ambas opciones conforme se...

Страница 198: ..._26_A Girar CAMERA LIGHT 2021 09 26 01 47 57 AM 9 3FT 2021_09_26_A Posici n de 180 grados Posici n de 270 grados Nota La pantalla permanecer en posici n de girar hasta que se ajuste a la opci n predet...

Страница 199: ...onda Sonda Activa el transmisor de sonda que se encuentra en el extremo del resorte de terminaci n del tiracables de inspecci n de tuber as esto para localizar la posici n aproximada de la sonda dentr...

Страница 200: ...ardadas para su revisi n edici n exportaci n o eliminaci n Galer a 202109211052c 202109211052b 202109211052a 202109260518c 202109260518b 202109260518a 2021_09_21 2021_09_26_A 00 19 2021 09 21 00 18 20...

Страница 201: ...o destacado Archivo JPEG Un archivo de imagen en formato JPEG Las opciones de archivos que se incluyen en la galer a son Reproducir Reproduce un archivo de video grabado o muestra un archivo de imagen...

Страница 202: ...contenido destacado que tienen reas de inter s Esto resulta sumamente til al momento de revisar videos ya que muestra un punto de inter s de comentario dentro del video para avanzar o regresar m s r...

Страница 203: ...al submen vaya a la opci n Salir y opr malo para salir a la Galer a 2 3 14 Recorte de archivos de video Utilice la funci n de Recortar para editar la duraci n de un video y guardarlo como un nuevo arc...

Страница 204: ...r Recortar 00 18 00 36 Confirmar el recorte Esto crear un archivo nuevo Cancelar Recortar 6 Utilice el teclado en pantalla para ingresar el nombre del nuevo archivo Cuando haya terminado de nombrar el...

Страница 205: ...r a seleccione el video deseado al que quiere agregarle anotaciones 2 Seleccione la opci n REPRODUCIR para ver el video y oprima la opci n Pausa en el lugar en el que desea agregar la anotaci n Utilic...

Страница 206: ...video deseada dentro de la tarea 2 Utilice el disco de navegaci n para seleccionar la opci n Borrar y opr malo 3 Oprima el disco de navegaci n para confirmar el mensaje emergente de eliminaci n cuand...

Страница 207: ...Definido Por El Usuario Utilizado Frecuentemente CONEXI N DE TUBER A DESCENTRADA DESALINEADA PIEZA EN T RA CES SE ESTABLECE LA CONEXI N DE LA TUBER A TUBER A CURVADA TUBER A ROTA Todos Los Marcados De...

Страница 208: ...vegaci n para aceptar cada uno de los caracteres en el teclado 5 Cuando haya terminado de trabajar en la etiqueta navegue hasta la tecla Enter y oprima el disco de navegaci n Marcados De Identificaci...

Страница 209: ...ci n mostrar el teclado en pantalla para realizar las ediciones y navegar a la tecla Aceptar Oprima el disco de navegaci n y despu s seleccione la opci n Guardar para guardar los cambios realizados en...

Страница 210: ...i n Restablecer La Lista De Los Marcados De Identificaci n De Uso Frecuente Editar Marcados De Identificaci n 2 4 Reinicio de f brica y actualizaciones de firmware Monitor inal mbrico M18 2 4 1 Reinic...

Страница 211: ...e la secci n Informaci n del sistema que se encuentra en la parte inferior del men Configuraci n del men Configuraci n y tome nota de la versi n actual del firmware que tiene el sistema Configuraci n...

Страница 212: ...n cuando el archivo de actualizaci n est resaltado en rojo para empezar la actualizaci n Configuraci n MTCam_monitor bin Los archivos de actualizaci n tienen una extensi n bin 9 Lea el mensaje de adve...

Страница 213: ...timiento contra los residuos 5a Puerto USB A Sirve para guardar directamente videos e im genes as como para instalar las actualizaciones de firmware 5b Puerto USB C Opcional para la alimentaci n de en...

Страница 214: ...le 5 Empuje el Smart Hub dentro del tiral neas de inspecci n de tuber as hasta que se escuche un clic que indique que est fijo 6 Empuje el cable de empuje y la terminaci n de resorte dentro del tiral...

Страница 215: ...empuje 4 Oprima el bot n de desbloqueo y qu telo 3 3 Uso del Smart Hub de 500 GB M18 Recargue nicamente con el cargador espec fico para la bater a Para m s informaci n acerca de las instrucciones de...

Страница 216: ...0 GB M18 sin necesidad de usar una conexi n WIFI Alimenta el Smart Hub de 500 GB M18 al monitor inal mbrico M18 cuando no hay ninguna bater a en el centro y viceversa 3 3 3 Poste de puesta a tierra El...

Страница 217: ...de prueba de c mara en la parte de atr s del Smart Hub de 500 GB M18 como herramienta de resoluci n de problemas Si ocurre alg n problema en el cabezal de c mara el usuario puede aislar el cabezal de...

Страница 218: ...itorio o port til Consulte el fin de esta secci n para ver las instrucciones de c mo hacerlo Formateo del Smart Hub M18 o de las memorias miniaturas 1 Gire el disco de navegaci n hacia la opci n Confi...

Страница 219: ...CANCELAR Cancel OK 5 El procedimiento de formateo de archivo se ejecutar y cuando termine aparecer el mensaje de Formato Completo Formateo de USB F Formato completo OK 3 5 Reinicio de f brica y actua...

Страница 220: ...a Actualizaci n Del Sistema Pie Espa ol Configuraci n De Pantalla Servicio Y Soporte 2 Seleccione la opci n Smart HubConfiguraci n de f brica del Smart Hub y oprima el disco de navegaci n Configuraci...

Страница 221: ...la memoria USB o bien haga clic derecho y copie el archivo de actualizaci n de firmware para despu s copiarlo en una memoria USB 5 Encienda el Smart Hub de 500 GB M18 y el monitor inal mbrico M18 o la...

Страница 222: ...rrumpa el proceso de actualizaci n despu s de haberlo iniciado Cancelar OK 12 Aparecer un indicador de avance que mostrar el progreso de la actualizaci n El SMART HUB se est actualizando 58 13 Aparece...

Страница 223: ...ripci n 1 Empu adura retr ctil se muestra en la posici n plegada 2 Bot n de liberaci n y bloqueo de empu adura retr ctil 3 Tambor de cable de empuje y cable de empuje 4 Pies de posici n vertical 5 Seg...

Страница 224: ...encia Descripci n 1 Empu adura 2 Tambor de cable de empuje y cable de empuje 3 Pies de posici n vertical 4 Seguro de rotaci n de monitor inal mbrico 5 Seguro inclinable del monitor inal mbrico 6 Conec...

Страница 225: ...Tenga cuidado al transportar esta herramienta cuando el tiral neas y la mochila est n conectados Puede ocurrir una p rdida de equilibrio 1 2 3 4 La parte trasera del tiral neas de inspecci n de tuber...

Страница 226: ...ca de mochila 1 Empuje la placa de mochila superior en el recept culo de montaje superior del tiral neas 2 Ahora empuje la parte inferior de la placa de mochila en el tiral neas aline ndola con el pos...

Страница 227: ...en posici n vertical Para reducir el riesgo de corto circuito cuando baje la herramienta o la bater a no permita que la bater a est en contacto con fluidos corrosivos o conductores Recept culo de mon...

Страница 228: ...eseado 3 Apriete el brazo de ajuste hacia la izquierda hasta sentir resistencia Ajuste del ngulo de inclinaci n del monitor inal mbrico 1 Oprima el bot n de inclinaci n de bloqueo para desbloquear el...

Страница 229: ...fricci n para aminorar el movimiento del tambor del cable de empuje de ser necesario Usar el tiral neas en posici n horizontal aumentar el ancho que hay entre los pies As tendr m s estabilidad en el...

Страница 230: ...ara enjuagar la c mara y limpiar toda suciedad y residuos acumulados que podr an haberse quedado en el resorte Sacuda en seco o utilice aire a baja presi n para soplar el excedente de agua y secar las...

Страница 231: ...mara incluyen una cubierta protectora de pl stico Siempre utilice la cubierta protectora mientras usa el tiral neas de inspecci n de tuber as Cara 34mm 25mm 1 2 1 2 1 Cubierta LED de policarbonato 2 L...

Страница 232: ...325 Extremo de c mara 5 3 Retiro e instalaci n de los cabezales de c mara Evite tocar con la mano desnuda la tarjeta de circuito verde o las clavijas doradas que est n en el ensamble de resorte o el c...

Страница 233: ...ra Tocarlos transferir los aceites de los dedos a estos componentes que podr a ocasionar una corrosi n prematura Use guantes de hule limpios de ser posible 5 4 1 Retiro del ensamble de resorte Antes d...

Страница 234: ...fuerza excesiva 5 5 Cubiertas protectoras y patines de c mara Cubiertas protectoras Son cubiertas que se ajustan en los cabezales de c mara de 25 mm y 34 mm Las cubiertas protectoras se incluyen con t...

Страница 235: ...Quite la parte de arriba de la cubierta protectora 5 5 3 Instalaci n de las cubiertas protectoras 1 Ponga la mitad inferior de la cubierta protectora en la parte trasera del cabezal de c mara 2 Gire...

Страница 236: ...o estrella de 101 60 mm 4 Pat n tipo barril de 25 mm Pat n tipo barril de 34 mm Pat n tipo estrella de 34 mm 5 5 5 Instalaci n del pat n tipo barril 1 Abra totalmente el pat n de la c mara y ponga el...

Страница 237: ...pat n tipo barril 1 Abra totalmente el pat n estrella y ponga el resorte en el pat n Posicione el pat n de tal manera que la c mara est nivelada 2 Cierre el pat n estrella y presione las aletas juntas...

Страница 238: ...ue est en el directorio de Servicio y Soporte 1 Gire el disco de navegaci n hacia la opci n Configuraci n y opr malo 2 Gire el disco de navegaci n hacia la opci n Servicio y soporte y opr malo para en...

Страница 239: ......

Страница 240: ...MILWAUKEE TOOL 13135 West Lisbon Road Brookfield WI 53005 USA 58140154d2 01 22 Printed in China...

Отзывы: