background image


4.7 

Editing and saving a sequence 

 
In high speed recordings usually only a portion of the frames contain relevant informa-
tion. Therefore, it is useful to save only that range of frames which contains this essen-
tial information. 
 
There are 2 methods of selecting the essential range of frames for saving: 

Enter the range of the frame numbers in the "from" and "to" input field of the 
"Save" or the "Make Avi" menu.   
Alternatively you may enter the frame range by means of mouse-button and 
control keys as described in the next chapter.   
The selected range will be shown as a blue bar in the frame slider. 

Create a list of frames in the "Play settings" menu. 

The sequence may now be saved as single bmp-files in the "Save" menu or as an avi-
file in the "Make Avi" menu . See chapter 5.4.2 and 5.4.3 on page 45 and page 47 for 
detais. 
 

4.7.1 Editing a sequence by using frame slider or keys 

If the frame slider has the focus you may use the mouse buttons or the key “b”, “e” and 
“l” for editing a sequence. 
 

L


This method works only if the frame slider has the focus! Click on the frame 
slider for getting the focus 


4.7.1.1 Set the beginning of a sequence 


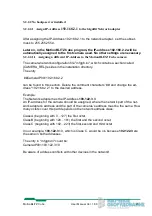
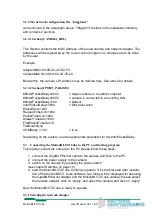
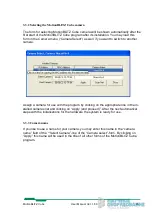
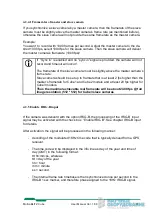
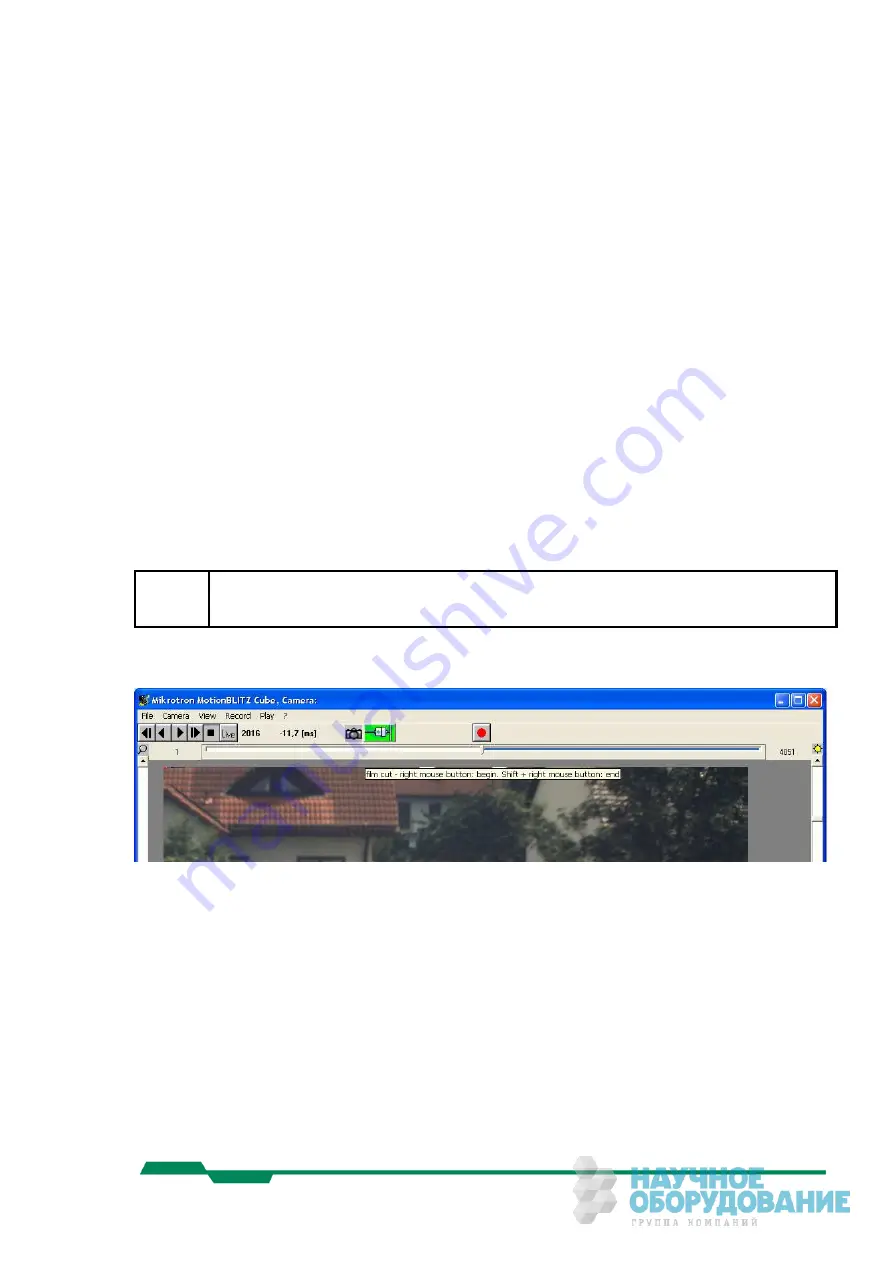
Press the right mouse button or the key “b”. The actual frame number, 2016 in the pic-
ture above, will be set as a start value for the range of frames. The selected range will 
be shown as a blue bar in the frame slider. 


MotionBLITZ Cube 

User Manual Ver. 1.8.0 

36 

Содержание Cube5 C

Страница 1: ...H Landshuter Str 20 22 D 85716 Unterschleissheim Germany Tel 49 89 726342 00 Fax 49 89 726342 99 info mikrotron de www mikrotron de Instruction Manual MotionBLITZ Cube Digital Motion Analysis Recorder Version 1 8 0 ...

Страница 2: ... 2 2 3 Start recording 19 2 2 3 1 recording modes 19 2 2 3 2 Non circular mode 19 2 2 3 2 1 Circular recording mode 19 3 INSTALLATION OF MOTIONBLITZ CUBE 20 3 1 MINIMAL SYSTEM REQUIREMENTS PC 20 3 2 INSTALLATION OF THE SOFTWARE 20 3 2 1 Assigning an IP address to the GigaBit Ethernet adapter 21 3 2 2 IP Adress of the camera 22 3 2 2 1 bootp server installed 22 3 2 2 2 No bootp server installed 23 ...

Страница 3: ...k line 40 5 CONTROLS AND MENUS IN THE MOTIONBLITZ CUBE SOFTWARE 41 5 1 MOVING THE CAMERA IMAGE 41 5 2 ZOOM IN AND ZOOM OUT 41 5 3 BRIGHTNESS AND CONTRAST 42 5 4 MENU FILE 42 5 4 1 Reload bmp files 43 5 4 1 1 Load loop 43 5 4 1 2 Load frame list 44 5 4 2 Save images to bmp files 45 5 4 2 1 Save Loop 45 5 4 2 2 Save frame list 46 5 4 3 Make Avi File 47 5 5 THE CAMERA MENU 48 5 6 THE VIEW MENU 49 5 6...

Страница 4: ...5 72 8 2 CONNECTOR ASSIGNMENTS 73 8 2 1 Power connector male type Binder Cube1 2 3 73 8 2 2 Signal input Sync connector male type Binder Cube1 2 3 73 8 2 3 Power connector male type Lemosa Cube1 2 3 UPL Cube4 5 74 8 2 4 Signal input sync connector male type Lemosa Cube1 2 3 UPL Cube4 5 74 8 2 4 1 IRIG B input 75 8 2 4 2 Trigger Sync input signal definition 75 8 2 4 3 Trigger connection example 75 ...

Страница 5: ...nal components The MotionBLITZ Cube must be connected to a host PC via fast Ethernet only when downloading recorded sequences or when camera parameters need to be modified or changed 1 2 Customer indications 1 2 1 For customers in the U S A This equipment has been tested and found to comply with the limits for a Class A digi tal device pursuant to Part 15 of the FCC Rules These limits are designed...

Страница 6: ...gree to fully indemnify Mikrotron for any damages resulting from such improper use or sale 1 3 Declaration of conformity Manufacturer Mikrotron GmbH Address Landshuterstr 20 22 85716 Unterschleissheim Germany Product High Speed Camera MotionBLITZ Cube The dedicated products conform to the requirements of the Council Directives 2004 108 EG for the approximation of the laws of the Member States rela...

Страница 7: ...Warranty Note Do not open the body of the camera The warranty becomes void if the camera body is opened 1 5 Remarks Warnings This document contains important remarks and warnings See the corresponding sym bols L Important remark Attention Warning ...

Страница 8: ...ameras 1 6 1 The rear of the camera The identification type plate is to be found at the rear of the camera It contains the se rial number and the mac address for identifying the device in a network MotionBLITZ Cube User Manual Ver 1 8 0 8 ...

Страница 9: ... 1 6 2 1 Connectors There are 3 connectors 2 switches and 2 LEDs mounted on the right side of the Camera The pin assignments of these connectors are described in chapter 8 2 Connector assignments MotionBLITZ Cube User Manual Ver 1 8 0 9 ...

Страница 10: ... For cameras with standby facility press the power switch longer than 1 second for swichting off the camera See chapter 2 1 Standby for Cube4 and Cube5 cameras only for details MotionBLITZ Cube User Manual Ver 1 8 0 10 ...

Страница 11: ...ess GREEN constant Switched on no charging battery full or no power supply connected ORANGE constant Switched on battery charging in progress In addition for Cube4 und Cube5 with according hardware version supporting the standby facility RED ORANGE flashing Standby mode with external power supply GREEN ORANGE flashing Swiched on with internal power supply battery With empty batteries it may take a...

Страница 12: ...er on Power up boot procedure in progress GREEN constant Ready for the first recording after power up ORANGE blinking Circular recording in progress waiting for stop ORANGE steady Circular recording stopped Wait for next start signal 1 6 3 The front of the camera The c mount for the lens is located at the front of the camera MotionBLITZ Cube User Manual Ver 1 8 0 12 ...

Страница 13: ...ry The following components are included as part of the delivery 1 MotionBLITZ Cube version as ordered see selection below 1 Interface cable GigaBit Ethernet 1 110 220V power supply 1 CD with MotionBLITZ Cube operating software 1 Binder connector for signal Input ...

Страница 14: ... 93000 CM FM Cube4 M C Color 1 5 1280x1024 93000 CM FM Cube4 M3 B w 3 1280x1024 93000 CM FM Cube4 M3 C Color 3 1280x1024 93000 CM FM Cube5 B w 1 5 512x512 1900000 CM FM Cube5 C color 1 5 512x512 1900000 CM FM Cube5 M3 B w 3 512x512 1900000 CM FM Cube5 M3 C color 3 512x512 1900000 CM FM 1 Additional configuration options HG indicates the Hi G version ruggedized for crash and vibration IB Camera has...

Страница 15: ...reduced resolution when using more than 2500 fps Cube4 reduced resolution when using more than 1000 fps Cube5 reduced resolution when using more than 5000 fps 6 Lens mount Cube1 Cube2 Cube3 CM C Mount Cube4 Cube5 CM C Mount optional FM F Mount Cube3 Cube5 have an increased photosensitivity six times higher than the Cube1 Cube2 ...

Страница 16: ...30 minutes of circular recording with full resolution For Cube4 5 cameras this time will be increased to 60 minutes Stored images can be retained in the camera up to two hours with a fully charged bat tery The battery will be automatically charged when the power supply 10 5 24 V DC is connected to the camera and the camera is switched off Charging of a completely empty battery will take 3 hours If...

Страница 17: ...e camera s power switch for a short moment less than 1 second when the camera is ready to operate or configure it with the cube software as described in chapter 5 7 1 Standby after the end of a recording session or in chapter 5 5 The Camera menu To get the camera out of the standby mode you have to press the camera s power switch for a short moment less than 1 second Please pay attention If you pr...

Страница 18: ...trigger switch MotionBLITZ Cube holds up to 8 Gbyte internal frame memory From this memory a very small part only as much as required by one frame is used for storing the frames for the live mode The remaining memory is used for sequence recording 2 2 1 Live mode The camera images are continuously recorded and displayed This mode is optimal for defining image detail adjusting the focus and setting...

Страница 19: ...ol program 2 2 3 1 recording modes MotionBLITZ Cube has 2 recording modes The difference is the usage of the camera s image memory 2 2 3 1 1 Non circular mode The camera stops recording when the internal frame buffer is full 2 2 3 1 2 Circular recording mode The camera records frames in a circular mode i e the oldest frames are always over written by the newest and waits for a signal to stop There...

Страница 20: ...2 Mbyte PC Ram 40 Gbyte Harddisk 32 Mbyte graphic memory Display with 1400 x 1050 pixels 24 Bit GigaBit Ethernet Adapter 3 2 Installation of the software The GigaBit Ethernet adapter and driver should be installed before the MotionBLITZ Cube software is installed For details see the GigaBit Ethernet adapter manual Insert the MotionBLITZ Cube Setup CD in the CD Rom drive on the PC Start the setup e...

Страница 21: ... address perform the following steps 1 Close all MotionBLITZ Cube applications 2 Open the Network and Dial up Connections window from the Windows Control Panel Right click on the desired connection in the panel and click the Properties item The properties dialog for the connection shown in the next figure on the next page will be displayed MotionBLITZ Cube User Manual Ver 1 8 0 21 ...

Страница 22: ...f the GigaBit network adapter See details on next page in chapter 3 2 2 2 1 Assign IP Address 192 168 2 1 to the GigaBit Network adapter 3 2 2 IP Adress of the camera Some settings are required depending on the Ethernet configuration 3 2 2 1 bootp server installed The IP address for the camera is assigned by the server No other settings are neces sary MotionBLITZ Cube User Manual Ver 1 8 0 22 ...

Страница 23: ...ameraIP00 192 168 2 2 can be found in this section Delete the comment characters and change the ad dress 192 168 2 2 to the desired address Example The Network adapter has the IP address 193 122 3 9 An IP address for the camera should be assigned where the network part of the net work adapter s address and the part of the cameras s address must be the same How many octets cover this part depends o...

Страница 24: ...hernet switch PacketSize 1440 RequestTimeOut 1000 PacketTimeOut 1000 AnswerTimeOut 1000 FirstPacketTimeOut 0 TabQuantity 2 COMDelay 100 in us Depending on the system use the appropriate parameter for the InterPacketDelay 3 3 Connecting the MotionBLITZ Cube to the PC and starting program To properly connect the camera to the PC please follow these steps 1 connect the GigaBit Ethernet cable to the c...

Страница 25: ...enu Select Network Adapter as well Assign the network adapter for use with the program by clicking on the appropriate line in the installed network adapters list and clicking on Apply and proceed In the next step the form for selecting the camera will be shown automatically if it s a programm start without successfully selecting a camera before MotionBLITZ Cube User Manual Ver 1 8 0 25 ...

Страница 26: ...th the program by clicking on the appropriate line in the in stalled cameras list and clicking on Apply and proceed After the next automatical steps with the initialisations for the hardware the system is ready for use 3 3 3 Camera name If you like to use a name for your camera you may enter this name in the camera name field of the Select Camera line of the Camera select form By clicking on Apply...

Страница 27: ...is new directories you may use up to four cameras si multaneously For connecting the cameras with your PC you should use a Gigabit Ethernet switch The following switches are recommended for use with the MotionBLITZ Cube cameras SMC TigerSwitch 86xxT family 3COM 3C1740x 3800 famliy Dlink DGS 10xxTx 10 100 1000 famliy SMC 8505 or SMC 8508 NETGEAR ProSafe 16 Port Gigabit Smart Switch GS716T 3 3 4 1 S...

Страница 28: ...er recording stored sequences of images maybe subsequently edited Start the software by double clicking on the appropriate MotionBLITZ Cube symbol on the PC desktop or choose the application in the windows start menu The following screen mask will appear Select modes of operation or change parameters by pressing a command button or by selecting an item in a pulldown menu If the mouse cursor is mov...

Страница 29: ...y alter the quality of recorded im ages Be sure that you have saved your recorded images to file before ap plying these changes because afterwards the images may be destroyed or lost Now the new parameters will be sent to the camera All other parameters e g shut tertime or analog gain will be sent immediately to the camera after entering If there is no connection to the camera the following error ...

Страница 30: ...ance form for color cameras or the histogram form for monochrome cameras is a good tool for adjusting the black level In live mode close the lens of the camera for getting a completely black image adjust the black level until the black line in the whitebalance or the histogram touches the min border of the chart 4 2 3 Low Light Mode In low light mode the camera s exposure time is extended up to 10...

Страница 31: ...uld be set up to framrate that is at least 2 fps higher than the master s framerate for Cube1 and Cube2 models and at least 20 fps higher for Cube3 models Thus the maximal achievable real framerate will be about 2480 fps full image resolution 512 512 for Cube3 slave cameras 4 2 5 Enable IRIG B input If the camera was deliverd with the option IRIG B the processing of the IRIG B input signal may be ...

Страница 32: ...m cameras The rising edge of the signal provided on pin 3 shows the beginning of the exposure of the master camera s image the falling edge the end 4 2 6 2 ARM activated If you select ARM you get a signal if the camera is ready for triggering in the circular recording mode For Cube4 5 cameras only With the both check boxes on the right side of the Sync out ARM you may define if ARM is active high ...

Страница 33: ...ecording in circular mode Circular mode should be used if a trigger is applied The trigger may be the closing of the camera s trigger switch a trigger signal the ImageBLITZ the clicking on the stop button in the MotionBLITZ Cube control software A trigger is necessary if images are needed before and or after an event The trigger defines the point of time of your event Circular mode is selected wit...

Страница 34: ...e internal camera state LED see 1 6 2 3 2 on page 12 will start flashing orange This indicates that recording is in progress and the camera is waiting for the trigger to complete the sequence 4 5 2 Stop recording There are 3 various methods to stop recording 1 Press the Start Stop recording switch of the camera 2 Apply a triggersignal to the appropriate camera input connector 3 Press the stop butt...

Страница 35: ... press the reconnect button after the camera is re connected with your system If this button is not pressed after reconnec tion the chronology of a meanwhile recorded sequence may be lost The same applies to a completed recording session that has been started with the camera s trigger switch Click on one of the forward or backward buttons Now the frames will be displayed Al ternatively the play se...

Страница 36: ...er Create a list of frames in the Play settings menu The sequence may now be saved as single bmp files in the Save menu or as an avi file in the Make Avi menu See chapter 5 4 2 and 5 4 3 on page 45 and page 47 for detais 4 7 1 Editing a sequence by using frame slider or keys If the frame slider has the focus you may use the mouse buttons or the key b e and l for editing a sequence L This method wo...

Страница 37: ...re to be viewed select the directory the filename and the de sired frame numbers in the File Load menu chapter 5 4 1 on page 43 Now the image source for displaying frames is the selected directory with the appropriate files This is indicated by the symbol in the status area of the MotionBLITZ Cube control programm The playback buttons or the Play settings menu allow navigation through the image fi...

Страница 38: ... light For recalibrating the color correction click first on Live and then in the menu Camera Setup on the button white balance The following screen mask will be shown L White balance is available for color cameras only For black white cameras a histogram will be provided instead The histogramm con tains only a chart without red green and blue MotionBLITZ Cube User Manual Ver 1 8 0 38 ...

Страница 39: ...hown as three curves red green and blue Using the R G and B sliders move the three curves until they are nearly congruent as shown in the figure above 4 9 2 Automatic white balancing Take a picture of a scene that contains in its middle area mostly white Click on the Auto button 4 9 3 Save the white balance values in the camera Click on Apply to assume these values and to save them in the camera C...

Страница 40: ...vide the lenght of the check line The green check line may be used for approximately determing the length of distances between the starting point and the endpoint of the line The value will be shown in the field length of the check line This value and its physical unit may be calibrated by en tering your values in both fields If you know e g in the upper example 204 pixel that this corresponds to ...

Страница 41: ...button and move the mouse The image will move in the desired direction 5 2 Zoom in and zoom out For zooming use the left vertical scrollbar The range of the zoom factor is from 0 1 smaller to 10 bigger than the original Click on the zoom icon for the original size The number next to the zoom icon indicates the actual zoom factor Doubleclick on the icon to fit the image into the form The icon gets ...

Страница 42: ...l state of the appropriate parameter is set Adjust the base value for the con trast computation using ContrastBase This is needed only in special light conditions L Changes to contrast and brightness are relevant for the saved frames 5 4 Menu File The File menu allows reloading bmp files for display start saving images as bmp files create an avi file and exit the program MotionBLITZ Cube User Manu...

Страница 43: ...to be loaded Load loop Load frame list 5 4 1 1 Load loop Click on the radio button Load loop Entries can be made in the fields From and To by clicking on files on the file list with the mouse Click the contents of the From field with the left mouse button number 1 in our example The background of the figure is blue Click on the desired image file with the left mouse button e g frames bmp 14 is add...

Страница 44: ...ttings chapter 5 8 on page 64 Only the files whose numbers are included in the frame list will be loaded and displayed By clicking OK the first file is loaded into the main window Use the replay buttons as described in 4 6 on page 35 for displaying the whole sequence MotionBLITZ Cube User Manual Ver 1 8 0 44 ...

Страница 45: ...be used which conforms to Windows MotionBLITZ Cube extends these characters by a 6 digit figure which corresponds to the frame number At present only bmp data is supported i e the name suffix is permanently set to bmp 5 4 2 1 Save Loop Click on Save Loop The numbers of the images in the range of From and To fields including the values themselves are written to a file by clicking OK The frame numbe...

Страница 46: ... box is NOT active the frames will not be displayed In this case the saving procedure will be faster If a file with the same name already exists a response to a message box is required Click on Yes The file and all the following files will be overwritten No The image will not be stored and if possible the procedure continues with the next image Cancel The image is not stored and no further images ...

Страница 47: ...eck box An rectangle named AVI clipping area will be over layed in the camera image Adjust the size as needed and move the rectangle over the region of interest with the mouse Once all parameters have been set click on Make AVI The Avi progress bar and the estimated time to completion will appear If you click on Cancel while an Avi is created the AVI will hold only the frames up to the point of ti...

Страница 48: ...ils with Camera Select connect with the camera via the ethernet See chapter 3 3 2 Selecting the MotionBLITZ Cube camera with Select Network Adapter select the adapter as described in chapter 3 3 1 Selecting the network adapter with Standby set the connected camera into tzhe standby mode More informaton to this topic you will find in chapter 2 1 Standby MotionBLITZ Cube User Manual Ver 1 8 0 48 ...

Страница 49: ...nalog input ports may be displayed the value of the ana log port may be converted to a physical unit like Volt or degree Display Input ports Convert Analog Values 5 6 2 1 Display Input ports If Display Input Ports is enabled checked the 4 Bit digital input and the 8 Bit analog input values of the camera is displayed in the toolbar If Infoline is enabled checked the values are inserted in the infol...

Страница 50: ...laces of the con verted value will be defined The number of zeros before the decimal point defines the minimal numer of integer places the number of zeros after the decinal point defines the number of decimal places Example for the format string and the resulting output Format string comment Values to output 0 3894 12 532 00 0 At least 2 integer place 1 decimal places 00 4 12 5 00 At least 2 integ...

Страница 51: ...ken from the SpeedCam main window shows the re maining part of a recording and the information portion It contains the following fields with information at the time of recording Field Content in the example Date 21 01 2009 Time 18 08 01 IRIG B time code 1 contains 3 characters day of the year 6 charcters for time of day GMT 021 17 08 01 Frame number 6274 rel time after trigger ms 1774 0 ms Sequenc...

Страница 52: ...the first image line to save on frame memory It is interpreted from that structure for playback and then attached to the images 1 IRIG B is an optional camera feature 2 Sequence number is not available for Cube1 camera versions Sequence number indicates the number of the recorded sequence in multi sequence mode See 5 7 3 2 Multi sequence for details ...

Страница 53: ...uage German or English may be selected as language for all texts in the program 5 7 Record settings The recording mode may be selected There are 2 modes Non circular mode Circular mode If Cube4 and Cube5 cameras have an according hardware version they may switch to standby mode automatically after the end of a recording session MotionBLITZ Cube User Manual Ver 1 8 0 53 ...

Страница 54: ...be deactivated auto matically afterwards By getting into the standby mode the camera stops communication with the PC Time out will be indicated therefore In order to get access to the camera s image memory again you must set the camera into the ready to operate state Please press the camera s power switch for a short moment less than 1 second and click at the reconnect button 5 7 2 Non circular mo...

Страница 55: ...th trigger facility Cube4 and Cube5 cameras with an adequate hardware version provide the triggering facility in the non circular recording mode L During a non circular recording session with triggering actual images are shown as long as the camera provides them on account of the ac tive trigger While waiting for the next trigger there are now images shown MotionBLITZ Cube User Manual Ver 1 8 0 55...

Страница 56: ...l trigger signal connected with the camera s trigger input provided that Trigger With External Signal in Record Settings is activated The active edge or the active state of the signal may be selected in the menu Camera Setup Selecting resolution speed gain trigger sync ARM and white balance 3 changings of the contents in a specific part of the actual recorded image if Im ageBLITZ is used i e Trigg...

Страница 57: ...ecording which was initiated by the trigger edge the camera will wait for the next edge as long as the end of the memory is not reached After reaching the end of the memory the recording is completed Alternatively the re cording may be aborted via the Stop button or F12 As described in the chapter before the trigger could be the camera s trigger switch an external trigger signal or the ImageBLITZ ...

Страница 58: ...ossible frame 4049 as well If you select Before Percent the before frames to total frames ratio will be retained if the total number of frames is changed e g by changing the frame size Trigger with ImageBLITZ and number of sequences are not availabel for Cube1 cam era versions 5 7 3 1 Triggermodes MotionBLITZ Cube comes with two triggermodes which may be selected independ ently Select an external ...

Страница 59: ...s called the ImageBLITZ window The parameters of ImageBLITZ are adjusted in the Recording settings menu in Live mode The ImageBLITZ window is shown as a green red or yellow rectangle in the displayed frames L ImageBLITZ is an optional camera version Don t move or alter the ImageBLITZ window while recording Movements while re cording have no effect MotionBLITZ Cube User Manual Ver 1 8 0 59 ...

Страница 60: ...his value should be between 10 and 70 5 7 3 1 2 1 2 Relative object size This parameter defines the relative size of the area within the ImageBLITZ window that must be different from the reference frame before ImageBLITZ triggers The value range is 1 to 100 percent If you use a small value e g 5 then ImageBLITZ triggers when 5 of the image details are different 5 7 3 1 2 1 3 ImageBLITZ Reference f...

Страница 61: ...mber of post trigger frames will be as expected If a multi sequence recording will be stopped with the camera s Start Stop recording switch or the Cube control program s Stop button or key F12 MotionBLITZ Cube fills the rest of the sequences that are not yet recorded with the number of post trigger frames and brings the recording to an end Multi sequence mode is provided only by means of the Motio...

Страница 62: ...ons labled with the se quence number The number of the sequence that will be recorded actually is represented by the green color of the sequence command button In the example above ImageBLITZ had triggered while recording the first sequence The command buttons are disabled during the recording session MotionBLITZ Cube User Manual Ver 1 8 0 62 ...

Страница 63: ...ommand buttons are enabled by clicking on a button you navigate to the frame immediate after the trigger event in the appropriate sequence Click here to use the frame slider for all sequences or one sequence only MotionBLITZ Cube User Manual Ver 1 8 0 63 ...

Страница 64: ... radio button Single frame The frame with the number shown in the entry field Single frame is retrieved from the MotionBLITZ Cube frame memory and dis played Any image desired may be loaded from the memory by entering the frame number into the entry field or by operating the frame slider in the main form 5 8 2 Display loop from to Click on from Enter the frame number of the beginnning and ending o...

Страница 65: ...ist Click on frames list By clicking Forward playback or Reverse playback all frame numbers are processed on the list in an infinite loop i e the recorded images are loaded from the MotionBLITZ Cube frame memory and displayed 5 8 5 Last frame number Depending on the size of the frame memory and the current frame size line length and number of lines the last permissible frame number xxx is determin...

Страница 66: ...yright statement The second part holds information about the connected camera Serial number of the camera Model type Cube1 Cube2 Cube3 Cube4 Sensor type Firmware Version MAC Address IP Address The size of the frame memory Features C Color sensor M3 3 seconds recording time M6 6 seconds recording time HG Hi G version crash proofed IB ImageBlitz IG IRIG B signal processing MS Multi sequence MotionBL...

Страница 67: ...t on this filter is best removed by means of an oil free air pressure spray or with a lens cleaning tissue Sticky mud and fingerprints may be cleared away with medical alcohol Improper cleaning agents may damage the filter Such damage may alter the quality of the images L Infrared light is part of the visible light spectrum and warps the color in the camera images Therefore it is necessary to illu...

Страница 68: ...ITZ Cube to work If the firewall is active set it to inactive close MotionBLITZ Cube and start it again If it works now you may configure MotionBLITZ Cube in the windows firewall as an excep tional program and activate the firewall again A check if the MotionBLITZ Cube user has write permission in the MotionBLITZ Cube installation directory e g c Program Files Mikrotron GmbH MotionBLITZ Cube Write...

Страница 69: ...mption max continuous recording 1280x1024 resolution and 500 frames sec Thermal resistance typ 15W 6 25 W Serial data link GigaBit Ethernet Baud Rate 19200 Digital video GigaBit Ethernet Operating temperature 5 45 C Shock vibration 100g 10grms Dimensions WxHxD 94 x 70 x 106 mm Weight ca 1050 g Lens mount C mount Software click drag and drop for Windows XP Computer requirement Min Pentium III 650 M...

Страница 70: ...frames sec 15W Thermal resistance typ 6 25 W Serial data link GigaBit Ethernet Baud Rate 19200 Digital video GigaBit Ethernet Operating temperature 5 45 C Shock vibration 100g 10grms Dimensions WxHxD 94 x 70 x 106 mm Weight ca 1050 g Lens mount C mount Software click drag and drop for Windows XP Computer requirement Min Pentium III 650 MHz 1024 768 Pixel 256 MB RAM 10 Gbyte Hard disk GigaBit Ether...

Страница 71: ...monochrome Shutter Electronic Freeze Frame Shutter Trigger Trigger and Sync input Internal Dynamic 59 dB Power supply 10 5 30 V Power consumption max continuous recording 1 3 GBytes sec Thermal resistance typ 15 W 6 25 W Serial data link Thru GigaBit Ethernet baud rate 19 200 Bd Digital video MC134x GigaBit Ethernet Shock vibration 100g 10grms Dimensions WxHxD 93 x 69 x 92 mm c mount 93 x 69 x 128...

Страница 72: ...l resistance typ 6 25 W Serial data link GigaBit Ethernet Baud Rate 19200 Digital video GigaBit Ethernet Operating temperature 5 45 C Shock vibration 100g 10grms Dimensions WxHxD 93 x 69 x 92 mm c mount 93 x 69 x 128 mm f mount Weight ca 900 g Lens mount C mount or F mount Software click drag and drop for Windows XP Computer requirement Min Pentium III 650 MHz 1024 768 Pixel 256 MB RAM 10 Gbyte Ha...

Страница 73: ...2 1 8 2 2 Signal input Sync connector male type Binder Cube1 2 3 1 2 3 4 5 6 7 8 connector male view Solder side 180 Binder 99 0425 10 08 shielded recommend 90 Binder 99 0425 75 08 shielded recommend www binder connector de Pin Nr Signal Level Description 1 GND GND 2 0 2 5V 1MΩ Analog input voltage 8 Bit resolution 3 LVTTL Sync Output ARM 4 LVTTL Digital Input 1 5 LVTTL Digital Input 2 6 LVTTL Dig...

Страница 74: ...ut sync connector male type Lemosa Cube1 2 3 UPL Cube4 5 Pinning of matching signal plug male solder side select the plug according to your requirements right angle plug water resistant etc under http www lemosa com e g straight plug FGG 1B 308 CLAD52ZJ Mounted socket in camera EEG 1B 308 CLL Pin Nr Signal Level Description 1 GND GND 2 0 2 5V 1MΩ Analog input votage 8 Bit resolution 3 LVTTL Sync O...

Страница 75: ...p resistors R33 R32 are powered by a internal DC DC converter X3 3V The optocoupler will switch if the input is connected to the common GND signal Pin 1 on Signal I O connector A positive edge on the Sync input will output the next image if the positive Trigger edge is selected in the camera menu A positive edge on the Trigger input will stop a circular recording if the positive Trigger edge is se...

Страница 76: ...4 4 Analog input signal definition The analog input is protected by a 330kΩ series resistor and adjusted to deliver the digital value of 255 for 2 55V input voltage MotionBLITZ Cube User Manual Ver 1 8 0 76 ...

Страница 77: ...cted this output will carry a Strobe that corresponds to the selected exposure time of the camera If Arm is selelcted it will be active if the camera runs in circular recording mode The optocouplers output will sink 13 mA with max 0 6V output voltage The output polarity is positive when the selected signal is active The suppressor diode protects the output against reverse voltages It starts conduc...

Страница 78: ...8 3 Spectral response 8 3 1 Cube1 Cube2 MotionBLITZ Cube User Manual Ver 1 8 0 78 ...

Страница 79: ...8 3 2 Cube3 Cube5 MotionBLITZ Cube User Manual Ver 1 8 0 79 ...

Страница 80: ...8 3 3 Cube4 MotionBLITZ Cube User Manual Ver 1 8 0 80 ...

Страница 81: ... 12 µm Fill factor 40 Sensitive area 10 5 x 6 5 µm 8 4 2 Cube3 Cube5 Pixel size 16x 16µm Fill factor 62 Sensitive area 8 19 V x 8 19 H µm 8 4 3 Cube4 Pixel size 12x 12µm Fill factor 40 Sensitive area 10 5 V x 6 5 H µm MotionBLITZ Cube User Manual Ver 1 8 0 81 ...

Страница 82: ...8 5 Dimensions 8 5 1 Top bottom view Cube1 2 3 Maximum torque for M4 fastening screws 2 5 Nm MotionBLITZ Cube User Manual Ver 1 8 0 82 ...

Страница 83: ...8 5 2 Side view Cube1 2 3 Maximum torque for M4 fastening screws 2 5 MotionBLITZ Cube User Manual Ver 1 8 0 83 ...

Страница 84: ... of 93 x 69 x 92 mm WxHxD c mount without lens very compact To fasten the camera there are two mounting holes M4x7mm and one tripod connection on each side available Maximum torque for M4 fastening screws 2 5 Nm c mount f mount MotionBLITZ Cube User Manual Ver 1 8 0 84 ...

Страница 85: ...8 5 4 Side view Cube4 5 c mount f mount MotionBLITZ Cube User Manual Ver 1 8 0 85 ...

Отзывы: