P
AGE
6
M
IDIAN
E
LECTRONICS
I
NCORPORATED
DDU-300 Manual Rev. 2006.02.22
between displaying the ANI and the message
'EMERGENCY' every 2 seconds.
TIMESTAMP – This is the time of day that the last ANI
was received. The timestamp is in 24-hour format. In
24-hour format, 4 A.M. is displayed as 04:00 and 4
P.M. is displayed as 16:00. Note that the timestamp
changes only when a new ANI comes in, it is not a
time-of-day clock.
USER NAME – This is the name of the user
associated with the numeric ID that was received. User
names are stored in a database. The database must
be configured before names can be displayed.
SCROLL LEFT INDICATOR – Indicates that there are
other ANI’s previously logged. Press the left
<SCROLL> button to view the previously logged
items.
POWER / EMERGENCY LED – Glows green when
power is turned on. Blinks between orange and green
to indicate that an emergency ANI was received
recently. This indicator remains blinking until the
operator presses any key.
TRANSMIT / BUSY LED – This LED is off when there
is no activity. It glows red during transmit. It blinks
green any time the radio channel is busy (provided the
COR input is connected).
4.1.2 Keypad Operation in Display Mode
<SCROLL> LEFT - When in Display Mode, the
keypad <SCROLL> keys are used to scroll through the
previously logged ANI’s. The scroll left indicator
remains present on the screen so long as there are
more previous entries to be viewed. The scroll left
indicator disappears when the oldest entry is reached.
<SCROLL> RIGHT - A scroll right indicator will appear
on the right side of the screen when there are newer
entries available for viewing. Press the right
<SCROLL> button to view the newer entries. When
the last entry is reached, the right scroll indicator
disappears.
<#> POUND KEY – Repeatedly pressing the <#> key
will always return the DDU to display mode with the
last ANI received being shown.
<MONITOR> - This button always controls the monitor
function of the radio. Press <MONITOR> to toggle the
state of the monitor output to the radio.
<SEND> - Activates the radio PTT switch, placing the
radio in transmit mode. This function applies only to
units equipped with a microphone.
NUMBER KEYS – The number keys perform no
function in display mode. They are used in menu
mode for data entry.
<*> STAR KEY – Pressing the <*> will place the DDU
in Menu Mode at the main menu.
4.2
M
ENU
M
ODE
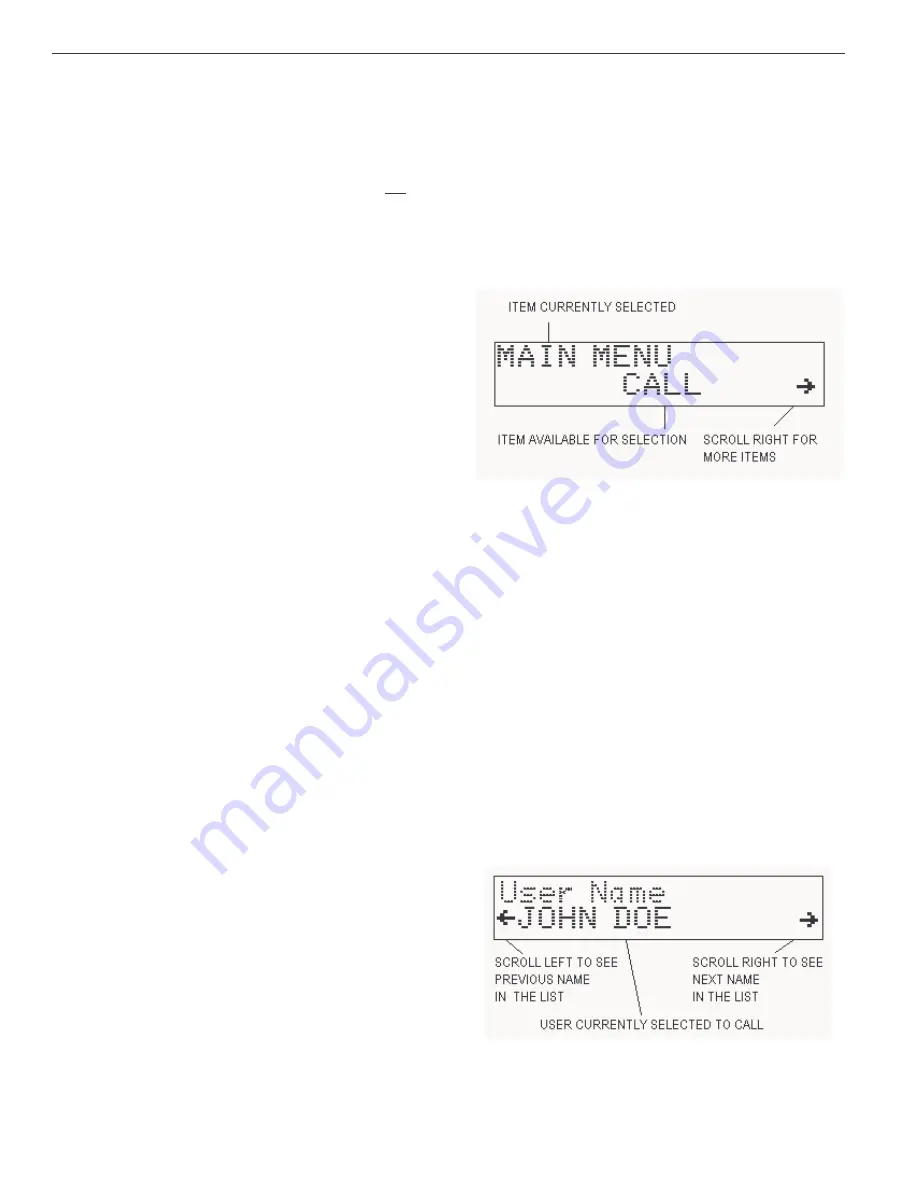
The Menu Mode provides the method for configuring
the DDU.
4.2.1 Navigating the Menus
Press the star key <*> while in Display Mode to place
the unit into Menu Mode. Upon entry to Menu Mode,
you will be in the Main Menu. The top line of the
display indicates this. The bottom line displays an item
available for selection, in this case the CALL
command.
The scroll right symbol on the right side of the display
indicates that additional items are available. Press the
right <SCROLL> button to view the next available
item. The scroll left symbol will then appear, indicating
that the left <SCROLL> button may be used to go
back to the previous item.
To select the displayed item, press the <SEND>
button (the <SEND> button acts like an ENTER key
when in menu mode). Upon selection, the name of the
item will appear on the top line of the display. The
bottom line will present additional items for selection.
Press the <#> key to return to the previous selection.
4.2.2 Calling a Unit in the Database
To place a call to a unit in the database, first select
CALL from the Main Menu. Press the right <SCROLL>
button to display the first user in the database. Either
the User ID will be displayed, or the User Name (alias)
will be displayed. This is determined by the Call Entry
Mode setting.
The left and right scroll indicators will appear on the
bottom line. This is the Select Mode. Use the
<SCROLL> keys to locate the desired user within the
database. When the name is located, press the
<SEND> key to place the call. The <#> key may be
Содержание DDU-300
Страница 15: ...MIDIAN ELECTRONICS INCORPORATED PAGE 15 DDU 300 Manual Rev 2006 02 22 7 MENU SYSTEM MAP...
Страница 16: ...This page intentionally left blank...
Страница 17: ......
Страница 18: ......
Страница 19: ......
Страница 20: ......
Страница 21: ......
Страница 22: ......


