12
13
1. For the first use, please charge for 12 hours;
Remote control will work when within 16 feet of the robot.
2. When the battery is low power, please charge it as soon as possible;
3. If you do not use the appliance for an extended period of time, fully charge the battery and
put it in a ventilated and dry place;
4. If the appliance is not used for more than 3 months, charge the appliance for 12 hours.
NOTE
NOTE
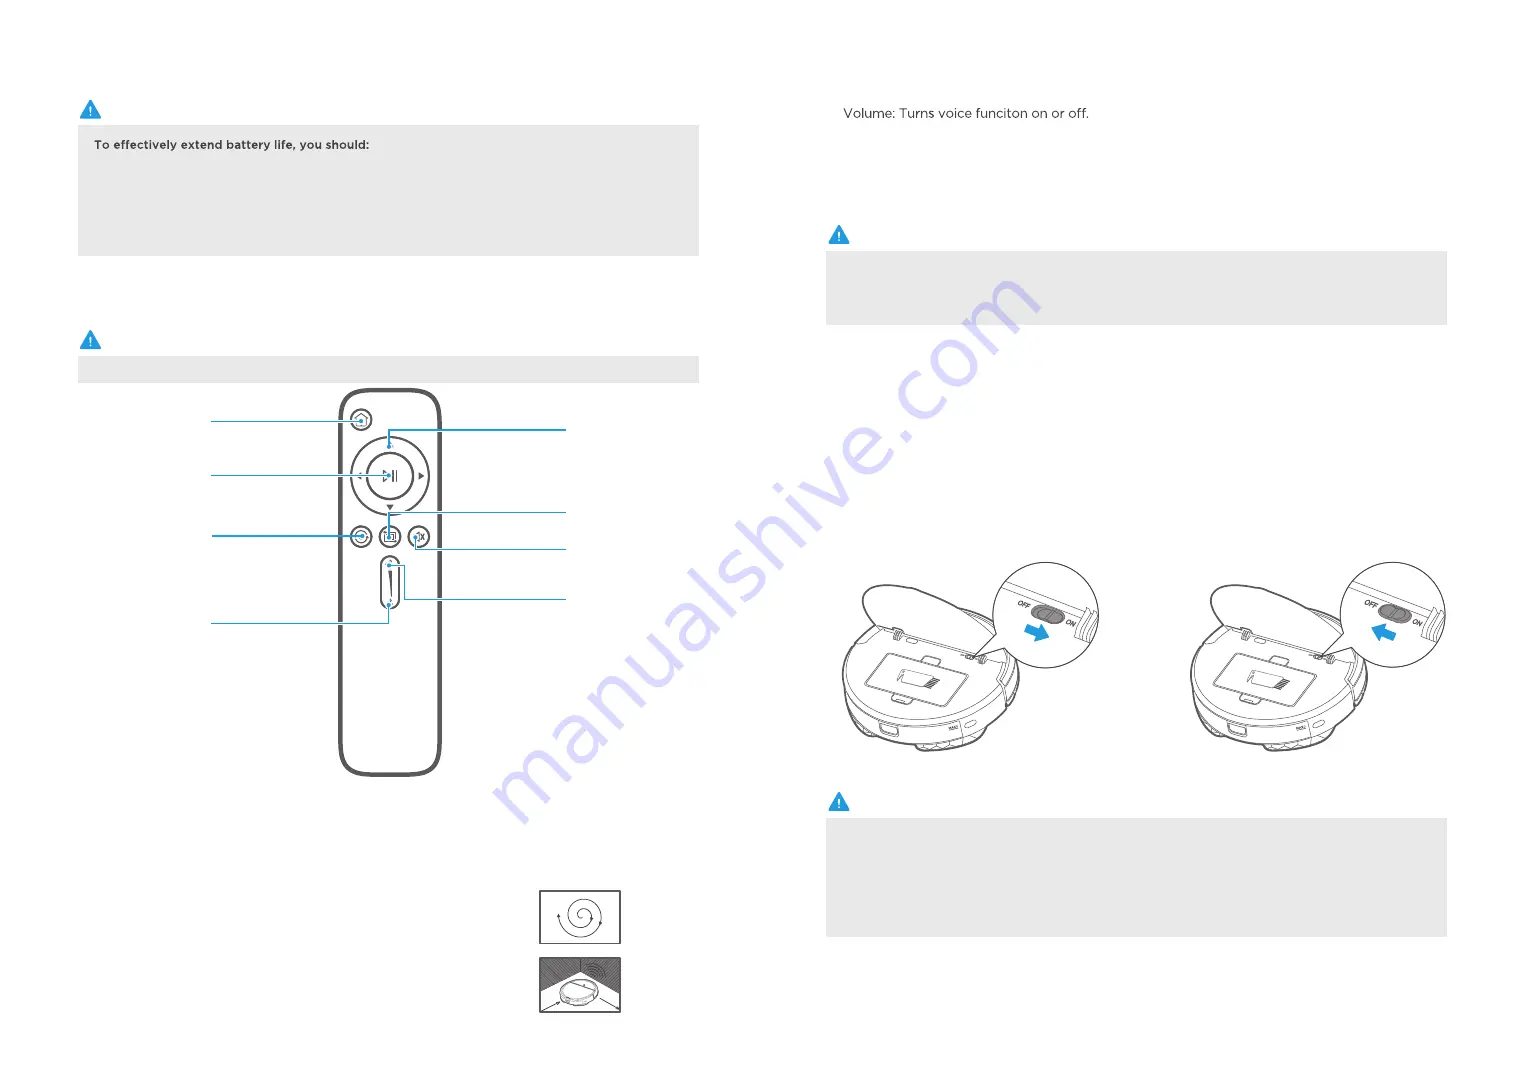
a. Before using remote, insert the 2 included AAA batteries. Remove back battery cover and insert
in correct orientation.
b. To prevent the robot from accidentally falling down stairs, there is no backwards direction.
NOTE
Low Power Test Mode
In this mode, the wifi module will enter the IDLE state, and the cleaner is in a low-power
consumption state and cannot work normally.
Entry: After the cleaner is turned on for 30 seconds, press the left bumper and mute button on the
remote control simultaneously. The operation need to be completed within 1 minute.
Exit: Restart the cleaner.
NOTE
Docking: Vacuum will return to docking station to charge.
1
6
Suction increase: Increases the suction power.
7
Suction decrease: Decreases the suction power.
8
Direction: Manually control the direction of the robot (forward, left, and right). Note that the robot
2
does not vacuum when in manual mode.
Start/Pause: Start or pause cleaning. The robot will automatically begin Smart Path cleaning.
3
Power ON/OFF
Introduction of Remote Control
1
Open the cover and slide power switch
to on.
Docking
Start/Pause
Spot cleaning
Suction decrease
Direction
Edge cleaning
Volume
Suction increase
Spot cleaning: The robot will clean a specific area in a spiral pattern.
4
Edge cleaning: The robot will clean edges of the room and furniture.
5


