2016 Microchip Technology Inc.
DS50002547A-page 37
7. Ensure that the RN4870 board is still connected to the Windows PC and suc-
cessfully enumerated. Click
Scan
button to scan for all the UART COM ports
available on the Windows PC.
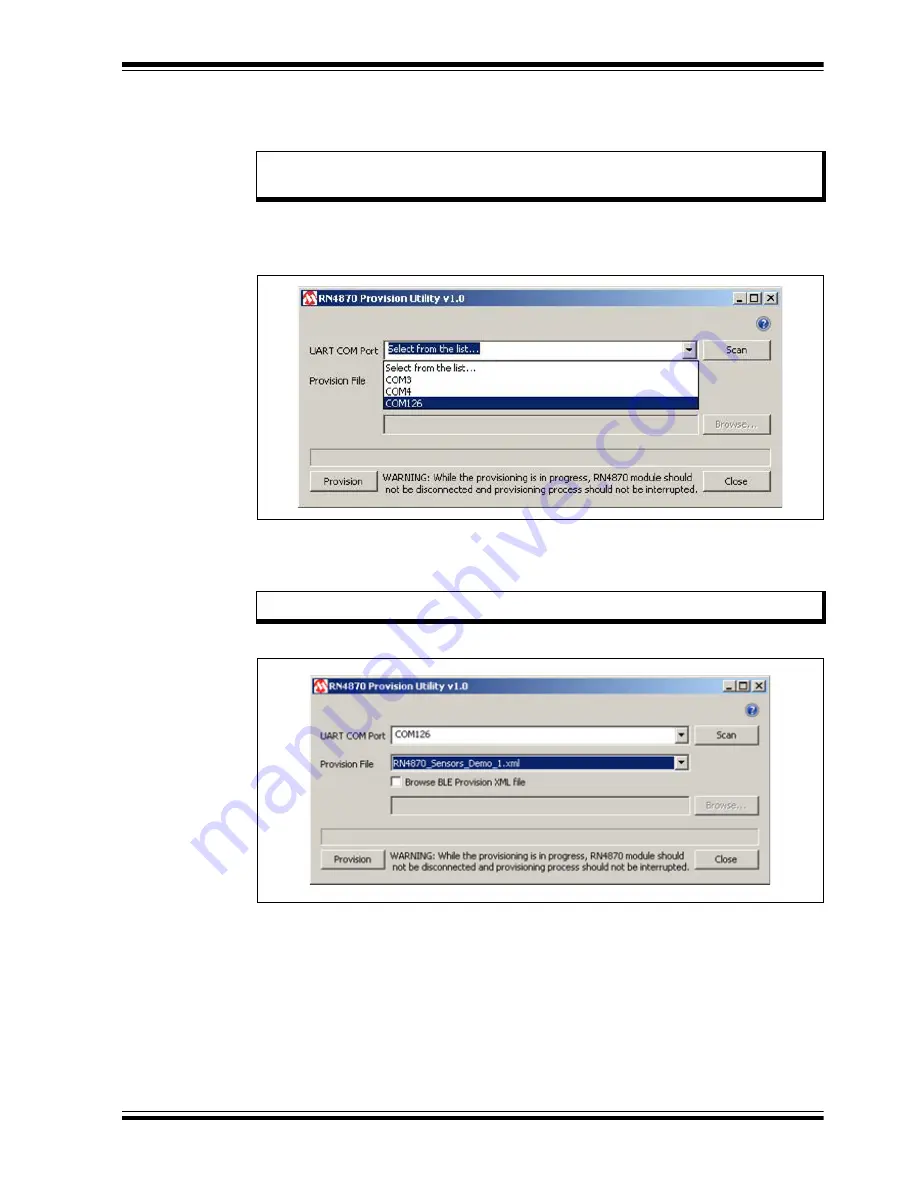
8. Click the drop-down menu of the UART COM Port and select the correct COM
port that is assigned to the RN4870 board to be provisioned. Refer to
FIGURE 4-9:
CONFIGURATION UTILITY: SELECT COM PORT
A set of prebuilt provision options for the RN4870 module are provided. Choose the
RN4870_Sensors_Demo_1.xml XML
file from the Provision File drop-down
menu as shown in
.
FIGURE 4-10:
CONFIGURATION UTILITY: SELECT XML FILE
9. With the RN4870 board still connected, the COM port and the
RN4870_Sen-
sors_Demo_1.xml
XML file selected, click
Provision
button to start the
RN4870 provisioning process. The progress bar shows the progress of the pro-
visioning process. Refer to
Note:
Ensure that the COM port on which the RN4870 board is enumerated is
not
opened by another application like a Serial Terminal application.
Note:
Use only a valid BLE Provision XML (.xml) file.


