background image


2.3


Network Settings 

Table 2-4 Configurator settings 

#Jumper 

Function 

State 

ON 

OFF 

Network configuration 
select 

User IP/mask settings 

Default IP/mask settings (IP 
169.254.0.254 mask 
255.255.0.0) 

Automatic mode 

Use predefined 

hostname

 (if 

DHCP server is available), 
allow server to assign IP 
automatically 

Use currently selected by 
jumper #1 network settings 

3-5 

Not used 

Reset

 (must be OFF) 

Blocks analyzer operation, 
processes hardware reset. 

Default state 


In non-automatic mode it’s necessary to select User IP/mask settings (jumper #1 is ON) if two or more 
analyzers are expected to operate in common LAN. Produce following steps to modify user network 
parameters: 

a.


Turn off the analyzer’s power, connect VNA directly to PC with jumpers #1-2 (Table 2-4) set to 
“OFF” state. 

b.


Go to “169.254.0.254” address in a WEB-browser to access instrument remote interface. 

c.


Locate and click “Network settings” on the start page. 

d.


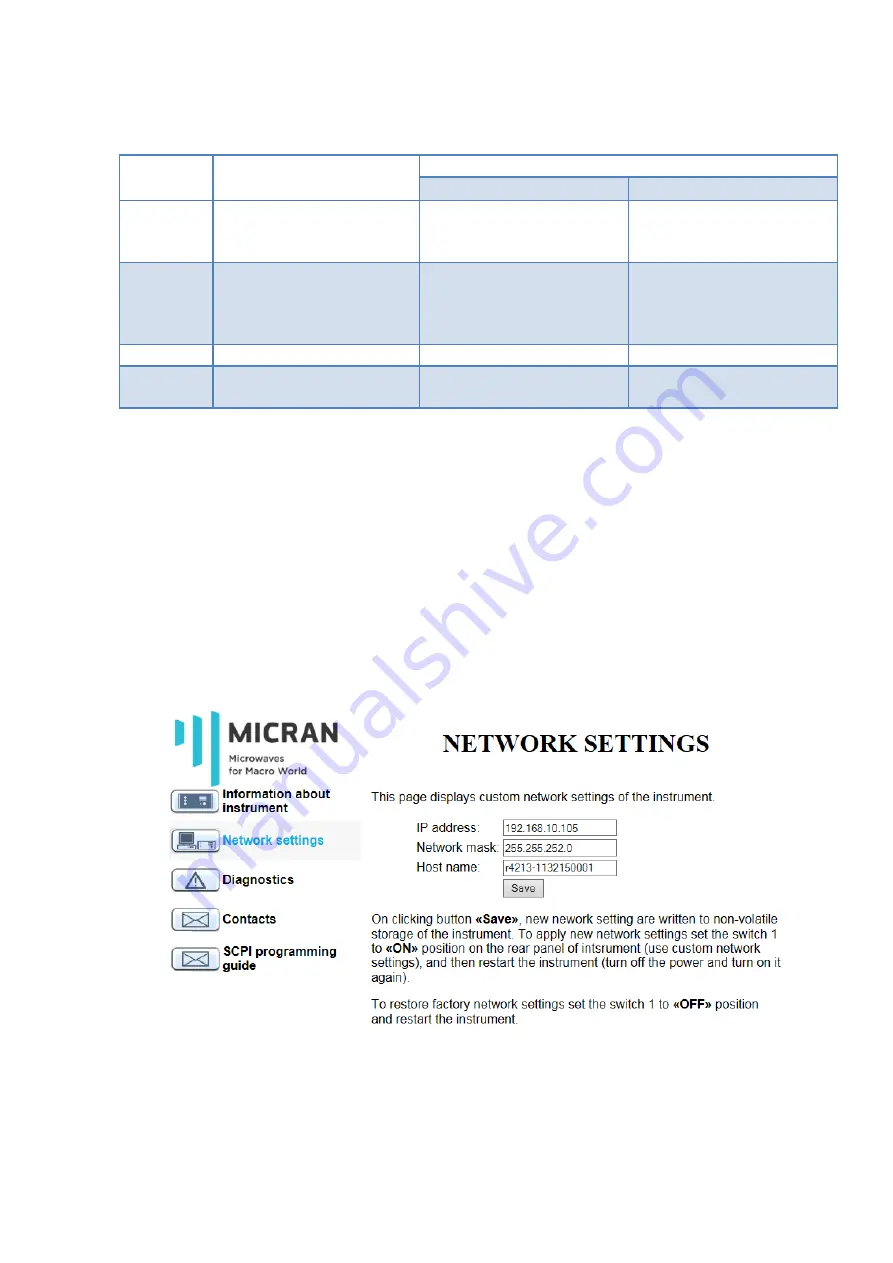
Modify IP address and network mask (Fig.2-3). 

e.


Perform “Save”. 

f.


Power-off the analyzer, set jumper #1 to “ON”. The instrument is ready to work. 


Figure 2-3 Modifying networks settings through remote interface. 

Содержание R42 Series

Страница 1: ...R42 Vector Network Analyzer Installation and Quick Start Guide ver 1 3 Phone 7 3822 900 037 Homepage http micran com Support pribor micran ru ...

Страница 2: ...ransmission and reflection losses power measurements in continuous or pulse mode Optional noise figure vector and scalar mixer measurements Various SOLT TRL calibration types automatic calibration procedure ability Post calibration circuits fixturing reference plane conversions Save load measured data user settings and calibrations Data averaging smoothing accumulation limit testing Display variou...

Страница 3: ...ange without notice This document contains proprietary information that is protected by copyright All rights are reserved No part of this document may be photocopied reproduced or translated to another language without the prior written consent of Micran Company ...

Страница 4: ...ork Settings 7 2 4 Software Setup 8 2 5 Connecting to analyzer 8 2 6 Options activation 9 2 7 Emulation mode 9 3 Basic Operations 11 3 1 Basic control elements 11 3 1 Control Panels 12 3 2 Measurement Sequence 13 3 2 1 Defining measurement parameters 13 3 2 2 Calibration 14 3 2 3 Measurements and Analysis 14 ...

Страница 5: ...e that the operating environment Table 2 2 and power supplied to analyzer Tab 2 3 meet the following requirements Provide appropriate ventilation at the workplace to satisfy the specifications and measurement accuracy of the analyzer keep from vibration and strong electromagnetic influences Table 2 2 Operating Environments Temperature 15 С to 35 С Humidity 40 to 80 Atmospheric pressure 537 to 800 ...

Страница 6: ... GHz x86 x64 Ethernet LAN 100 Mbit s GPU memory 512 MB DRAM 1 GB Display resolution 1280 720 Keyboard mouse or sensor display 80 Mb of free disk space for software installation Connect analyzer and PC by means of supplied Ethernet cable directly or using hub to operate in a local area network see connectors on Figure 2 2 Use configurator on the rear panel to select network profile described in Tab...

Страница 7: ...tate In non automatic mode it s necessary to select User IP mask settings jumper 1 is ON if two or more analyzers are expected to operate in common LAN Produce following steps to modify user network parameters a Turn off the analyzer s power connect VNA directly to PC with jumpers 1 2 Table 2 4 set to OFF state b Go to 169 254 0 254 address in a WEB browser to access instrument remote interface c ...

Страница 8: ...art menu Applications Micran Graphit R4M or Windows desktop icon Connection dialog will automatically appear after software s loading Fig 2 5 User should select required instrument from the Favorite or Instrument Search list It s recommended to add address of the analyzer to the favorites list or enable Use by Default option to speed up the connection procedure next time Editing and removing of fa...

Страница 9: ...stem License Keys on the program s main menu and install the option by adding supplied License file lk to the list Fig 2 6 no further reboot is needed Figure 2 6 Option activation 2 7 Emulation mode Graphit R4M application can be run in demo mode using integrated Emulator utility Fig 2 7 Add new instrument and specify 127 0 0 1 IP address or localhost as instrument address in the connection window...

Страница 10: ...be changed before connection or during measurements To expand the simulated frequency range of the instrument adjust Start and Stop parameters in the More settings section before connection procedure In addition Emulator implements few simple trigger functions and allows user to specify Hot and Cold noise data for the Noise Figure measurements ...

Страница 11: ...ons Channel Status Bars display basic sweep and correction parameters extract hint by using mouse hover to get string description for each channel Diagram graphic area for one or more traces data and mathematical traces can be linked to various measurements and channels Trace List displays traces of the diagram selects one or more traces it s allowed to change some trace properties directly by mou...

Страница 12: ... option for the mixer measurements Frequency frequency range point number frequency list management full span and zero span quick buttons Power output power value or modify power sweep span output input attenuation Scale trace format reference level value and position scale division scale mode selection quick buttons for the autoscaling selected trace s and all traces of the selected diagram Synch...

Страница 13: ...ble when focused Some controls have value presets like Points IF Filter etc to speed up input procedure 3 2 Measurement Sequence This section describes the basic measurement procedure using R4213 R4225 and presents an example of the S parameters measurement of arbitrary bandpass filter Follow next few instructions below 3 2 1 Defining measurement parameters Reset user settings using menu Profile R...

Страница 14: ...pened dialog Choose Calibration Variant SOLT TRL and Calibration Type from the lists Check desired measurement options Isolation Unknown THRU etc if available Follow the wizard s instructions to perform calibration Click Apply to finish calibration procedure or Back to repeat one or more calibration steps 3 2 3 Measurements and Analysis Connect the DUT Adjust the scale manually or using Autoscale ...

Отзывы: