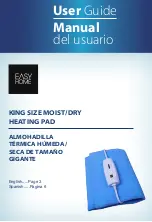
background image


The unit is to be operated from standard household sockets. Before commissioning, check that 
the mains voltage indicated on the rating plate matches that of the mains supply. 


The product may only be operated in its intended manner. Modification or other use may result 
in damage to the product or the environment in which it is used. 


The Euro mains plug must be disconnected after each use, in the event of malfunctions during 
operation and before cleaning the appliance. 


In the event of damage to the power cord, it must be replaced immediately by the 
manufacturer, its after-sales service or a qualified person. 


The appliance is intended exclusively for household or similar use. It must not be used for 
commercial purposes! 


The appliance must never be used after a malfunction, or if the appliance has been dropped 
into water or damaged in any other way. 


The manufacturer accepts no responsibility whatsoever for incorrect use resulting from failure 
to observe the instructions for use. 


Technical changes and errors excepted! 

Commissioning: 


Open the Velcro fastener of the carrying strap 


Unroll the heating mat completely 


Lay out the heating mat with the fleece side facing up and the fabric/nap side facing down. 


Plug the Euro mains plug into a suitable socket. 


The power LED and the display light up once briefly. 


The heating mat is now ready for operation. 

Usage: 

CAUTION: No heavy furniture or objects may be placed on the heating carpet. Also, do not place any 
point loads such as table legs or similar. 

Switch on: 

By pressing the red switch, the heating carpet is switched on, the power LED of the switch lights up if the 
carpet is switched on. After switching on, the 3h-LED (3 hour timer) and the High-LED (highest power level) 
also light up. Thus, the 3h timer and the highest power level are automatically active. 

Set the heating temperature: 

The desired power level (temperature) can be set by pressing the "Temperature" key several times. The 
selected power level is indicated by the respective LED (Low/Mid/High) lighting up. 

Three power levels are available: Low 30 ± 5°C / Mid 35 ± 5°C / High 40 ± 5°C. 

Set the switch-off timer: 

After switching on the heating carpet, the 3-hour timer is automatically active. The timer time can be set 
by pressing the "Time" key several times. The selected timer time is indicated by the respective LED 
(9h/6h/3h) lighting up. After the selected timer time has elapsed, the heating carpet switches off 
automatically. 

Three timer times are available: 9 hours (9h) / 6 hours (6h) / 3 hours (3h). 

Содержание 1024

Страница 1: ... Bedienungsanleitung Technische Daten Max Leistungsaufnahme siehe verfügbare Varianten Abmessungen siehe verfügbare Varianten IP Schutzart IP21 Oberflächentemperatur siehe verfügbare Varianten Oberflächenmaterial Vlies Heizelement Heizkabel Rutschfeste Rückseite 3 Stufen Temperatur Steuereinheit mit Timer Funktion bis zu 8 Stunden Schutzklasse II 1 5m Kabellänge Netzkabel mit Euro Stecker Wichtige...

Страница 2: ... zu prüfen ob es Anzeichen von Abnutzung oder Beschädigung am Produkt gibt Dieser Artikel ist nicht für den Gebrauch in Krankenhäusern bestimmt Es dürfen keine Nadeln Nägel Schrauben oder andere spitzen Gegenstände in bzw durch den Heizteppich gesteckt werden Der Heizteppich darf nicht im aufgerollten Zustand in Betrieb genommen werden Hilfsbedürftige Personen Kinder und temperaturempfindliche Men...

Страница 3: ...rch Nichtbeachtung der Gebrauchsanleitung zustande kommt Technische Änderungen und Irrtümer vorbehalten Inbetriebnahme Heizteppich vollständig ausrollen Der Heizteppich ist mit der Vlies Seite nach oben und der Stoff Noppen Seite nach unten auszulegen Euro Netzstecker in eine geeignete Steckdose einstecken Die Power LED und das Display leuchten einmal kurz auf Der Heizteppich ist nun betriebsberei...

Страница 4: ...Sleep Taste Ausschalten Das Abschalten des Teppichs erfolgt durch erneutes Drücken des roten Schalters Die Power LED des Schalters und die LEDs für die Timerzeit sowie die Leistungsstufe erlöschen Nun kann der Euro Netzstecker von der Stromversorgung getrennt werden HINWEIS Bevor der Heizteppich zusammengerollt und verstaut wird muss diese vollständig abgekühlt sein Reinigung des Heizteppichs 1 He...

Страница 5: ...aufgerollten Teppich legen Das Gurtende durch die Schnalle ziehen und die Klettflächen aufeinanderdrücken 4 Den aufgerollten Heizteppich an einem kühlen trockenen und vor direkter Sonneinstrahlung geschütztem Ort aufbewahren Steuereinheit Beschreibung der Schalter Taster und Geräte LEDs ON OFF roter Schalter Schalter zum ein ausschalt des Heizteppichs Sleep Taste zum ein ausschalten der Sleep Funk...

Страница 6: ... der RoHS Richtlinie 2011 65 EU der EMV Richtlinie 2014 30 EU und der Niederspannungsrichtlinie 2014 35 EU befindet Die ausführliche Konformitätserklärung finden Sie unter https infrarot fussboden de Downloads_1 Dokumentation 2021 Mi Heat Heizsysteme GmbH Alle Rechte vorbehalten Ohne schriftliche Zustimmung des Herausgebers darf diese Anleitung auch nicht auszugsweise in irgendeiner Form reproduzi...

Страница 7: ...arpet Operating instructions Technical data Max Power consumption see available variants Dimensions see available versions IP protection class IP21 Surface temperature see available variants Surface material Fleece Heating element Heating cable Non slip back 3 stage temperature control unit with timer function up to 8 hours Protection class II 1 5m cable length mains cable with Euro plug Important...

Страница 8: ...torage Before each use check for signs of wear or damage to the product This item is not intended for use in hospitals No needles nails screws or other sharp objects may be inserted into or through the heating carpet The heating mat must not be used when rolled up Persons in need of assistance children and temperature sensitive persons may only use the product under supervision The product must be...

Страница 9: ...t with the fleece side facing up and the fabric nap side facing down Plug the Euro mains plug into a suitable socket The power LED and the display light up once briefly The heating mat is now ready for operation Usage CAUTION No heavy furniture or objects may be placed on the heating carpet Also do not place any point loads such as table legs or similar Switch on By pressing the red switch the hea...

Страница 10: ...ay only be cleaned with a slightly damp cloth or a soft brush The heating carpet must be completely dry before it is used again 4 The control unit and cables may only be cleaned with a dry and soft cloth IMPORTANT No moisture may penetrate the control unit or the cable The heating carpet must not be immersed in water or other liquids No cleaning agents solvents or scouring agents may be used Stora...

Страница 11: ...switching the sleep function on off 28 5 C The status LED is located to the right of the Sleep button Time key for selecting the timer time The selected time is indicated by the three LEDs above the timer key Temperature key for selecting the desired temperature power level The selected level is indicated by the three LEDs above the Temperature key ...

Страница 12: ... 55150 LY FW 518 105200 NX 3798 are in conformity with the RoHS Directive 2011 65 EU the EMC Directive 2014 30 EU and the Low Voltage Directive 2014 35 EU The detailed Declaration of Conformity can be found at https infrarot fussboden de Downloads_1 Documentation 2021 Mi Heat Heizsysteme GmbH All rights reserved No part of this manual may be reproduced in any form or by any means without the writt...

Отзывы: