Model V-Max
—23—
INSTRUCTIONS FOR OPTIONAL AUTOMATIC CHAIN
OILER
WARNING
: DISCONNECT PTO DRIVE SHAFT AND HYDRAULIC HOSES (RELIEVE HYDRAULIC
PRESSURE) BEFORE CLEANING, ADJUSTING, LUBRICATING OR SERVICING THIS SPREADER. FAIL-
URE TO HEED MAY RESULT IN SERIOUS PERSONAL INJURY OR DEATH.
The automatic chain oiler attachment gives a squirt of clean oil to all roller chains every time that
the spreaders rear gate, hydraulic cylinder is activated. In this way, the spreaders roller chains
get oiled in direct proportion to the number of hydraulic cylinder cycles of the rear gate. This
assures adequate lubrication.
New 30 weight oil, which is placed in the reservoir tank mounted on the spreader, is all that is
needed to properly lubricate all roller chains and sprockets. The automatic chain oiler does not
use any oil from the tractors hydraulic system. The hydraulic hose connected to the bottom of the
oiler pump only serves to power the piston in the pump every time that the spreaders rear gate is
opened.
Should the oil reservoir tank run dry, pour about a ½ cup of clean 30 weight oil into the tank. Al-
low time for the oil to run down into the oiler pump slowly and allow air to escape. After thirty min-
utes to one hour has passed, finish filling the reservoir tank.
Make sure that all fittings and
brackets are tight when finished filling the tank.
WARNING
: HYDRAULIC FLUID ESCAPING UNDER PRESSURE CAN HAVE SUFFI-
CIENT FORCE TO PENETRATE SKIN. KEEP ALL HOSES AND CONNECTIONS IN GOOD
SERVICEABLE CONDITION. FAILURE TO HEED MAY RESULT IN SERIOUS PERSONAL IN-
JURY OR DEATH.
While running the tractors hydraulics only, open and close the spreaders rear gate several times.
This will cycle the hydraulic cylinder leading to the oiler pump. Keep cycling until oil can be seen
in all of the oil lines leading to the oiler brushes. (If you experience problems priming the oiler
pump, you may need to bleed air out of the hydraulic hose where it is connected to the pump.
Crack the fitting until oil comes out then re-tighten.) The hydraulic cylinder that the oiler pump is
tied into is double acting and must reach 300 PSI of pressure to actuate the pump.
When replacing oiler brushes into brush holders, use regular ½”-20 nuts. Tighten nut finger tight
initially as some adjustment may be needed later. For best results, place brush holders over top
of roller chains and directly on top of sprockets. Adjust brush holders so oiler brushes are pushed
down into the roller chain approximately ½”. Carefully tighten up the ½”-20 nuts on the oiler
brushes. DO NOT over tighten as damage to the brush will occur. The plastic threads of the oiler
brush will crack and then break off from the brush body.
IMPORTANT!
The 5/32” oil line tubing can only be removed from an oiler brush by
pushing in on the red plastic ring and pulling the tubing out while holding the ring down.
The oiler pump is set at the factory to deliver the maximum amount of oil per cycle. If less oil is
desired, loosen the jam nut on the bottom of the pump and screw in the adjusting shaft 1/4” or
approximately 5 turns. It is not recommended to screw the shaft into the bottom of the oiler pump
more than 15 turns as this may not allow for proper lubrication of the roller chains.
IMPORTANT! Always use new 30 weight oil. In cold weather, use a SAE 10 or a mixture of
two parts of 30 weight oil to one part diesel fuel.
Содержание V-MAX 2636 Operators
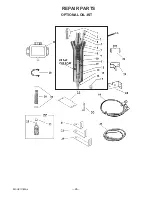
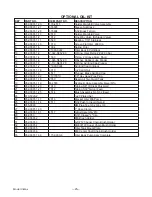
Страница 24: ...Model V Max 24 REPAIR PARTS OPTIONAL OIL KIT 35 ...
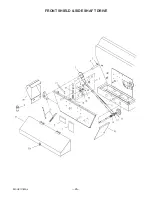
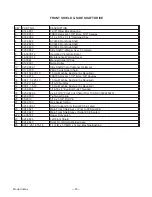
Страница 26: ...Model V Max 26 FRONT SHIELD SIDE SHAFT DRIVE ...
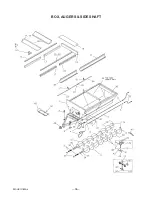
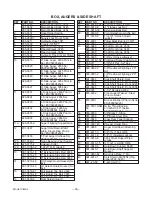
Страница 34: ...Model V Max 34 BOX AUGERS SIDE SHAFT ...
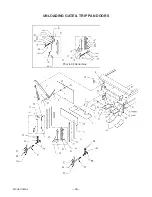
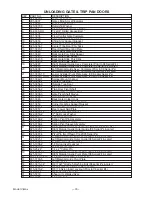
Страница 36: ...Model V Max 36 UNLOADING GATE TRIP PAN DOORS Prior to 08 Serial Nos ...
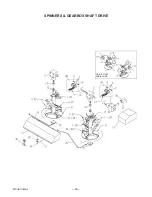
Страница 38: ...Model V Max 38 SPINNERS GEARBOX SHAFT DRIVE PRIOR TO 08 SERIAL NOS ...
Страница 42: ...Model V Max 42 OPTIONAL THIRD AUGER Items 10 and 11 are used on two auger units only ...
Страница 57: ...Model V Max 57 ...
Страница 58: ...Model V Max 58 ...
Страница 59: ...Model V Max 59 ...
Страница 60: ...E ...

