


Service Manual Version 18
7
.5.1
AUGUST 3, 2021 SQA-iO Service Manual
12
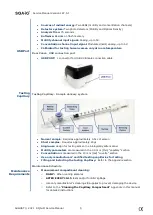
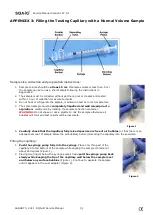
3.
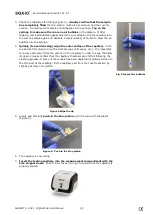
Check the capillary after filling (Figure 3),
visually confirm that the sample
has completely filled
the thin section (without a meniscus) and the cuvette
section. A small level of sample should appear in the syringe.
Tap on the
syringe to make sure there are no air bubbles
in the sample. If, after
tapping, some air bubbles appear below the Luer adaptor, dip the capillary into
the semen sample again and aspirate a small quantity of semen to draw the air
bubbles into the syringe.
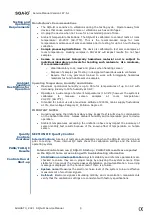
4.
Quickly (to avoid wicking) wipe the outer surface of the capillary
- both
top and bottom (Figure 4) with a delicate wipe (Kimwipes, etc.). It is important
to remove all semen from the exterior of the capillary in order to keep the SQA-
iO clean. Visually confirm that the capillary chambers are still full following the
cleaning process. If some of the sample has been depleted (meniscus formed in
the thin part of the capillary) fill the capillary part from the cuvette section by
slightly pushing in the piston.
Figure 4 Wipe the tip
Fig 3 Inspect for bubbles
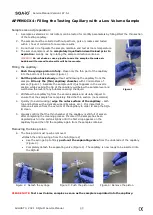
5.
Slowly and carefully
push-in the blue piston
until it is level with the plastic
(Figure 5).
Figure 5: Push in the blue piston
6.
The capillary is now ready.
7.
Insert the testing capillary into the measurement compartment with the
blue stopper down.
Push it in as far as it will go to ensure that the capillary is
properly seated.


