background image

1

2

3

4

5

6

7

8

9

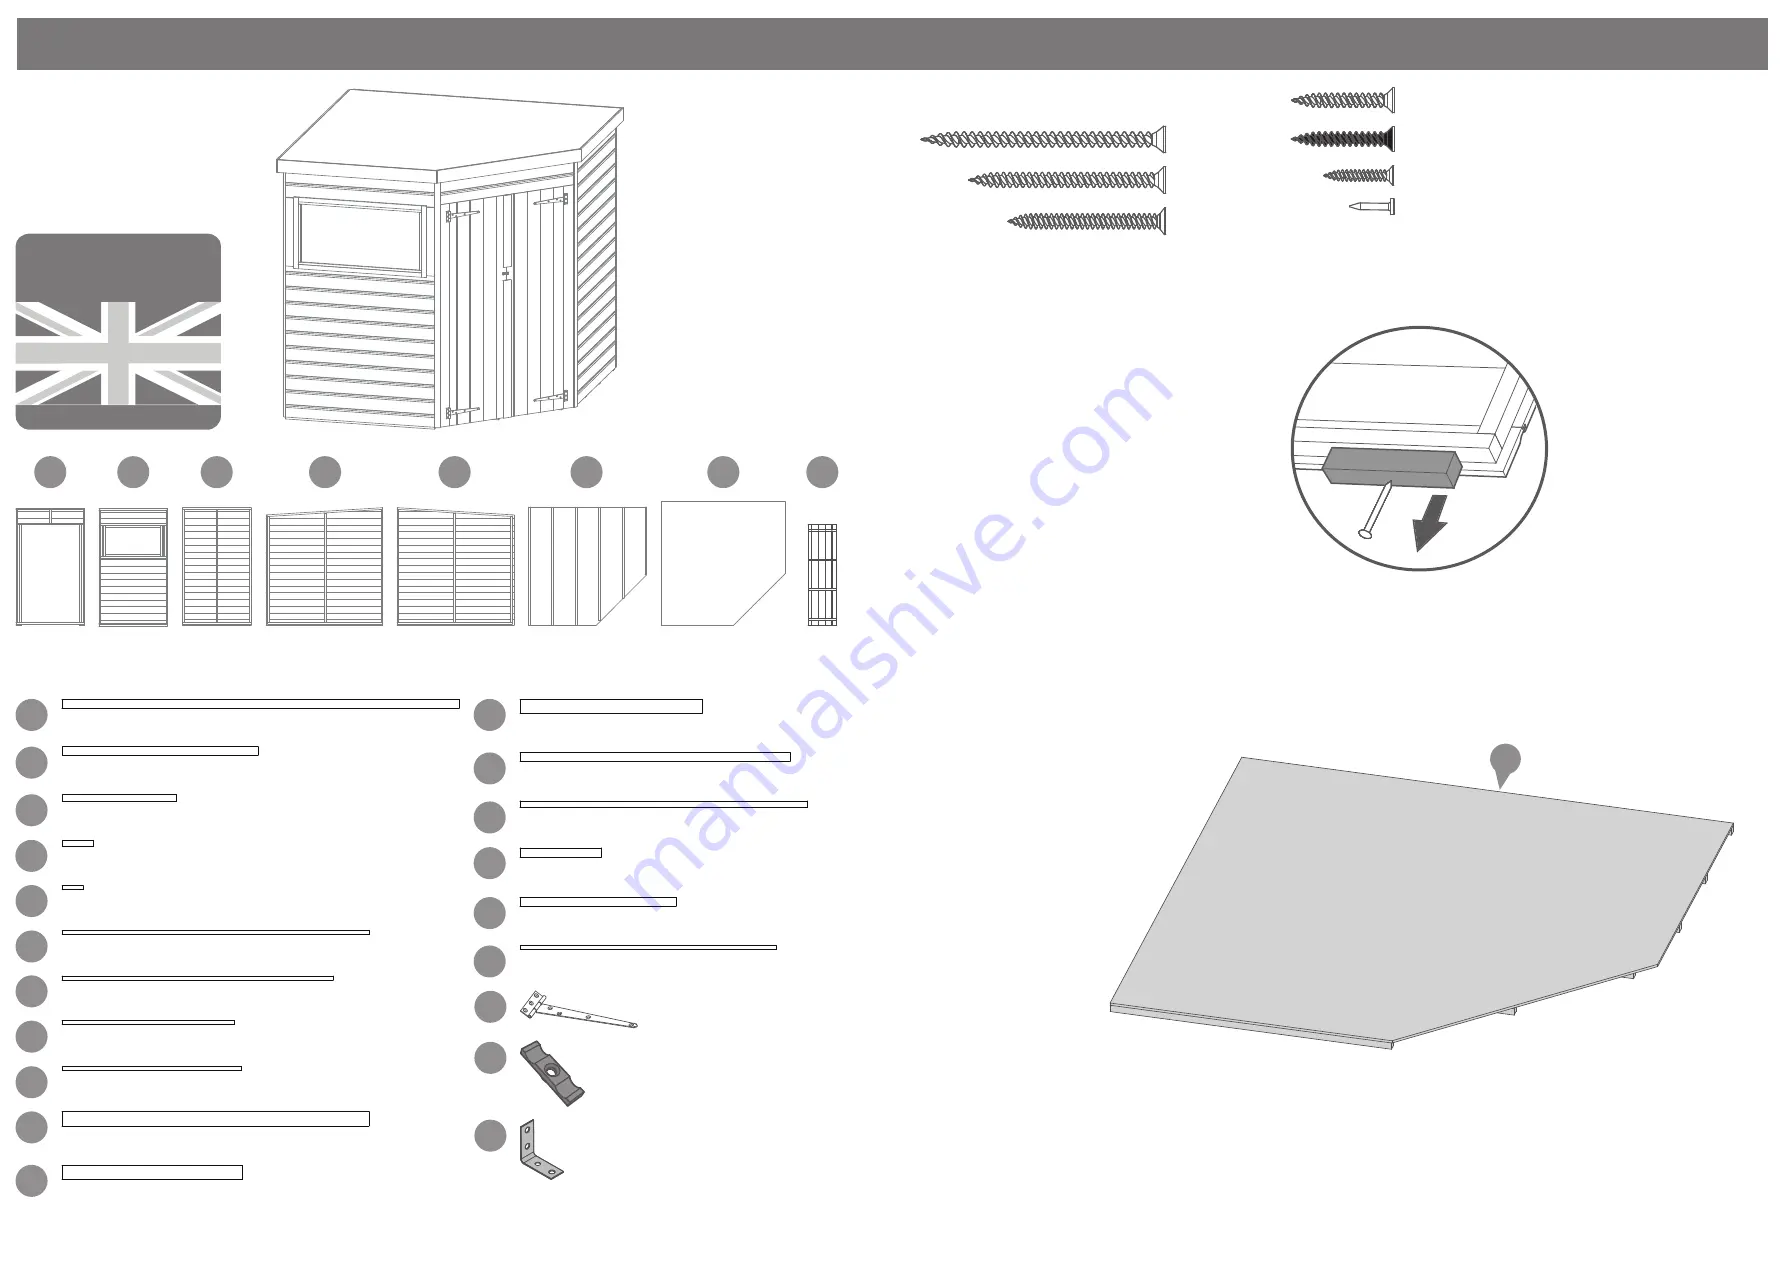
Step 1

Place the floor on to a firm & level

base. Ensure the base has suitable

drainage, free from areas where

standing water can collect.

6

50mm Screw x40 

40mm Screw x40 

80mm Screw x7

Felt Tacks x80

20mm Screw x6

30mm Screw x90

30mm Black Screw x3

Nail Bag

P 2

01COR0707-V1 

Overall Dimensions:


Length = 2076mm 

Width = 2073mm 

Height = 1972mm 

Base Dimensions: 

Length = 1960mm 

Width = 1959mm 

Please retain product label and instructions for future reference


Before assembly  

please make sure you have a 

suitable base ready to erect your 

building 


MADE IN GREAT BRITAIN

Door

Panel

Window

Panel

Plain

Panel

Rear Panel

Right

Rear Panel

Left

Floor

Roof Sheet

Door

QTY 2

Roof Support Bar - 2650mm

Roof Support Bar - 1303mm

Roof Support Bar - 763mm

Roof Support Block - 210mm QTY 3

Door Block - 140mm QTY 2

Eaves Frame - 2049mm

Eaves Frame - 2025mm

Eaves Frame - 1149mm Qty 2

Eaves Frame - 1196mm

Fascia - 2045mm QTY 2

Fascia - 1202mm QTY 2

Fascia - 1213mm

Cover Trim - 1800mm QTY 2

Cover Trim - 1918mm QTY 4

Door Trim Top - 543mm

Door Trim Bottom - 1040mm

T-Hinges QTY 4

Turn Buttons QTY 3    

“L” Brackets QTY 5    

Panel Joint Frame - 1806mm

Pre Assembly

Remove the transportation blocks from

the bottom of each panel before

beginning the assembly.

10

11

12

13

14

15

16

17

18

19

20

21

22

23

24

26

27

28

25

Содержание 01COR0707-V1

Страница 1: ...must be taken to ensure the product is placed on a suitable base BUILDING A BASE When thinking about where the building and base is going to be constructed Ensure that there will be access to all sides for maintenance work and annual treatment Whilst all products manufactured are made to the highest standards of Safety and in the case of childrens products independently tested to EN71 level we can...

Страница 2: ...ect your building MADE IN GREAT BRITAIN Door Panel Window Panel Plain Panel Rear Panel Right Rear Panel Left Floor Roof Sheet Door QTY 2 Roof Support Bar 2650mm Roof Support Bar 1303mm Roof Support Bar 763mm Roof Support Block 210mm QTY 3 Door Block 140mm QTY 2 Eaves Frame 2049mm Eaves Frame 2025mm Eaves Frame 1149mm Qty 2 Eaves Frame 1196mm Fascia 2045mm QTY 2 Fascia 1202mm QTY 2 Fascia 1213mm Co...

Страница 3: ... Step 4 Place the plain window panel onto the floor Secure the plain panel and the window panel to the rear panels using 3x50mm screws The window and plain panels can be placed either side of the building Do NOT screw the building to the floor until the roof is fitted 6x50mm Screws Pre drill hole 50mm screw 1 8 8 26 Step 5 Secure the doors to the door panel using 2x T hinges per door fixing into p...

Страница 4: ...lack Screw 30mm screw 30mm screw Pre drill hole 12 9 Step 8 Place the door panel onto the floor Secure the panel to the the window plain panel using 6x50mm screws Do NOT screw the building to the floor until the roof is fitted 6x50mm Screws 50mm screw Pre drill hole Roof support must be level with top of framing Step 9 Position the larger roof support bar in the centre of the building between the ...

Страница 5: ...nsure the framing is flush to the edge of the sheet and fix into each eaves frame into place using 30mm screws 17x30mm Screws 30mm screw Pre drill hole Step 12 Place the assembled roof section onto the building esuring the framing slots over each side Secure into place using 21x40mm screws making sure to align the screws with the vertical framing and along the roof support bar It is recommended to...

Страница 6: ...ound the building see dotted line 80x Felt Tacks Felt tacks HANDLE WITH CARE 1 2 3 4 Step 15 Fix the cover trims to the building using 3x30mm screws per trim 12x30mm screws 30mm screw Pre drill hole Step 16 Fix the cover trims to the building using 3x30mm screws per trim 6x30mm screws 30mm screw Pre drill hole P 6 Please retain product label and instructions for future reference 22 22 22 22 1 2 3 ...

Страница 7: ...17x40mm screws 40mm screw Pre drill hole It is ESSENTIAL that you apply wood treatment immediately after the building has been assembled AFTER TREATMENT score around protective cover on glazing and carefuly peel covering back Please retain product label and instructions for future reference ...

Отзывы: