background image

8

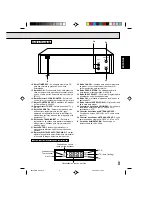
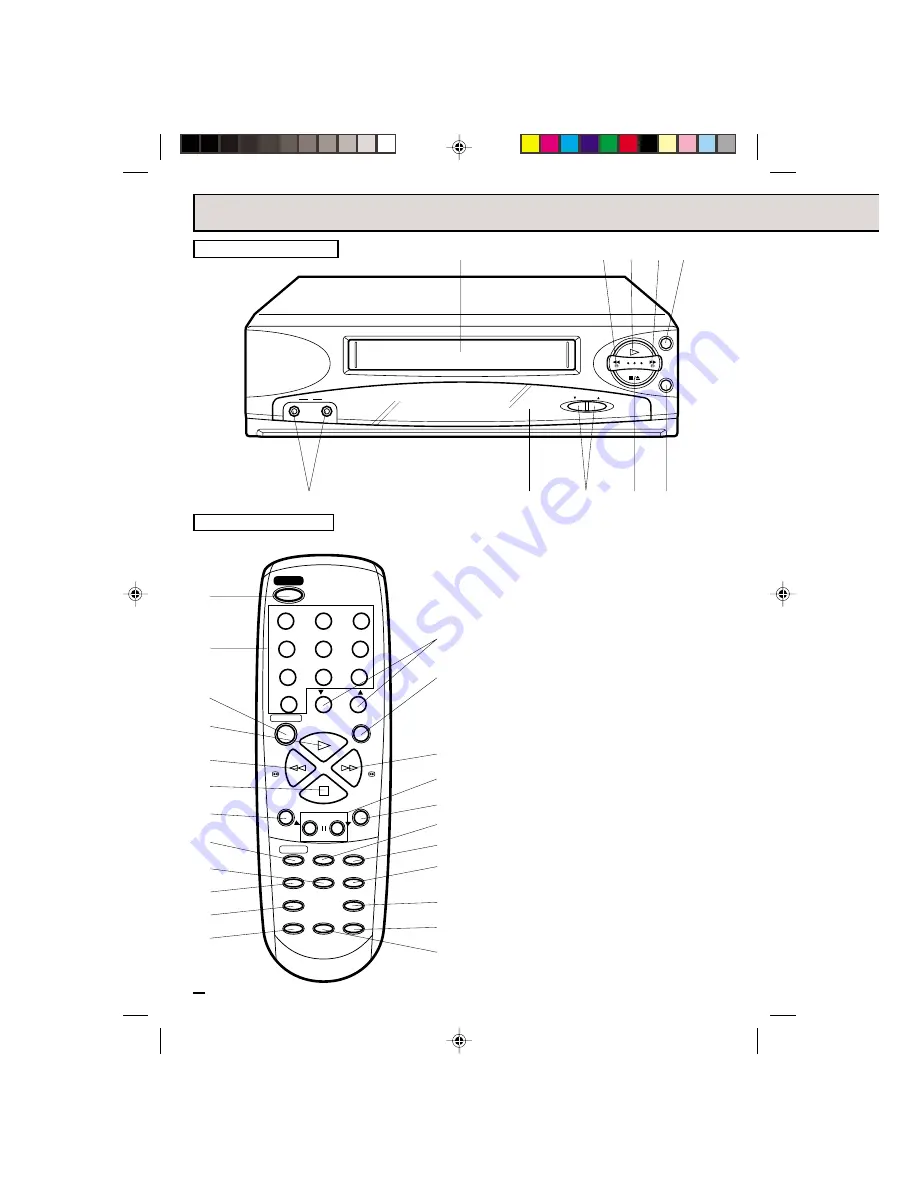
1. Apertura para carga de la cinta - Se utiliza para

insertar o quitar una cinta de video.

2. Botón REW (REBOBINADO) - En el modo STOP

(PARADA), este botón rápidamente enrrolla la cinta
en reversa. En el modo PLAY (REPRODUCCION),
este botón activa la Búsqueda en Reversa.

3. Botón PLAY (REPRODUCCION) - Presione este

botón para reproducir una cinta pregrabada.

4. Botón F.FWD (AVANCE HACIA ADELANTE) - En el

modo STOP (PARADA), este botón rápidamente
enrrolla la cinta hacia adelante. En el modo PLAY
(REPRODUCCION), este botón activa la Búsqueda
Hacia Adelante.

5. Botón POWER (INTERRUPTOR DE

ALIMENTACION) - Para encender el VCR y
apagarlo.

6. Botón REC/OTR (GRABACION/GRABACION DE

UN TOQUE) - Presione una vez para grabación
normal. La presión adicional activa la Grabación de
Un Solo Toque.

7. Botón STOP/EJECT (PARADA/EXTRACCION) -

Estando la unidad en cualquier modo de operación,
presione este botón una vez para detener la cinta.
Presiónelo de nuevo (en el VCR) para extraer la cinta.

8. Botones CHANNEL 

▲ 

/

 ▼

 (CANAL EN 

▲ 

/

 ▼

) -

Estos botones se usan para seleccionar canales
para visualización o grabación.

9. Sensor de control remoto - Aquí se reciben las

señales desde el control remoto.

10. Conectores de entrada de AUDIO/VIDEO - Aquí

pueden conectar desde una fuente externa los
cables de señales de audio y video.

11. Botones de Selección de Canales directos (0-9) -

Permite accesar directamente a cualquier canal.

12. Botón STOP - Presione una vez para detener la cinta.
13. Botón MENU - Presione este botón para indicar el

MENU de función en la pantalla.

 PARTE DELANTERA

 CONTROL REMOTO

TV/VCR

SPEED

SLOW

MENU

REW

REC/OTR

PAUSE/STILL

CHANNEL

F.FWD

SET

ENTER

STOP

PLAY

1

2

3

4

5

6

7

0

8

9

– 

TRACKING 

+

CALL

CANCEL

COUNTER

RESET

CLOCK/

COUNTER

AUTO

TRACKING

TIMER REC

INPUT

SELECT

ZERO

RETURN

POWER

8

23

22

4

19

21

5

11

6

3

2

12

14

15

13

24

25

26

27

16

17

18

20

CHANNEL

STOP/EJECT

PLAY

POWER

REC/OTR

VIDEO

AUDIO

IN

1

2

9

6

7

10

4

5

8

3

UBICACION DE LOS CONTROLES

  4E30401B S P08-13

26/04/2001, 19:05

8

Содержание MVR041

Страница 1: ...code Si usted a comprado un control de remoto universal por favor comunicace con el fabricante para el codico de programaccion requerido TV CATV MODE SELECTION SELECCION DE MODO DE TV CATV When shippe...

Страница 2: ...ty and operating instructions should be read before the unit is operated 2 RETAIN INSTRUCTIONS The safety and operating instructions should be retained for future reference 3 HEED WARNINGS All warning...

Страница 3: ...t likely to be walked on or pinched by items placed upon or against them paying particular attention to cords at plugs convenience receptacles and the point where they exit from the appliance 13 LIGHT...

Страница 4: ...s specified by the manufacturer or those that have the same characteristics as the original parts Unauthorized substitutions may result in fire electric shock or other hazards 21 SAFETY CHECK Upon com...

Страница 5: ...nly 2 If the polarized AC cord does not fit into a non polarized AC outlet do not attempt to file or cut the blade It is the user s responsibility to have an electrician replace the obsolete outlet PR...

Страница 6: ...ically turn on Automatic Playback When loading a cassette tape with out the erase prevention tab this VCR will automatically turn on and play back the cassette tape at the correct speed Automatic Rewi...

Страница 7: ...the display 2 Speed Picture Search 3 or 5 times normal speed in SP mode 7X or 9X in LP and 9X or 15X in SLP 3 Speed Playback Plays three tape speeds SP LP SLP 2 Speed Record Records two tape speeds SP...

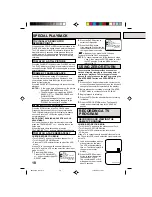
Страница 8: ...ording Additional presses activate One touch Timer Recording 7 STOP EJECT button Press once to stop the tape in any mode Press again to eject the tape 8 CHANNEL buttons Used to select a channel for vi...

Страница 9: ...3 CANCEL button Used to clear the selected timer recording program 24 ZERO RETURN button Used to stop the tape when the counter reaches 00 00 00 25 INPUT SELECT button Switches the program for viewing...

Страница 10: ...connect the antenna from the TV and connect it to the VCR Then connect the VCR to the TV Below are 3 common methods of connecting an antenna system to a VCR Find the type of antenna system you are usi...

Страница 11: ...UHF antenna input TV with 300 ohm UHF and 75 ohm VHF antenna inputs TV with 300 ohm UHF and 300 ohm VHF antenna inputs VCR TO TV CONNECTION After you have connected the antenna to the VCR you must co...

Страница 12: ...els through the converter box scrambled and unscrambled Using the programmable timer to record only the channel selected at the converter box PREVENTS Recording one channel while watching another Usin...

Страница 13: ...ls while recording another channel Using the VCR tuner to select channels VHF UHF IN ANT OUT IN A B UHF VHF VCR Splitter Converter Descrambler TV VHF UHF IN ANT OUT IN UHF VHF A B VCR Converter Descra...

Страница 14: ...To UHF VHF OUT TV AUDIO Cord not supplied AUDIO VIDEO CONNECTIONS AUDIO VIDEO CONNECTION 1 Connect the VIDEO OUT jack on the VCR to the VIDEO IN jack on the TV 2 Connect the AUDIO OUT jacks on the VC...

Страница 15: ...MENU button Press the TRACKING SET or button to select the CLOCK SET option then press the ENTER button 2 Press the TRACKING SET or button to set the month then press the ENTER button 3 Set the day y...

Страница 16: ...and this VCR on and select the video input mode on the TV ENTER MENU CH SET UP TV CATV AUTO CH MEMORY ADD DELETE 1 Press the MENU button Press the TRACKING SET or button to select the CH SET UP optio...

Страница 17: ...out 4 seconds Press the STOP button once The tape will stop but remain fully loaded and ready to play will appear on the screen for about 4 seconds The STOP indicator will light in the display for abo...

Страница 18: ...ON OFF NO NOISE BACKGROUND SPECIAL PLAYBACK TO VISUALLY SEARCH FOR DESIRED POINTS When either the F FWD or REW button is pressed in the PLAYBACK mode the speed search picture will appear The CUE indi...

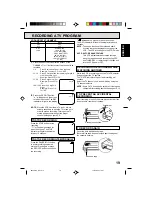
Страница 19: ...nnel selector NOTE Some CATV hookups do not permit viewing one channel while recording another See pages 12 13 RECORDING ONE PROGRAM WHILE WATCHING ANOTHER After recording break off the erase preventi...

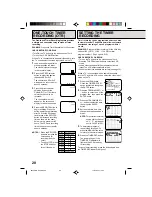
Страница 20: ...FF ON OFF AUTO REPEAT CH SET UP LANGUAGE IDIOMA LANGUE NO NOISE BACKGROUND 26 SU ENTER CANCEL MENU START END DATE CH ENTER CANCEL MENU DATE START END CH CH 125 OTR 0 30 NOTES Press the REC OTR button...

Страница 21: ...minus sign will be displayed in front of the time When you load a tape the counter will change to 00 00 00 The counter does not function on nonrecorded blank sections of the tape When you rewind fast...

Страница 22: ...you set the SPEED to the SP mode on the recording VCR for best results Unauthorized recording of copyrighted television programs films video tapes and other materials may infringe on the rights of co...

Страница 23: ...g The erase prevention tab of the video cassette is broken off INPUT SELECT is set to the LINE mode The time is not set correctly The recording start end time is not set correctly The TIMER REC button...

Страница 24: ...e Power Consumption Tuner RF Channel Output Inputs Outputs Video Audio Antenna 4 Rotary Heads MONO Sound 1 Track 120V 60Hz Approx 8 watts 181 Channel Freq Synthesized VHF 2 13 UHF 14 69 CATV 14 36 A W...

Страница 25: ...25 ENGLISH MEMO 4E30401B E P20 BACK 17 04 2001 14 02 25...

Страница 26: ...mediante una o m s de las siguientes medidas Reorientar o relocalizar la antena receptora Incrementar la separaci n entre el equipo y el receptor Conectar el equipo a un tomacorriente o circuito difer...

Страница 27: ...s caracter sticas de seguridad de la clavija de conexi n a tierra PARA SU SEGURIDAD 12 PROTECCION DEL CABLE DE ALIMENTACION Los cables de alimentaci n deber n ser tendidos de manera tal que la probabi...

Страница 28: ...las mismas caracter sticas que las piezas originales Los cambios no autorizados podr n causar incendios descargas el ctricas y otros problemas 21 REVISION DE SEGURIDAD Al finalizar cualquier servicio...

Страница 29: ...ga est tica al tocar la unidad y las funciones del VCR fallan simplemente desenchufe la unidad desde la salida de corriente en la muralla espere 10 minutos y vuelva a enchufar ste El VCR debe volver a...

Страница 30: ...mpatible con otros videograbadores VHS 4 cabezas de video Proporcionan una calidad de imagen ptima para la reproducci n de efectos especiales Temporizador programable de 8 programas 1 mes con capacida...

Страница 31: ...magen a dos velocidades 3 5 veces la velocidad normal en el modo SP 7 9 veces en LP y 9 15 veces en SLP Reproducci n a tres velocidades de cinta Reproduce tres velocidades de cinta SP LP SLP Grabaci n...

Страница 32: ...una vez para detener la cinta Presi nelo de nuevo en el VCR para extraer la cinta 8 Botones CHANNEL CANAL EN Estos botones se usan para seleccionar canales para visualizaci n o grabaci n 9 Sensor de c...

Страница 33: ...miten ajustar el seguimiento autom ticamente minimizar el ruido sobre la imagen durante la reproducci n 23 Bot n CANCEL Utilizado para borrar el programa de grabaci n con temporizador y para mover el...

Страница 34: ...NEXIONES BASICOS CONEXION DE ANTENA A VIDEOGRABADOR El videograbador debe conectarse entre la antena y el televisor Primero desconecte la antena del televisor y con ctela al videograbador Luego conect...

Страница 35: ...y siga el diagrama de conexiones Este videograbador dispone de una nica salida de 75 ohmios para conexi n a un televisor Si su televisor dispone de entradas de antena de VHF y UHF separadas n meros 2...

Страница 36: ...ndo canales pagados o por suscripci n Al tener una gama de sintonizaci n ampliada este videograbador puede sintonizar la mayor a de los canales de TV cable sin necesidad de usar un caja convertidora p...

Страница 37: ...la caja convertidora Usar el temporizador programable para grabar s lo desde el canal seleccionado en la caja convertidora NO PERMITE Usar el sintonizador del videograbador para seleccionar canales P...

Страница 38: ...es est reo se puede conectar un amplificador est reo para disfrutar del sonido en est reo 1 Conecte las toma VIDEO OUT de la videograbadora en las toma VIDEO IN del televisor 2 Conecte las toma AUDIO...

Страница 39: ...amente al terminar el ajuste MONTH DAY TIME YEAR 3 1 12 WED 00 AM 2000 ENTER CANCEL MENU ENTER CANCEL MENU MONTH DAY TIME YEAR 3 23 8 FRI 30 AM 2001 AJUSTE DEL RELOJ NOTAS Tras un fallo en el suminist...

Страница 40: ...SET UP LANGUAGE IDIOMA LANGUE ON OFF NO NOISE BACKGROUND ENTER MENU MENU CLOCK SET TIMER REC SET ON OFF AUTO REPEAT CH SET UP LANGUAGE IDIOMA LANGUE ON OFF NO NOISE BACKGROUND ENTER MENU CH SET UP TV...

Страница 41: ...onecta el TV utilizando un cable de audio video encienda el TV y el VCR y seleccione el modo de entrada de video en el TV Presione el bot n STOP PARADA una vez La cinta parar pero permanecer cargada y...

Страница 42: ...ble de audio video encienda el TV y el VCR y seleccione el modo de entrada de video en el TV NOTA Para cancelar el modo de repetici n siga los pasos 1 y 2 luego presione el bot n ENTER para selecciona...

Страница 43: ...e el bot n REC OTR para continuar la grabaci n aparecer en pantalla durante 4 segundos aproximadamente El indicador REC brillar en pantalla durante 4 segundos aproximadamente NOTA La funci n pausa ser...

Страница 44: ...DE LA GRABACION POR TEMPORIZADOR CONFIRME ANTES DE EMPEZAR Encienda el TV y fije el Canal 3 4 Presione el bot n selector TV VCR para seleccionar a posici n VCR Coloque una cinta de cassette con las l...

Страница 45: ...uarse de manera continua hasta que se cancele o se alcance el final de la cinta Durante la grabaci n con temporizador el mecanismo de rebobinado autom tico no funciona Presione el bot n CALL Presione...

Страница 46: ...EZA DE VIDEO DUPLICACION DE UNA CINTA DE VIDEO LIMPIEZA DE LA CABEZA DE VIDEO 4 Presione el bot n de reproducci n en el VCR luego presione el bot n PAUSE STILL 5 Presione el bot n PAUSE STILL en ambos...

Страница 47: ...l de video no est en la posici n correcta El cable de antena est desconectado La conexi n de antena no es la correcta Conecte la antena correctamente RECEPCION DE TRANSMISIONES DE TV ENERGIA El cord n...

Страница 48: ...as bater as en la instalaci n no es la correcta Inst lelas correctamente Dirija el sensor del control remoto al VCR El control remoto no funciona El sensor del control remoto no se ha dirigido hacia e...

Отзывы: