Memorex CrystalVision MLT5552 Скачать руководство пользователя страница 3

- 3 -

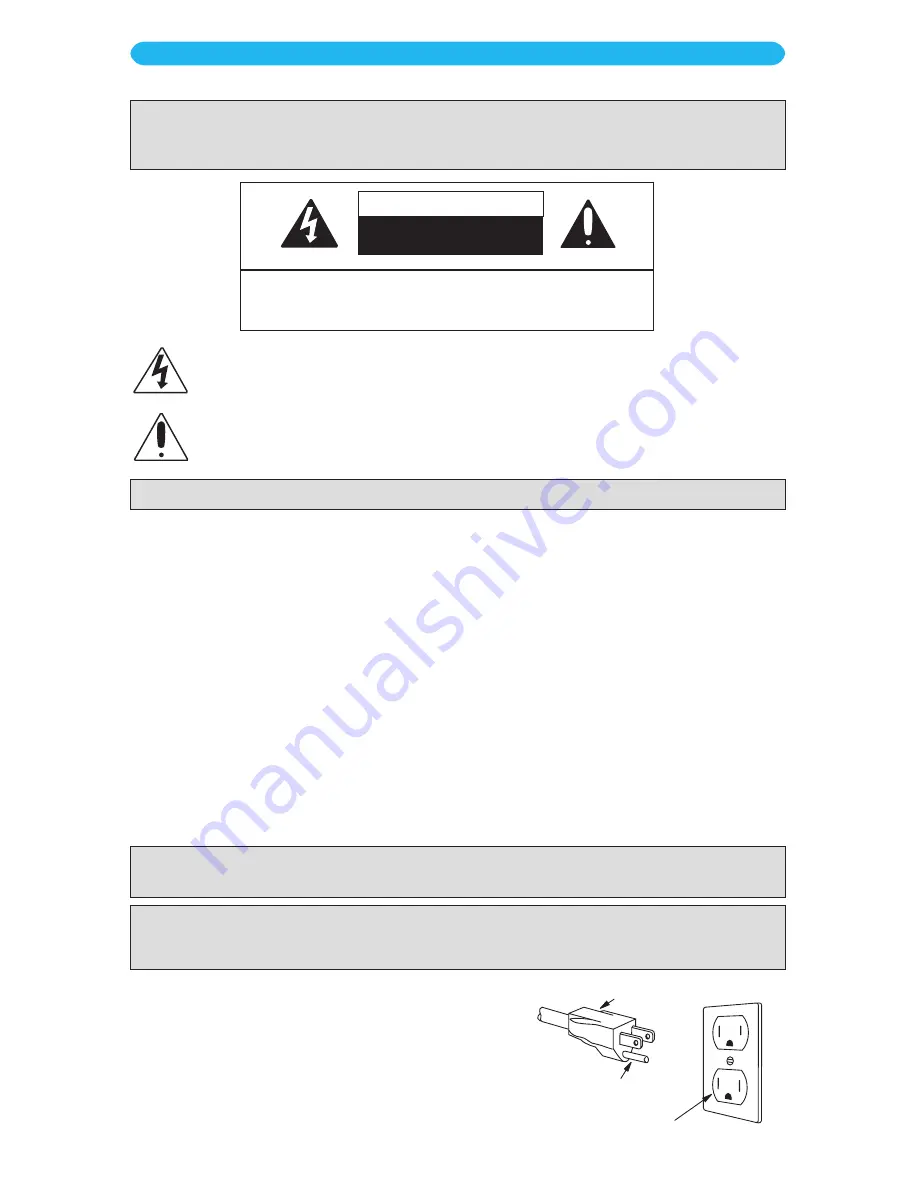
DANGEROUS  VOLTAGE:

  The  lightning  flash  with  arrowhead  symbol  within  an  equilateral  triangle 

is intended to alert the user to the presence of uninsulated dangerous voltage within the product’s 

enclosure that may be of sufficient magnitude to constitute a risk of electric shock to persons.

ATTENTION:

 The exclamation point within an equilateral triangle is intended to alert the user to 

the presence of important operating and maintenance (servicing) instructions in the literature 

accompanying this product.

FCC WARNING:

  This  equipment  may  generate  or  use  radio  frequency  energy.  Changes  or  modifications  to  this 

equipment may cause harmful interference unless the modifications are expressly approved in the instruction manual. 

The user could lose the authority to operate this equipment if an unauthorized change or modification is made.
This device complies with part 15 of the FCC Rules. Operation is subject to the following two conditions: (1) This device 

may not cause harmful interference, and (2) this device must accept any interference received, including interference 

that may cause undesired operation.

THIS APPLIANCE MUST BE GROUNDED:

 In the event of an 

electrical short circuit, grounding reduces the risk of electric 

shock by providing an escape wire for the electric current. 

This appliance is equipped with a cord having a grounding 

wire with a grounding plug. The plug must be plugged into 

an outlet that is properly installed and grounded. 1) Plug into 

properly installed and grounded three-prong outlet. 2) DO 

NOT remove ground prong.  3) DO NOT use an adapter.

NOTE:

 This equipment has been tested and found to comply with the limits for a Class B digital device, pursuant to 

part 15 of the FCC Rules. These limits are designed to provide reasonable protection against harmful interference in 

a residential installation. This equipment generates, uses and can radiate radio frequency energy and, if not installed 

and used in accordance with the instructions, may cause harmful interference to radio communications. However, 

there is no guarantee that interference will not occur in a particular installation. If this equipment does cause harmful 

interference to radio or television reception, which can be determined by turning the equipment off and on, the user 

is encouraged to try to correct the interference by one or more of the following measures:
•  Reorient or relocate the receiving antenna.
•  Increase the separation between the equipment and receiver.
•  Connect the equipment into an outlet on a circuit different from that to which the receiver is connected.
•  Consult the dealer or an experienced radio/TV technician for help.
•  The rating information is located at the rear of the unit.

CAUTION: 

Any changes or modifications to this equipment not expressly approved by the party responsible for 

compliance could void your authority to operate the equipment.

DOT DEFECTS: 

The panel is a high technology product with resolution of two million to six million pixels. In a very few 

cases, you could see fine dots on the screen while you’re viewing the TV. Those dots are deactivated pixels and do not affect 
the performance and reliability of the TV.

WARNING: 

 TO PREVENT FIRE OR SHOCK HAZARD, DO NOT EXPOSE THIS UNIT TO RAIN OR MOISTURE.

PRODUCT SAFETY: 

 When used in the directed manner, this unit has been designed and manufactured to ensure your personal 

safety. Improper use of this product can result in potential electrical shock or fire hazards. Please read all safety and operating 
instructions carefully before installation and use, and keep these instructions handy for future reference.

IMPORTANT SAFETY PRECAUTIONS

3-Pronged Plug

Ground Plug

3-Prong Receptacle

CAUTION

RISK OF ELECTRIC SHOCK

DO NOT OPEN

CAUTION: TO REDUCE THE RISK OF ELECTRIC SHOCK, DO NOT 

REMOVE COVER (OR BACK). NO USER-SERVICEABLE PARTS 

INSIDE. REFER SERVICING TO QUALIFIED SERVICE PERSONNEL.

Содержание CrystalVision MLT5552

Страница 1: ...on 43 HDTV Widescreen LED The Entertainer Owner s Manual Please read these instructions completely before operating this product memorex ce com Model MLT4352 PLEASE RECYCLE Facilities may not exist in...

Страница 2: ...ERATION 34 Setup Wizard 34 Main Operation 35 USB Media Operation 37 UPGRADING THE FIRMWARE 40 TROUBLESHOOTING 41 SPECIFICATIONS 43 WARRANTY 44 TABLE OF CONTENTS Congratulations on your purchase of the...

Страница 3: ...equipment generates uses and can radiate radio frequency energy and if not installed and used in accordance with the instructions may cause harmful interference to radio communications However there i...

Страница 4: ...for long periods of time unplug it from the wall outlet and disconnect the antenna or cable system This will prevent damage to the product due to lightning and power line surges 14 POWER LINES An out...

Страница 5: ...s Manual Remote Batteries WHAT IS INCLUDED CrystalVision 43 HDTV Widescreen LED The Entertainer Owner s Manual Please read these instructions completely before operating this product memorex ce com M...

Страница 6: ...OF CONTROLS Front 2 Main Power Switch 3 SOURCE Button 4 Channel Up Down Buttons 5 Volume Up Down Buttons 6 MENU Button 7 Power Standby Button 1 Power Indicator and Remote Sensor 1 2 3 4 5 6 7 1 2 3 4...

Страница 7: ...4 VGA Jack 5 PC Audio In Jack 6 Component AV 2 Audio In Jacks 7 Coaxial Audio Out Jack 8 USB Jack 9 AV 1 In Jacks 10 Video 1 In Jack 11 Earphone Jack 12 Component AV 2 In Jack 13 TV Coaxial Jack 8 11...

Страница 8: ...Button 15 Previous 9 Button 16 Next Button 17 SOURCE Button 18 MUTE Button 19 Freeze F1 Button 3D is not applicable to this set 20 DASH Button 21 SMART Picture Button 22 Channel Up Down Buttons 23 MT...

Страница 9: ...follow the correct polarity when installing the batteries as indicated in the battery compartment A reversed battery may cause damage to the device 4 Do not mix different types of batteries together e...

Страница 10: ...fall over if a placed on an uneven unstable or non level surface or b pushed pulled or improperly moved Also make sure to give proper clearance as shown in the image 1 Place TV flat on table 2 Instal...

Страница 11: ...close enough to an AC outlet Also make sure that nothing obstructs the view 4 Locate the studs as you want to make sure that at the very least one stud is used to attach the mount 5 Attach the mounti...

Страница 12: ...p buttons Confirm by pressing the OK button Follow the on screen instructions for the Setup Wizard see page 34 Antenna Box Terminal Coaxial 75 NOTES Not all broadcasts are in High Definition HD Pleas...

Страница 13: ...ernal unit 4 Press the SOURCE button and then select the respective HDMI jack 1 2 or 3 using the Navigation q p buttons Confirm by pressing the OK button DVD HD Cable Box Computer etc Not Included HDM...

Страница 14: ...red and white plugs of an audio cable not included from the Audio Out jacks on the external unit to the red and white Component AV1 Audio In jacks on the rear of the TV 4 Turn on the TV and external u...

Страница 15: ...n the rear of the TV 3 Connect the yellow video plug from the Video Out jack on the external unit to the yellow Video In jack on the rear of the TV 4 Turn on the TV and external unit 5 Press the SOURC...

Страница 16: ...he TV and computer 4 Press the SOURCE button and then select PC using the Navigation q p buttons Confirm by pressing the OK button RGB OUT PC AUDIO OUT Computer Not Included INSTALLATION VGA Connectio...

Страница 17: ...V 4 Press the SOURCE button and then select HDMI2 using the Navigation q p buttons Confirm by pressing the OK button Mobile Device or other Device Compatible with MHL Function Not Included NOTES If yo...

Страница 18: ...nnect a Coaxial Audio cable not included from the Coaxial Out jack on the rear of the TV to the Coaxial In jack on the external digital audio unit 3 Turn on the TV and digital audio unit 4 Make sure t...

Страница 19: ...on the TV 4 Press the SOURCE button and then select MEDIA using the Navigation q p buttons Confirm by pressing the OK button For private listening connect headphones with a standard 3 5mm plug into th...

Страница 20: ...o enter the advanced setting as described on the next page Select Move MENU Return PictureMode Contrast Brightness Saturation Sharpness AdvancedVideo Tint Personal 50 50 50 50 50 The Tint option is on...

Страница 21: ...cribed on the previous page 2 Press the q button to select Advanced Video and then press the OK button to enter 3 Press the q button to select a setting i e Color Temp etc 4 Press the t u buttons to a...

Страница 22: ...o stream Select PCM if connected to a compatible PCB amplifier AUDIO LANGUAGE Set the desired Audio Language if supported This option is only available when receiving a Digital signal 1 Press the MENU...

Страница 23: ...he u button to enter the setting Press t u buttons to select yes and then press the OK button again to restore all the options to their default settings 1 Press the MENU button to bring up the On Scre...

Страница 24: ...US Canada RRT Setting Reset RRT CHANGE PASSWORD Set the desired Lock password If you forget you can always use 1470 to access SYSTEM LOCK Turn On to lock the system and have the TV adhere to the Lock...

Страница 25: ...return to the previous menu ON SCREEN DISPLAY Setup Menu Parental Control Input Lock Submenu Select Move MENU Return TV Unlock AV Unlock PC Unlock HDMI1 Unlock HDMI2 Unlock For the following options...

Страница 26: ...ct TV and then press the OK button to enter 4 Press the t u buttons to select a rating and then the OK button to BLOCK ratings at or above cannot be viewed or UNBLOCK ratings at or under can be viewed...

Страница 27: ...Canadian French and then press the OK button to enter 7 Press the p buttons to Lock a desired Canadian French rating G 8ans 13ans 16ans 18ans EXEMPT Press the q button to Unlock 8 When done press the...

Страница 28: ...setting 5 Press the t u buttons to adjust the setting 6 When done press the EXIT button to exit the menus or press the MENU button to return to the previous menu ON SCREEN DISPLAY Setup Menu Parental...

Страница 29: ...ock Off Atlantic Off Off 1980 1 6 3 16AM SLEEP TIMER Allows you to choose how long the TV will stay on before turning off Set a desired sleep time from 5 minutes to 240 minutes or select Off to turn t...

Страница 30: ...Mute and the TV will display Closed Captions when muted BASIC SELECTION Set the desired Analog Closed Caption mode Used during Analog broadcasting CC1 will show the primary caption data with captions...

Страница 31: ...t u buttons to adjust the setting 6 When done press the EXIT button to exit the menus or press the MENU button to return to the previous menu ON SCREEN DISPLAY Setup Menu Menu Settings Submenu Select...

Страница 32: ...Settings Submenu H POSITION Set the desired horizontal positioning V POSITION Set the desired vertical positioning CLOCK Clock Phase Set the desired Clock Phase which will minimize any vertical bars...

Страница 33: ...ly from the menu CHANNEL LABEL Allows you to change the channel labeling and name them as desired DTV SIGNAL Displays the signal intensity of Digital TV programming Select Move MENU Return Air Antenna...

Страница 34: ...the q button to select Time Zone 5 Press the t u buttons to select the desired Time Zone 6 Press the q button to select Daylight Saving Time DST 7 Press the t u buttons to turn Daylight Saving Time On...

Страница 35: ...channel set into memory You can also select a channel directly using the DASH bt 0 9 v buttons followed by the OK button x FUNCTION BUTTON OPERATION MUTE Button ar Press to mute the sound Press again...

Страница 36: ...ound When an SAP program is received press this button to select mono or SAP When stereo and SAP broadcast is received press this button to select mono stereo or SAP Press this button to show the list...

Страница 37: ...mats have limitations so some files will not play properly or will give an error Do not unplug the USB device while playing or else it will cause system or device error The system supports USB flash d...

Страница 38: ...br Press to stop the slideshow or music ROTATE Button bq Press to rotate the image on the screen if file can be rotated The on screen rotate allows the picture to rotate clockwise or counter clockwis...

Страница 39: ...view the playlist INFO Photo Mode only Press to view the information on the selected playing photo file ROTATE Photo Mode only Press to rotate the photo Clockwise or Counter Clockwise 90o ZOOM IN Pho...

Страница 40: ...he power off Standby mode connect the USB device to the USB jack Then press and hold the CHANNEL Up and the VOLUME Up buttons ON THE TV not the remote simultaneously until the Standby indicator blinks...

Страница 41: ...tton to un mute TV Signal is weak Closed Captioning is not turned on see page 30 Remote is not aimed at sensor bottom right of TV Distance is too far or too much light in the room There is an obstacle...

Страница 42: ...om a digital source Standard analog TV will always be noticeably inferior to HD because your TV has video that is many times better than old TV s so now you can see interference and deficiencies you d...

Страница 43: ...30 W Maximum Resolution 1920 x 1080 Speakers 8 W 8 W Weight including base Approx 33 lbs Operating Temperature 5 C to 40 C Supported Systems ATV NTSC DTV ATSC HDMI Video Input 480i 480p 576i 576p 720p...

Страница 44: ...l number has been altered or removed from the Product This Warranty is valid only in the territory and only applies to products purchased and serviced in the territory NO WARRANTIES WHETHER EXPRESS OR...

Отзывы: