Mellanox Technologies MUA9402E-2SF-100 Скачать руководство пользователя страница 51

Rev 1.0

51

Mellanox Technologies

15.

Cable de alimentación homologado por UL y con certificación CSA   

16. Fuga > 3,5 mA     

17. Añadir conexión a tierra   

18. Códigos de instalación    

19.  Interconexión de unidades  

En conexiones de América del Norte, seleccionar un cable de alimentación 
homologado por UL y con certificación CSA de tres conductores, [16 AWG], termi-
nado en un enchufe moldeado con capuchón de 125 voltios nominal, [13 A], con una 
longitud mínima de 1,5 metros, pero no más de 4,5 metros.
En conexiones europeas, seleccionar un cable de alimentación armonizado 


internacionalmente y marcado "<HAR>", de tres conductores, hilo de 1,0 mm2 como 
mínimo, 300 voltios nominal, con cobertura protectora aislante de PVC. El cable debe 
tener un enchufe moldeado con capuchón de 250 voltios nominal, 10 A.

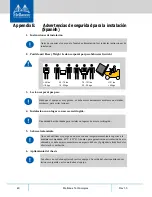
ADVERTENCIA: Alta corriente de fuga. Es esencial efectuar la conexión a tierra 
antes de conectar la alimentación.

Antes de conectar el dispositivo a la línea de alimentación, los tornillos del terminal de 
la puesta a tierra de protección del dispositivo se deben conectar a la puesta a tierra de 
protección de la instalación del edificio.
(Información de conexión a tierra): 
La instalación del edificio deberá prover un medio para la conexión con la puesta a 
tierra de protección y un técnico de servicio deberá conectar permanentemente el 
equipo a dicho medio de conexión. 
Un TÉCNICO DE SERVICIO comprobará si la toma eléctrica de la que se suminis-
trará corriente al equipo provee una conexión con la puesta a tierra de protección del 
edificio. De no ser así, el TÉCNICO DE SERVICIO se encargará de instalar un CON-
DUCTOR DE CONEXIÓN A TIERRA DE PROTECCIÓN, del terminal de puesta a 
tierra de protección separado al conductor de tierra de protección del edificio. El 
equipo se instalará en un área donde haya conexión equipotencial, como por ejemplo, 
un centro de telecomunicaciones o una sala de computadoras dedicada.

Este dispositivo se debe instalar conforme a la versión más reciente de los códigos 
eléctricos nacionales del país en cuestión. En América del Norte, el equipo se debe 
instalar de acuerdo con las disposiciones vigentes del Código Eléctrico Nacional de los 
EE.UU. y del Código Eléctrico de Canadá.

Los cables para la conexión con las interfaces RS232 y Ethernet de la unidad deben 
estar homologados por UL tipo DP-1 o DP-2. (Nota: cuando residen en circuito no de 
tipo LPS)
Protección contra sobrecargas: Al cableado del edificio se debe incorporar un disposi-
tivo de protección contra sobrecargas de circuito derivado, de fácil acceso, con una 
corriente nominal de 20 A.

Содержание MUA9402E-2SF-100

Страница 1: ...es www mellanox com Unified Fabric Manager SDN Appliance Hardware User Manual PN s MUA9402E 2SF 100 MUA9402E 2SF 1K MUA9402E 2SF 250 MUA9402E 2SF 2K MUA9402E 2SF 4K MUA9402E 2SF 500 MUA9402E 2SF HA Mo...

Страница 2: ...ost updated list of Mellanox trademarks visit http www mellanox com page trademarks NOTE THIS HARDWARE SOFTWARE OR TEST SUITE PRODUCT PRODUCT S AND ITS RELATED DOCUMENTATION ARE PROVIDED BY MELLANOX T...

Страница 3: ...nt Ports eth0 eth1 19 3 4 ConnectX 4 QSFP Ports 20 3 4 1 QSFP Port Interfaces 20 3 5 RJ 45 Ethernet Connector for Remote Management 20 3 6 USB Interface 21 3 7 System Cold Reset 21 3 8 UFM SDN Applian...

Страница 4: ...Troubleshooting 36 Appendix A UFM SDN Appliance Specifications 38 A 1 Approved Cables 40 A 2 EMC Certifications 40 A 3 China CCC Warning Statement 40 Appendix B Field Replaceable Units 41 Appendix C A...

Страница 5: ...e 6 PS Unit Status LED Configurations 15 Table 7 NIC Activity Indications 18 Table 8 Physical and Logical Link Indication 20 Table 9 Serial Terminal Program Configuration 33 Table 10 Mellanox UFM SDN...

Страница 6: ...16 Figure 10 Cold Reset Button 17 Figure 11 NIC Activity LEDs 17 Figure 12 Front Side Interfaces 18 Figure 13 Rear Side Interfaces 19 Figure 14 Illustration of InfiniBand Port Connector Interfaces 20...

Страница 7: ...Rev 1 0 7 Mellanox Technologies Document Revision History Table 1 Revision History Table Revision Date Description 1 0 April 2017 Initial release...

Страница 8: ...lanox All of these documents can be found on the Mellanox Website They are available either through the product pages or through the support page with a login and password Table 2 Reference Documents...

Страница 9: ...ocument to indicate information that is important to the user Abbreviations This icon makes recommendations to the user This icon indicates information that is helpful to the user This icon indicates...

Страница 10: ...d software which bridges the gap between servers applications and fabric elements Thus it enables administrators to manage and optimize clusters of various sizes UFM SDN Appliance is offered as a pre...

Страница 11: ...Overview Rev 1 0 11 Mellanox Technologies Figure 2 Pull Out Tab Example...

Страница 12: ...hows the front and rear sides of the appliance The system supports the following 4 RJ 45 connectors 5 USB connectors Status LEDs 2 Hot swap power modules 2 Hot swap hard disk drive HDD drawers Figure...

Страница 13: ...Activity LED C NIC 2 Activity LED D System Cold Reset Button E System Status LED F Power Button w Integrated LED G Hard Drive Activity LED Table 5 PS Unit Status LED Configurations LED Color Status Of...

Страница 14: ...Off Button and Indicators The primary power supply unit PS1 is located on the left side of the rear side panel with PS2 on the right of the PS1 Amber Fatal Error occurred non recoverable condition sy...

Страница 15: ...hing the button or by using the remote management Table 6 PS Unit Status LED Configurations LED Color Status Solid Green OK the Power supply is delivering the correct voltage Off Off no power to any o...

Страница 16: ...tivity Solid Amber A hard drive failure has occurred Flashing Amber RedundantArray of Independent Disks RAID is being rebuilt This hap pens after replacing a faulty drive Activity LED Off The system i...

Страница 17: ...ers 2 1 2 Reset Button Figure 10 Cold Reset Button The appliance has a system cold reset button Pressing this button performs a forced reset of the appliance hardware For a graceful shutdown of the sy...

Страница 18: ...s 1 on off button with an integral LED 1 RJ 45 serial port 2 X 100M 1Gb Ethernet connectors 2 EDR ports 1 remote management port 5 USB ports System Cold reset button Figure 12 Front Side Interfaces Ta...

Страница 19: ...anagement Ports eth0 eth1 These 2 RJ 45 ports are found on the rear side of the appliance see Figure 13 The eth0 eth1 and remote management interfaces are pre configured as DHCP and the initial host n...

Страница 20: ...necting to a remote management controller It usu ally connects to the same management network as eth0 For using out of the box DHCP set tings Default hostname for the appliance over eth0 is ufm applia...

Страница 21: ...ces closing all files flushing all caches etc use the CLI 3 8 UFM SDN Appliance Installation and Operation Installation and initialization of the UFM SDN Appliance are straightforward processes requir...

Страница 22: ...inches of clearance around the ventilation openings The chassis should not be stacked on any other equipment If the chassis falls it can cause bodily injury and equipment damage This product includes...

Страница 23: ...s There is a risk of explosion should the battery be replaced with a battery of an incorrect type Dispose of used batteries according to the instructions For North American power connection select a p...

Страница 24: ...ording to the WEEE Directive 2002 96 EC all waste electrical and electronic equipment EEE should be collected separately and not disposed of with regular household waste Dispose of this product and al...

Страница 25: ...may have occurred during shipping The appliance comes packed with the following items 1 X appliance 2 X installation rails one right hand and one left hand 2 X power cables one for each PS unit Type...

Страница 26: ...ide View 3 Slide the appliance into the rails as shown in the diagrams in the installation guide packed in the box Figure 18 Inserting Appliance Into Rails 4 Ground the appliance see Grounding the App...

Страница 27: ...to the same switch but Mellanox recom mends connecting to two separate switches to ensure SM connectivity to the fabric Figure 20 Connecting Up the UFM SDN Appliance 4 3 Grounding the Appliance Check...

Страница 28: ...is on Do not hot swap the power supply if your appliance has only one power supply You must power down the system to replace the power supply unit there is only one PS unit in the appliance The power...

Страница 29: ...If a power supply is installed grab the handle with your thumb pointing toward the latch Push the latch with your thumb towards the handle while you pull the power supply out of the appliance Figure...

Страница 30: ...takes up to 48 hours but does not interrupt with appliance operation 1 Power down the appliance before removing the HDD 2 Remove the HDD by pressing the latch button and opening the lever 3 Slide the...

Страница 31: ...ives or to disas semble for environmentally approved disposal 4 8 Supported Approved Cables For a list of approved cables for this appliance see http www mellanox com related docs user_manuals Mellano...

Страница 32: ...ttery This procedure is only to be used when you will be disassembling this appliance before discard ing to comply with regulations regarding disposal of batteries Remove the cover Remove the battery...

Страница 33: ...supports a direct connection via a serial port Please follow the steps below to con nect to the appliance 1 Connect the host PC to the RJ 45 port of the appliance system using the supplied cable The C...

Страница 34: ...n eth0 interface yes Hostname Perform this step to obtain an IP address for the appli ance eth0 is the management port of the appliance If you wish the DHCP server to assign the IP address type yes an...

Страница 35: ...ion Example Mellanox configuration wizard Do you want to use the wizard for initial configuration y Step 1 Hostname server name Step 2 Use DHCP on eth0 interface no Step 3 Use zeroconf on eth0 interfa...

Страница 36: ...ecommended to clean the fan unit and remove the dust from the front and rear panels of the appliance using a vacuum cleaner 4 The link LED for the Ethernet connector does not come on 1 Check that both...

Страница 37: ...e 3 Wait 5 minutes 4 Plug in the appliance and press the Power Button w Integrated LED 5 If the appliance does not come on check the power supplies 6 If the appliance comes on use the UFM management s...

Страница 38: ...pation 750 Watt Max 2560 BTU hour Power and Environmental Input Voltage CPU Input Voltage 750W power supply module 100 127 V at 50 60 Hz 8 2 A 200 240 V at 50 60 Hz 4 4 A CPU 2 Intel Xeon E5 2620 v4 C...

Страница 39: ...25 40 50 100 Gb s Regulatory Compliance Safety EMC Emissions Safety US Canada cTUVus EU CE International CB Russia GOST R Argentina S mark DoC EMC Emissions USA FCC Class A Canada ICES 003 Class A EU...

Страница 40: ...nox_approved_cables pdf A 2 EMC Certifications The list of approved certifications per switch in different regions of the world is located on the Mellanox Website at http www mellanox com related docs...

Страница 41: ...Number Description Power Supply 00WT199 Power Supply w PSU Side to Connector side airflow for Mellanox UFM Appli ance 1U VPI Server HDD 00WT141 Hard Drive for Mellanox UFM SDN Appliance 1U VPI Server...

Страница 42: ...ce libre autour des ouver tures de ventilation Le ch ssis ne doit pas tre empil sur un autre mat riel Si le ch ssis tombe il peut pro voquer des blessures corporelles et des d gradations de biens Ce p...

Страница 43: ...re des forts courants de fuite est essentielle avant le branchement de l alimentation Avant de brancher l appareil la conduite d alimentation les vis de protection la terre du terminal de l appareil d...

Страница 44: ...tion contre la surintensit Un appareil de protection r pertori facilement accessible contre la surintensit du circuit de branchement et calibr 20A doit tre incorpor dans le c blage lectrique du b time...

Страница 45: ...ent tre limin s avec les d chets m nagers Veuillez disposer de ce produit et de tous ses composants de mani re responsable et respectueuse de l environnement Caution Slide rail mounted equipment is no...

Страница 46: ...s ffnungen sein um einen einwandfreien Luftstrom zu gew hrleisten Das Chassis sollte nicht auf andere Ger te gestapelt werden Wenn das Chassis herunt erf llt kann es zu Verletzungen und Besch digungen...

Страница 47: ...m und qualifiziertem Personal installiert aus getauscht oder gewartet werden Die Entsorgung dieses Ger ts sollte unter Beachtung aller nationalen Gesetze Bestim mungen erfolgen Dieses Ger t sollte unt...

Страница 48: ...l Electrical Code F r Nordamerika m ssen in bereinstimmung mit den gel tenden Vorschriften in der US amerikanischen National Electrical Code und dem Canadian Electrical Code Kabel f r den Anschluss an...

Страница 49: ...uipo es muy pesado se debe mover nicamente mediante un elevador mec nico para evitar lesiones Esta unidad ha sido ideada para instalar en lugares de acceso restringido No se debe utilizar el equipo en...

Страница 50: ...son flexibles su conexi n a los conec tores y su desconexi n se deben efectuar con mucho cuidado Para ver advertencias o instrucciones especiales consultar al fabricante del cable Al instalar o realiz...

Страница 51: ...io deber prover un medio para la conexi n con la puesta a tierra de protecci n y un t cnico de servicio deber conectar permanentemente el equipo a dicho medio de conexi n Un T CNICO DE SERVICIO compro...

Страница 52: ...or separado y no se deben eliminar junto con residuos dom sticos Al deshacerse de este producto y de todas sus partes h galo de una manera respons able y respetuosa con el medio ambiente Caution Slide...

Страница 53: ...be plugged into a wall socket outlet which is connected to protective earth Socket outlets which are not con nected to earth shall not be used Finland Norway Sweden Do not connect this unit to any ou...

Отзывы: