background image

Warning: the battery life will be enhanced if the unit is promptly recharged as soon as the light goes dim. 

To  avoid  electrical  shock  please  do  not  open  the  case  housing  the  battery  and  wiring.  For 

internal repair or cleaning refer to qualified personnel. 


Important

1. Charge the unit before initial use. Refer to the "How to charge the lamp" paragraph for more information. 
2. Check the mains voltage before connecting the unit. 
3. Always recharge the unit whenever the light goes dim. 
4. Periodically recharge the unit for at least 8 hours when not in use or stored for over 3 months; otherwise 
the battery would completely exhaust and could not be recharged.  
5. Move the switch to the OFF position when the unit is not used. 
6.  The  efficiency may  decrease  if  the  lamp  is  used  or  charged  when  temperatures  are  below  32°f  (0°c)  or 
above 104°f (40°c. 
7. Please keep out of reach of water of rain. 
 

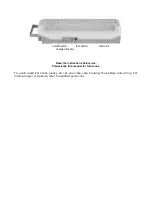
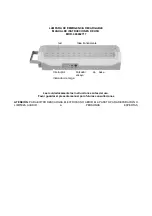
How to operate the lamp (Picture 1) 

1. Move the switch (picture 1) to select "ON" or "OFF". 
2. Move the switch to the “ON” position during the recharge operation to trigger the emergency function. The 
LED’s will automatically light in case of mains failure.  
3.  Over-exhaust  function:  when  the  battery  voltage  decreases  below  the  limit  the  LED  will  automatically 
switch off to protect the battery charge. 
 

How to charge the lamp  

1. Please check that the mains voltage is complying with the rated voltage of the unit. 
2. Connect the power cable both to the unit socket and in the power socket. 
3. This unit is equipped with an over-discharge protection feature. 
 

Note

Put the switch in “OFF” position. The red LED lights up to show that the unit is being recharged. The required 
time for such operation is 16-19 hours. A slight warming of the unit may occur during such operation. This is 
normal and does not mean malfunction.  
 

Specifications

1. Rechargeable battery: 

lead battery 4V 4.5Ah  

2. Discharge time: 


6-10 hours 

3. Recharge time: 


20-24 hours 

4. Dimensions:   


mm. 350x85x85 

 
Information  to  the  user:  as  per  directive  2002/96/CE  and  amendment  2003/108/CE  regarding  electric  and 
electronic equipment disposal this device is marked with the crossed waste bin symbol: 


For a future disposal of this device the user should be informed that: 
 
this  device  cannot  be  disposed  of  as  ordinary  house  waste,  but  it  must  be  handed  over  to  a  locally 
authorised collection centre. 
This device may be handed to a dealer when purchasing a new unit of the same type. 
The above-mentioned standard, to which reference is to be made for any further details, provides sanctions 
in case of illegal disposal of electric and electronic waste.  


Содержание Winner 499902717

Страница 1: ... D USO MOD 499902717 led coperchio trasparente interruttore pulsante di test base indicatore di carica Leggere attentamente le istruzioni prima dell uso Si prega di conservare il presente manuale per consultazioni future IMPORTATO DA MELCHIONI SPA MILANO ...

Страница 2: ...uova apparecchiatura dello stesso tipo La normativa sopra citata alla quale rimandiamo per ulteriori dettagli o approfondimenti prevede sanzioni in caso di smaltimento abusivo dei RAEE Rifiuti di Apparecchiature Elettriche ed Elettroniche 1 Questo apparecchio è conforme alla Direttiva CEE 89 336 e successive modifiche CEE 92 31 CEE 93 68 CEE 2004 108 relativa al rispetto dei requisiti essenziali d...

Страница 3: ... la corrente dovesse mancare i LED si attiveranno automaticamente 3 Funzione di scarica eccessiva quando la tensione della batteria diminuisce oltre il livello limite il LED si disattiverà automaticamente per proteggere la durata della batteria Come effettuare la ricarica 1 Prima di effettuare la ricarica si prega di controllare the la tensione dell alimentazione sia conforme a quella prevista per...

Страница 4: ...t charge indicator Read the instructions before use Please keep this manual for future use To avoid electrical shock please do not open the case housing the battery and wiring For internal repair or cleaning refer to qualified personnel ...

Страница 5: ...eases below the limit the LED will automatically switch off to protect the battery charge How to charge the lamp 1 Please check that the mains voltage is complying with the rated voltage of the unit 2 Connect the power cable both to the unit socket and in the power socket 3 This unit is equipped with an over discharge protection feature Note Put the switch in OFF position The red LED lights up to ...

Страница 6: ...sparente Interruptor Pulsador de ensayo base Indicador de carga Leer cuidadosamente las instrucciones antes del uso Favor guardar el presente manual para futuras consultaciones ATENCIÓN PARA EVITAR DESCARGAS ELÉCTRICAS NO ABRIR EL APARATO PARA REPARACIÓN O LIMPIEZA ACUDIR A PERSONAS EXPERTAS ...

Страница 7: ...e de alimentación tanto en la toma que en la unidad tanto en aquella de la alimentación 3 La presente unidad de nuevo concepto está dotata de la función de protección de descarga excesiva Nota Conmutar el interruptor en la posición OFF El indicador rojo se ilumina para indicar que la lámpara se encuentra en fase de recarga El tiempo normal para dicha operación es de 16 19 horas Durante dicha funci...

Страница 8: ...st Coque Indicateur de charge Lire attentivement ce mode d emploi avant d utiliser la lampe Nous vous prions de conserver ce mode d emploi pour le consulter ultérieurement ATTENTION POUR ÉVITER LES CHOCS ÉLECTRIQUES NE PAS OUVRIR L APPAREIL EN VUE DE LE RÉPARER OU LE NETTOYER S ADRESSER À DU PERSONNEL QUALIFIÉ ...

Страница 9: ...prévue pour la lampe 2 Raccorder le cordon d alimentation à l unité puis brancher la fiche dans la prise 3 La lampe dispose d une protection empêchant la décharge totale Note Placer l interrupteur sur OFF Le témoin rouge s allume pour indiquer que la lampe est en cours de charge Le temps de charge normal est de 16 19 heures Pendant la charge la batterie pourrait chauffer légèrement Cela est normal...

Отзывы: