


EN
37
INTENDED USE
The product is intended for fine polishing and
high gloss polishing of metal and enamelled
surfaces, together with polish. The product can
also be used to apply wax with a separate wax
bonnet.
ACCESSORIES
Accessories for polishing, waxing and cleaning
are available in Jula’s department stores and at
www.jula.com.
USE
DISC SUPPORT PLATE
Check
Check before fitting that the disc support plate
(10) is not cracked or otherwise damaged.
Never fit disc support plates that are cracked,
damaged or deformed, or show other signs of
incorrect use or storage.
Assembly
1. Screw the disc support plate (10) on the
spindle (9).
2. Lock the spindle (9) to prevent rotation by
pressing the spindle lock button (1), and
tighten the disc support plate (10) on the
spindle.
FIG. 2
WARNING!
The disc support plate should be tightened
until it fits firmly but is not overtightened –
this can damage it.
REMOVAL/REPLACING
Follow the instructions below to remove and
replace the disc support plate (10), for example
if it damaged or worn.
1. Press the spindle lock button (1) and
turn the disc support plate (10) until the
Always wear ear protection.
The declared values for vibration and noise,
which have been measured according to a
standardised test method, can be used to
compare different tools with each other and for
a preliminary assessment of exposure.
The measurement values have been determined
in accordance with EN 60745-1, EN 60745-2-3.
WARNING!
The actual vibration and noise level when
using tools may differ from the specified
maximum value, depending on how the
tool is used and the material. It is therefore
necessary to determine which safety
precautions are required to protect the user,
based on an estimate of exposure in actual
operating conditions (taking into account all
stages of the work cycle, e.g. the time when
the tool is switched off and when it is idling,
in addition to the start-up time).
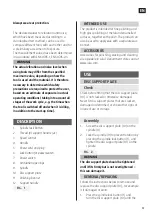
DESCRIPTION
1. Spindle lock button
2. Thread for support handle (2x)
3. Speed control
4. Handle
5. Power cord and plug
6. Lock button for power switch
7. Power switch
8. Ventilation openings
9. Spindle
10. Disc support plate
11. Polishing bonnet
12. Support handle
FIG. 1


