background image

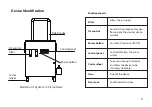
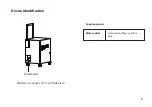
Water outlet

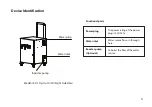
Device Identification

Functional parts

Water outlet

Ozone water flows out from 

here

4.

Medklinn O3 Hydro 10 /20  (Left Side View)

Содержание O3 Hydro 10

Страница 1: ...O3 Hydro 10 20 USER MANUAL...

Страница 2: ...1 Safety Precautions 2 Device Identification 3 System Overview 4 Control Panel Identification 5 Fault Indicator 6 Geting Started 7 Installation Of Device 1 3 7 8 9 14 20 TABLE OF CONTENT...

Страница 3: ...he plug or cutting the power cable in any way will immediately cause the Warranty to become void Any subsequent fault in the operation of the device will not be covered by the Warranty and repair and...

Страница 4: ...n or electronic equipment This is to minimize the possibility of interference with the equipment or the remote controller 2 Do not cover the device in any way at all particularly the ventilation holes...

Страница 5: ...ply Controls the amount of oxygen flowing into the device s ozone module Power button To switch the device ON OFF Control panel Castor wheel Control Monitors the entire system To ease in moving the de...

Страница 6: ...Water outlet Device Identification Functional parts Water outlet Ozone water flows out from here 4 Medklinn O3 Hydro 10 20 Left Side View...

Страница 7: ...onal parts Power plug The power rating of the power plug is 220 240v Water inlet Water source flows in through here Booster pump Optional To boost the flow of the water source Water inlet Power plug 5...

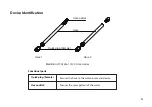
Страница 8: ...vice Identification Hose 2 Medklinn O3 Hydro 10 20 Accessories Hose 1 Hose outlet Hose Quick plug Female Quick plug Female Secures the hose to the water source and device Hose outlet Focuses the spray...

Страница 9: ...the Medklinn O3 Hydro 10 Hydro 20 operates the air is drawn into the device through the HEPA filter This air is forced through a fine mesh filter that traps pollutants before passing into the oxygen t...

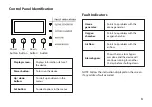
Страница 10: ...problem with the oxygen chamber Points to a problem with the air flow Alarm bypass Shows that an alarm bypass was done and the device will continue running for another 30 days before shutting down Dis...

Страница 11: ...a buzzer sound It directs the user to which component has failed Fault Indicators on the Control Panel Ozone Generator Fault Condition Buzzer sound emitted red light on Ozone Generator Display Screen...

Страница 12: ...ce will still continue to operate for the time stated on the Display Screen 2 Contact the nearest Medklinn service centre to arrange for maintenance service immediately Call dealer for service Mode Te...

Страница 13: ...n Oxygen Chamber Display Screen shows ALARM O2 Press v Down to mute Steps to take 1 Press Down to switch off the alarm 2 Contact the nearest Medklinn service centre to arrange for maintenance service...

Страница 14: ...ate for the time stated on the Display Screen Mode Temporary Remain 30 days Air Flow Fault Condition Buzzer sound emitted red light on Air Flow Display Screen shows Mode Stopped Call for service devic...

Страница 15: ...off and on again After 40 seconds check to see if the device operates back in normal mode without the fault status above The fault is resolved when the device is operating in normal mode after 40 sec...

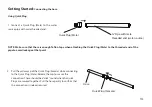
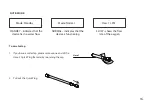
Страница 16: ...to the threaded end of the pipe to avoid leakage at that point 2 Pull the yellow cap of the Quick Plug Female while connecting to the Quick Plug Male Release the cap to secure the connection There sh...

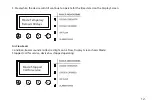
Страница 17: ...female to the device s water inlet 4 Connect the second hose s quick plug female to the device s Water Outlet 5 Switch on the device by pressing the power button 6 Monitor the device status and oxyge...

Страница 18: ...ater flow NORMAL indicates that the device is functioning FLOW shows the flow rate of the oxygen Mode Normal Flow 1 LPM To a water tap 1 If you have a water tap please remove one end of the Hose 2 Qui...

Страница 19: ...ater tap Tighten the connection by using the hose clip with a screwdriver Ensure it is tight and water will not leak out when the tap is turned on 4 Connect the other Quick Plug Female to the device s...

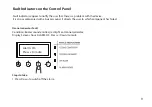
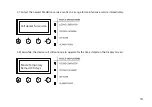
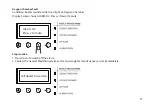
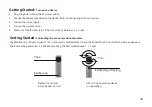
Страница 20: ...w rate between 1 1 5 lpm Getting Started Turn on the device 1 Plug the power inlet to the AC power outlet 2 Connect both hoses provided to the device Refer to Connecting the hose section 3 Turn on the...

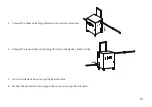
Страница 21: ...facing outward 2 To lock the castor wheel the clipping must be pressed downwards 3 To unlock the castor wheel the clipping must be pulled upwards 4 Do it for both wheels to lock unlock it into positio...

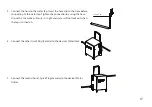
Страница 22: ...gs with M3 screws to the wall NOTE Leave a distance of 1 5 cm screw length from the wall Do not screw all the way in The length allows the device to be hooked on safely 2 Hook the Medklinn O3 Hydro 10...

Страница 23: ......

Страница 24: ......

Отзывы: