background image

10

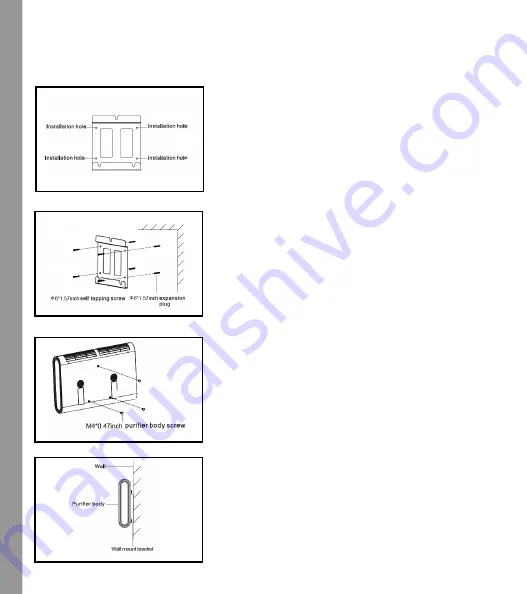
INSTALLATION GUIDE

WALL-MOUNTED

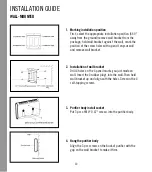
1.  Marking installation position

First, select the appropriate installation position (66.9" 
away from the ground) remove wall bracket from the 
package, hold wall bracket against the wall, mark the 
position of the screw holes with a pencil on your wall 
and remove wall bracket.

2.  Installation of wall bracket

Drill 4 holes on the 4 pencil marks you just made on 
wall. Insert the 4 rubber plugs into the wall. Then hold 
wall bracket up and align with the holes. Screw in the 4 
self-tapping screws.

3.  Purifier body install socket

Put 3 pcs of M4* 0.47" screws into the purifi er body.

4.  Hang the purifier body

Align the 3 pcs screws on the back of purifi er with the 
gap on the wall bracket to make it fi rm.

Содержание MA-35

Страница 1: ...MA WM35 AIRPURIFIER READ AND SAVE THESE INSTRUCTIONS INSTRUCTION MANUAL AND WARRANTY INFORMATION Lifetime warranty if replacing filters on time MA 35 US Rev 09 04 21 ...

Страница 2: ...use solvents like Benzene Alcohol or any flammable cleaners to clean the air purifier Turn off power immediately in case of any of the following Malfunction of any switch Circuit failure Abnormal heating of wires or plugs Any other malfunction WARNING KEEP BATTERIES AWAY FROM CHILDREN This product contains a lithium button coin cell battery If a new or used lithium button coin cell battery is swal...

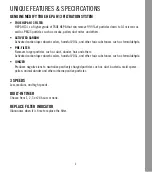
Страница 3: ...er toxic substances such as formaldehyde PRE FILTER Removes larger particles such as dust dander hair and others Activated carbon layer absorbs odors harmful VOCs and other toxic substances such as formaldehyde IONIZER Produces negative ions to neutralize positively charged particles such as dust bacteria mold spores pollen animal dander and other airborne positive particles 3 SPEEDS Low medium an...

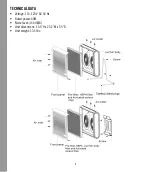
Страница 4: ...4 TECHNICAL DATA Voltage 110 120 V AC 60 Hz Rated power 40W Noise level 66 dB A Unit dimensions 15 6 H x 23 2 W x 3 9 D Unit weight 13 6 lbs ...

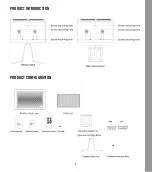
Страница 5: ...5 PRODUCT INTRODUCTION PRODUCT CONFIGURATION ...

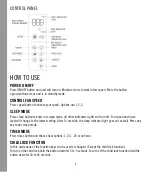
Страница 6: ...ill change to the lowest setting After 10 seconds the sleep indicator light goes out as well Press any key to exit sleep mode TIMER MODE Press timer button and choose hour options 1 2 3 24 or no timer CHILD LOCK FUNCTION In this mode none of the function keys can be used or changed Except the child lock function To turn on the child lock hold the button down for 3 to 5 seconds To turn off the chil...

Страница 7: ...packaging from the new filter before installing into the air purifier Place new filter into the air purifier with tab at top of filter should be facing you Replace front cover back After new filter is installed and unit is turned back on Hold down the filter reset button for 3 5 seconds and the indicator light will go off and timer is reset for 2 500 hours PURIFICATION INDICATOR After power on the...

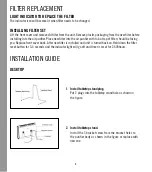
Страница 8: ...purifier with tab at top of filter should be facing you Replace front cover back After new filter is installed and unit is turned back on Hold down the filter reset button for 3 5 seconds and the indicator light will go off and timer is reset for 2 500hours INSTALLATION GUIDE DESKTOP 1 Install tabletop stand plug Put 2 plugs into the tabletop stand hole as shown in the figure 2 Install tabletop st...

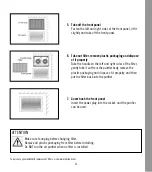
Страница 9: ... NOT run the air purifier when no filter is installed ATTENTION To purchase genuine Medify replacement filters visit www medifyair com 4 Take out filter remove plastic packaging and dispose of it properly Take the handle on the left and right sides of the filter gently take it out from the purifier body remove the plastic packaging and dispose of it properly and then put the filter back into the p...

Страница 10: ...pencil on your wall and remove wall bracket 2 Installation of wall bracket Drill 4 holes on the 4 pencil marks you just made on wall Insert the 4 rubber plugs into the wall Then hold wall bracket up and align with the holes Screw in the 4 self tapping screws 3 Purifier body install socket Put 3 pcs of M4 0 47 screws into the purifier body 4 Hang the purifier body Align the 3 pcs screws on the back...

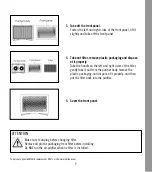
Страница 11: ...el Fasten the left and right sides of the front panel lift it slightly and take off the front panel 6 Take out filter remove plastic packaging and dispose of it properly Take the handle on the left and right sides of the filter gently take it out from the purifier body remove the plastic packaging and dispose of it properly and then put the filter back into the purifier 7 Cover back the front pane...

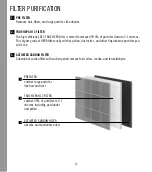
Страница 12: ...igher grade of HEPA filter easily catches pollen dust mites and other tiny airborne particles you can t see 3 ACTIVATED CARBON FILTER Substantial carbon filter with carbon pellets remove toxic odors smoke and formaldehyde PREFILTER catches large particles like hair and dust TRUE HEPA H13 FILTER catches 99 of particles to 0 1 microns including pet dander and pollen ACTIVATED CARBON FILTER absorbs a...

Страница 13: ...t moist cloth to wipe down the unit Do not use cleaners or chemicals on the air purifier at any time CLEANING THE AIR PURIFIER From time to time if you see excess dust accumulate on the unit wipe with a clean dry cloth Also make sure ai intake and vents are free from excess dust Do not vacuum or try to and wash filter as it will clog filter ...

Страница 14: ...will replace the defective unit at no charge to you and reimburse you for any shipping charges After 30 days Medify Air s obligation and liability under this Lifetime Warranty is dependent on your use of our genuine filters purchased on our website or from our authorized resellers which can be found on our website Prohibited use beyond power Can only use a 220v unit with a 220v power supply Can on...

Отзывы: