10
| DMR User Manual 4.0
August 2009
IP addresses may be assigned to the DMR by two ways:
DHCP and Fixed (Static) IP. If your network is configured
for DHCP, the IP address will be provided automatically
and will be visible on the S-Video or Composite output
of the DMR. To set a Fixed (Static) IP address, follow
the procedure below.
Configuring Static IP Address
1. Connect the Ethernet / LAN cable and power up the
DMR.
2. On your Internet browser, enter the current IP
address of the DMR. (Note: If the unit has factory
settings, the default static IP address is: 192.168.1.253)
3.Login to the DMR using the procedure shown in the
Logging In section.
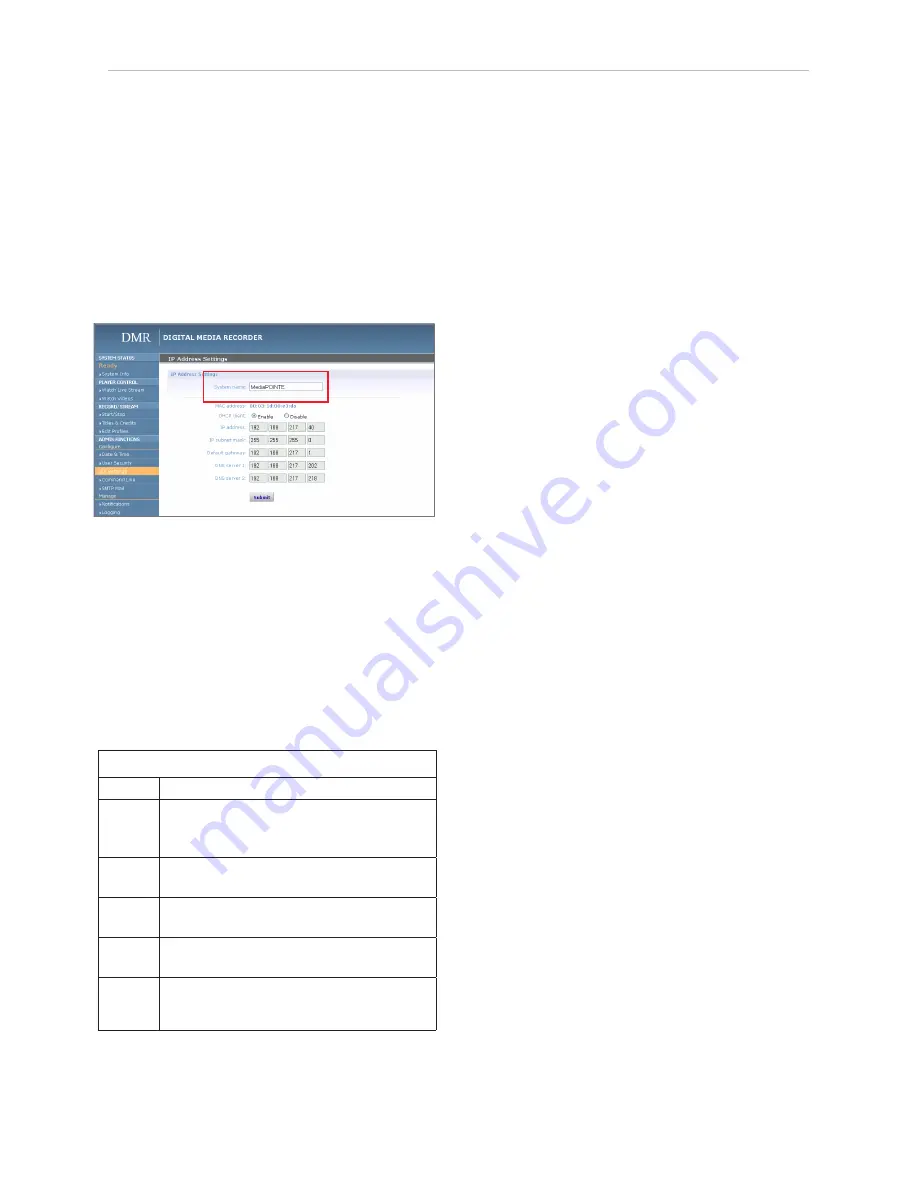
4. Navigate to the network settings page by selecting IP
Settings.
5. To change to a Fixed or Static IP address, set the
DHCP Client checkbox to “Disable”. Fill in the IP
Address, IP Subnet Mask and Default Gateway fields.
6. Once you have completed all of the above steps,
select the Apply Changes button. You will receive a pop-
up window warning you to use this option with caution
as you are changing the default address and should
remember the new settings.
Configuring DHCP IP Address
1. Follow the steps above (1 through 4)
2. To enable the DMR to pick up an IP address, set the
DHCP Client checkbox to “Enable”.
3. If you have made any changes to the network
settings, select the Apply Changes button. You will
receive a pop-up window warning you that you to use
this option with caution as you are changing the default
address and should remember the new settings.
USB Network Configuration
This section describes how to configure the DMR.
Changes in the Configure section of the Main Menu
require Administrator privileges and cannot be accessed
by users logged in with author or user profiles. The
network parameters of the DMR can be set via a special
configuration text file on a USB memory stick. Insert
the memory stick into one of the DMR USB ports at
any time. The unit will look for the presence of this
configuration file and will implement the settings from
the file. Use a simple ASCII text editor to create the
file.
Network Configuration
System Name
The factory set system name is the unit build number.
You can change the name in the IP setting menu page
by entering a new name in the text field. A reboot is
required for the new name to take effect. The name
can be up to 15 characters long and consist of alpha-
numeric characters. No special characters or symbols
will be accepted except for a hyphen.
IP Settings
The System Name and all network settings can be set
in the IP Settings section of the main menu. Network
settings may also be configured via USB memory stick
configuration.
To quickly find the system’s IP Address, connect a
Composite or S-Video monitor to the output. Use the
keypad to navigate to the System Info page of the on
screen menu.
Network Configuration
Setting
Description
DHCP Client Enable DHCP settings for automatic address retrieval f rom
DHCP Server . Disabling the DHCP client will require a static IP
address (with subnet mask and default gateway) to be entered .
IP Address
Assign a static IP address to DMR . This field will also display the
currently assigned IP address
IP Subnet
Mask
Assign subnet mask to DMR . This field will also display the
currently assigned subnet mask
Default
gateway
Assign a default gateway to the DMR . This field will also display
the currenty assigned default gateway
DNS server
If the network supports DNS, enter the DNS Server Address(es)
here .
Содержание DMR
Страница 1: ...An Advanced Media Design Technology Digital Media Recorder User Manual DMR ...
Страница 14: ... DMR User Manual 4 0 August 2009 ...
Страница 15: ...DMR ...


