


SpiroConnect Operators Manual
MedChip Solutions Ltd.
Page 20 of 31
001.105.GBR Issue 1.12
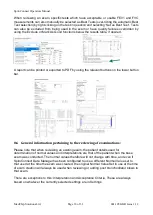
Note: The calibration must be checked when switching to a different turbine, using the
calibration procedure within the SpiroConnect Data Manager PC software. To update the
calibration the user simply clicks the ‘Update’ button at the end of the calibration routine. If
on checking the turbine had a calibration factor very similar to the previous one then it will
display as
PASS
and the ‘Update’ option not given.
Note: The ATS/ERS spirometry guidelines state that calibration checks must be undertaken
daily
1
.
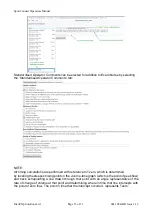
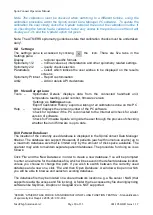
8.8
Settings:
The settings pane is accessed by clicking
the
icon. There are five tabs in the
Settings pane:
Display
– regional specific formats
Spirometry 1/2
– normal value set, interpretation and other spirometry related settings
Spirometry 2/2
– quality check selection
Parameters
– select which indices the user wishes to be displayed on the results
screens
Spirometry Printout
– Report customisation
ArtiQ
– Add or delete API credentials
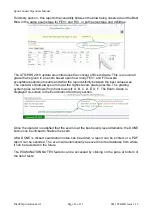
8.9
Menu Bar options:
Tools
–
‘Spirometer Details’ displays data from the connected handheld unit,
temperature reading, serial number, firmware version.
‘Settings’ as
Settings
above.
‘Export Calibration History’ exports a listing of all calibrations done on this PC
Help
–
‘About’ displays the version number of the PC software
‘Check for Updates’ if the PC is connected to the Internet will check for a later
version of software.
‘Check for Firmware Update’ will guide the user through the process of checking
whether their unit firmware is up to date.
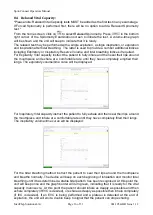
8.10
Patient Database:
The location of the currently used database is displayed in the SpiroConnect Data Manager
title bar. The database can support thousands of patients (each with numerous exams) up to
a maximum database size that is limited only by the amount of disk space available. The
operator may wish to maintain separate patient databases. The procedure for doing so is as
follows:
Click ‘File’ and the ‘New Database’ in order to create a new database. You will be prompted
to enter a new name for the database file, which will be saved in the default database location
unless you choose to change the path. If you wish to switch between the currently used
database and a new one, click ‘File’ and then ‘Open Database’. A window will open in which
you will be able to browse and select an existing database.
The database file may be located on a shared network location e.g. a file server / NAS (that
supports read/write access and file locking). A folder that is accessed by file sharing/syncing
software like SkyDrive, Dropbox or GoogleDrive is NOT supported.
1
SERIES ‘‘ATS/ERS TASK FORCE: STANDARDISATION OF LUNG FUNCTION TESTING’’ - Standardisation
of spirometry Eur Respir J 2005; 26: 319
–338.


