Page 33
45-J Desel - Servce & Parts Manual
January 2022
Secton 10 - Hydraulc System
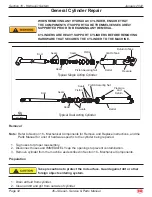
Insert cylinder into vise. Do not over clamp the cylinder or damage will result.
DO NOT overtighten the vise������ Overtightening may damage the cylinder������
Cylinder Disassembly
Mark and remove solenoid valves or counterbalance valves, if the cylinder is equipped with
them.
Remove the head from the cylinder body using special spanner tool.
Remove the shaft assembly from the barrel, pulling in a straight line, so as not to scar the
internal parts.
Insert shaft into a
soft jawed
vise so that the head and piston can be removed. Be sure the
shaft and vise are both clean before using.
Remove nut at the end of the shaft and pull head and piston off of the rod.
Some pistons may be threaded onto the end of the rod and secured with a set screw. Remove the set
screw before attempting to remove the piston to avoid damage to the rod and piston.
Remove all seals from the head and piston using a non-sharp seal tool. These tools are
available from various seal suppliers or tool stores.
Clean all fluid and debris off of the head, piston, shaft, collar and barrel using solvent, rags, and
an air hose.
Inspect parts for scratches, pits or polishing. Check seal groves and sealing surfaces.
Scratches or pits deep enough to catch the fingernail are unacceptable; replace the cylinder.
Polishing is a sign of uneven loading. Check for roundness. If a polished surface is not round
within .007 in. (0.18 mm) replace the cylinder.
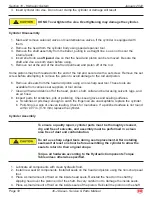
Cylinder Assembly
To ensure a quality repair, cylinder parts must be thoroughly cleaned,
dry, and free of solvents, and assembly must be performed in a clean
area free of dust and contamination������
Do not use sharp edged tools during seal replacement������ After installing
seals wait at least one hour before assembling the cylinder to allow the
seals to return to their original shape������
Torque all hardware according to the Hydraulic Components Torque
Table unless otherwise specified������
Lubricate all components with clean hydraulic fluid.
Install new seal kit components. Install all seals on the head and piston using the non-sharp seal
tool.
Place a small amount of fluid on the inside head seals. Reinstall the head on the shaft by
slipping head over the piston end of the shaft. Be very careful not to damage the inside seals.
Place a small amount of fluid on the inside seals of the piston. Reinstall the piston on the shaft
3.
1.
2.
3.
4.
5.
6.
7.
8.
a.
b.
1.
2.
3.
4.
Содержание 45-J Diesel
Страница 1: ...Service Parts Manual Part 95090 January 2022 Serial Number Range 14700001 Up 45 J Diesel Art 5500...
Страница 31: ...Page 25 45 J Diesel Service Parts Manual January 2022 Section 10 Hydraulic System Art_5706 ILLUSTRATION No...
Страница 132: ...Page 126 45 J Diesel Service Parts Manual January 2022 Notes...
Страница 195: ...Page 189 45 J Diesel Service Parts Manual January 2022 Section 25 Hydraulics THIS PAGE IS INTENTIONALLY LEFT BLANK...
Страница 229: ...Page 223 45 J Diesel Service Parts Manual January 2022 THIS PAGE IS INTENTIONALLY LEFT BLANK...
Страница 243: ...Page 237 45 J Diesel Service Parts Manual January 2022 Section 27 Options THIS PAGE IS INTENTIONALLY LEFT BLANK...
Страница 257: ...Page 251 45 J Diesel Service Parts Manual January 2022 Notes...


