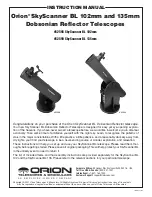
background image

5

ASSEMBLE THE BASE

STEP 1:

The base supports the telescope and allows you to

move the telescope from side to side.
Line up one of the base side panels (9) with the base front panel

(10) as shown here. Thread in the two black attachment bolts to

secure the panels together. Tighten the bolts to a firm feel.
Repeat with second side panel.

STEP 2:

Turn the base panels on their side.

Line up the circular base(11) with the 7 predrilled holes against

the panels. 
Thread 6 black bolts into the base, as shown here. Make sure that

the side with the countersunk holes on the base face the bottom

(see photo)

STEP 3:

Slide the  center bearing bushing into the 7th (center) hole of the

circular base.
Line up the other circular base (sometimes called the ground

base), which contains three teflon pads (finger points to a pad)

STEP 5:

Next attach the three feet to the bottom panel. Line up

each foot and thread a small attachment screw into the foot to

hold it in place. Tighten to a firm feel.

Note:

When attaching the feet, make sure that the center 

countersink depression is on the opposite side of the base.

STEP 5:

Next attach the three feet to the bottom panel. Line up

each foot and thread a small attachment screw into the foot to

hold it in place. Tighten to a firm feel.

STEP 4:

Place the center bearing bushing into the countersunk hole of the

ground plate. Slide the three roller bearing plates over the center

bearing bushing: First the roller bearing plate, then the roller 

bearing itself (the plate that looks alike a wagon wheel), then the

second roller bearing plate. Place the top part of the base plate

assembly over the center bearing bushing. To secure in place:

On the adjustment knob bolt, place two washers on either side of

the roller bearing washer. Slide the adjustment bolt through the

top base board and into the center bearing bushing and 

hand-tighten. A nut is captured on the bottom plate. See drawing

Note:

You will need to supply a phillips screwdriver and a one-

quarter inch or adjustable wrench to assemble the telescope.

Note:

Numbers in parentheses. e.g., (9), refer to Fig.1 and Fig. 1

insets.

Looking at or near the 

Sun

will cause 

irreversable

damage to your eye. Do not point

this telescope at or near the Sun. Do not look through the telescope as it is moving.

ASSEMBLY

Countersunk

depression

on this side

of base

adjustment

bolt

center

bearing

bushing

washers

roller 

bearing

roller

bearing

plates


Содержание LightBridge Truss Tube 10

Страница 1: ...Instruction Manual 8 10 12 16 LightBridge Truss Tube Dobsonian Telescopes MEADE COM...

Страница 2: ...damage to your eye Eye damage is often painless so there is no warning to the observer that damage has occurred until it is too late Do not point the telescope at or near the Sun Do not look through...

Страница 3: ...Meade Customer Service 16 Specifications 17 Optional Accessories 19 Appendix A Altitude Adjustment Knobs 21 CONTENTS WARNING Never leave the primary mirror uncov ered during the daytime unless using...

Страница 4: ...ottom truss lock knobs 3 7 Altitude bearing 8 Rear OTA Base Assembly 9 Side base panels 2 10 Front base panel 11 Circular base plates 2 12 Feet 3 Inset A 13 a Focus knob b Fine focus knob 16 models on...

Страница 5: ...attach the three feet to the bottom panel Line up each foot and thread a small attachment screw into the foot to hold it in place Tighten to a firm feel STEP 4 Place the center bearing bushing into th...

Страница 6: ...t panel Lift to remove the dust cover from the mirror Note You can thread the Altitude Adjustment Knob into the protrusion just below the Altitude Bearing 7 Use the Altitude Adjustment Knob when you a...

Страница 7: ...s to make it easier to line up more precisely with a target First assemble the red dot finder Slide the bracket over the groove of the red dot finder scope Tighten the two hex screws with the supplied...

Страница 8: ...D shows a correctly collimated LightBridge Dobsonian telescope as it appears when viewed through the focuser with the eyepiece removed To check and if necessary set the optical collimation follow thes...

Страница 9: ...flecting Telescope 1 Spider Vanes 2 Secondary Mirror 3 Parabolic Primary Mirror 4 Primary Mirror Hex Screws 5 Focuser Drawtube 6 Focused Image 1 2 3 4 5 6 Looking at or near the Sun will cause irrever...

Страница 10: ...veal oblong or elongated circles 2 Fig F Adjust the 3 collimating screws on the primary mirror housing until the circles are con centric on either side of the focus In summary the adjustment screws on...

Страница 11: ...too easily Just keep these bearing surfaces clean that s all the maintenance required 2 The altitude bearing surfaces 7 Fig 1 of the telescope are lightly lubricated at the factory for optimum perfor...

Страница 12: ...gher power eyepiece If the image starts to become fuzzy when you use higher magnification back down to a lower power The atmosphere is not sufficiently steady to support high powers Keep in mind that...

Страница 13: ...enus going through crescent phases But you cannot see any surface detail on Venus because it has a very thick atmosphere of gas When Mars is close to the Earth you can see some details on Mars and som...

Страница 14: ...e like a large football and are called elliptical galaxies There are many galaxies that are irregularly shaped and are thought to have been pulled apart because they passed too close to or even throug...

Страница 15: ...r blurred or distorted due to temperature differences between inside and outside air Also it is a good idea to allow your telescope to reach the ambient surrounding outside temperature before starting...

Страница 16: ...nded period perhaps for one month or more it is advisable to remove the batteries from the battery pack Batteries left in the telescope for prolonged periods may leak causing damage g Do not leave you...

Страница 17: ...ce Dust Cover To fit over primary mirror inside of lower tube Finder Deluxe red dot Computer Software CD ROM of Autostar Suite Astronomer s Edition software Assembled OTA weight 24 lbs Assembled Mount...

Страница 18: ...dels have a triangular ground plate Truss tubes Silver anodized aluminum with attachment hardware and captive bolts Machined aluminum altitude bearings Secondary Mirror Support 4 vane steel Mirror 12...

Страница 19: ...with attachment hardware and captive bolts Machined aluminum altitude bearings Secondary Mirror Support 4 vane steel Mirror 16 406mm Focal length 1829mm 72 Focal ratio f 4 5 Resolving Power 0 45 arc s...

Страница 20: ...hoto Visual Color Filters Color filters significantly enhance visu al and photographic image contrast of the Moon and planets Each filter threads into the barrel of any Meade 1 25 eyepiece and into th...

Страница 21: ...otrusion at the bottom of the tension plate The protrusion fits into the indent at the bottom of the brake Thread the tension adjustment bolt into the tension plate on the side panel of the base assem...

Страница 22: ......

Страница 23: ......

Страница 24: ...f any product or part a Return Goods Authorization RGA number must be obtained from Meade by writing or calling 800 626 3233 Each returned part or product must include a written statement detailing th...

Отзывы: