background image


- 14 - 

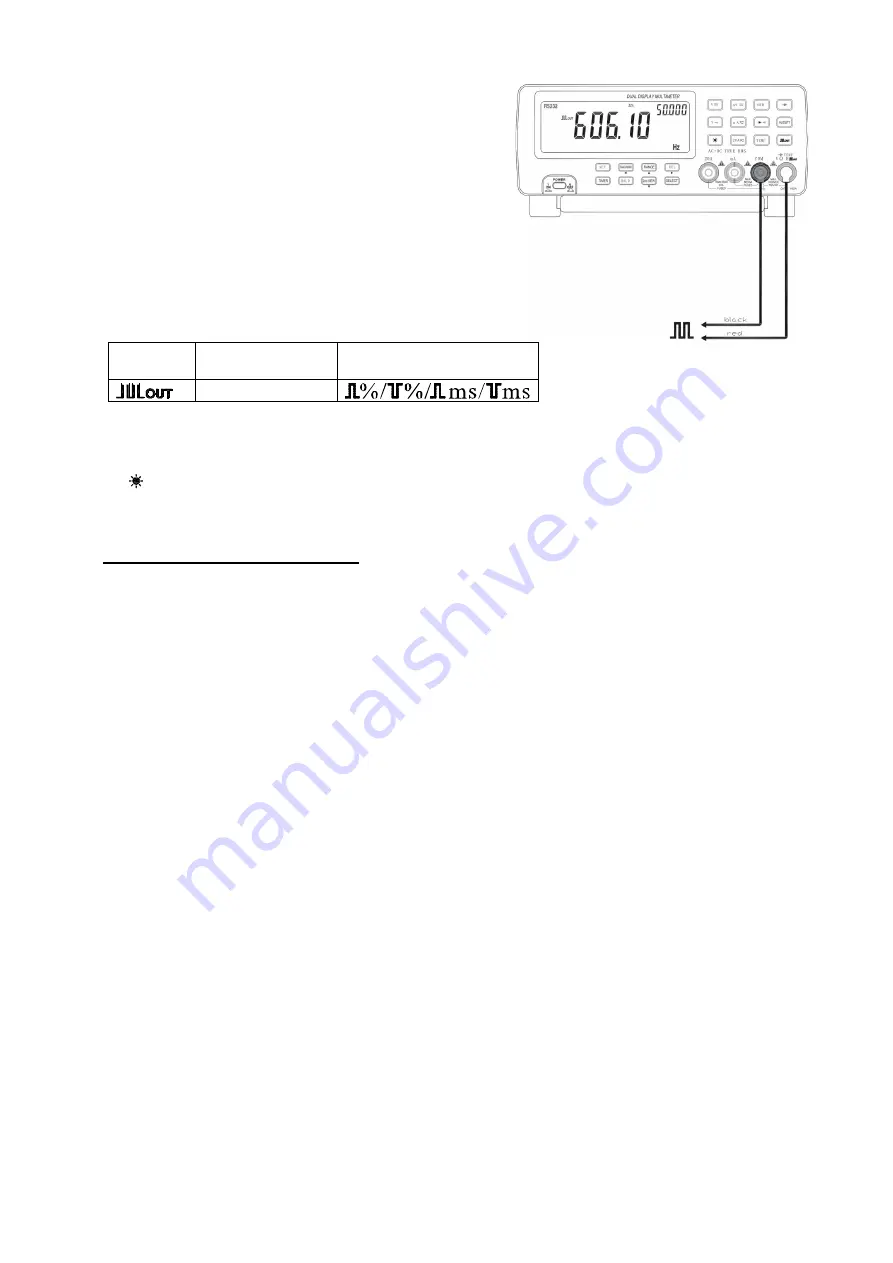
Connect  the  black  test  lead  to  “COM”  terminal  and  the  red  test 

lead to “VΩ Hz” terminal. 

Press 2nd VIEW button to select the frequency from the 

following ranges: 

0.5000Hz/1.0000Hz/2.0000Hz/10.000Hz/50.000Hz/60.240Hz/74.

63Hz/100.00Hz/151.50Hz/200.00Hz/303.00Hz/606.10Hz/1.2500

kHz/1.6660kHz/2.5000kHz/5.0000kHz 

Press SELECT button to select the duty cycle from 1% to 99% 

Press 2nd VIEW button for at least 2 seconds to return to default 

square wave output. 


Function 

Primary display 
Press 2nd VIEW 

Secondary display 
Press SELECT 


Hz 


4.12 Backlight Display 

Press “ ’ button to turn on backlight. Press it again to turn it off. 


5. PROGRAMMABLE CONTROL 


The  unit  is  equipped  with  RS232  interface  and  relevant  software,  which  allows  easy  connections  to  PC  for  PC 

control. 

Software operating environment: Windos9x/NT/2000/XP 

Software version: V1.0 


5.1 Installation 

Plug the CD disk into the CD drive. Start up the setup.exe file to install the software. Select a desired installation 

path. 


5.2 RS232 Port Set 

RS232 port is used for the data transfer between the multimeter and PC. There are two ports to be chosen from: 

COM1 and COM2. 


5.3 Connect 

Click “Connect” to activate the communication between the multimeter and PC. To disconnect the communication, 

click “Disconnect”. 


5.4 Recording Size 

User can store up to 8192 files to the multimeter memory. 


5.5 Sampling Interval 

The sampling interval can be set at any value between 0.1~99 seconds. 


5.6 Alarm Setup 

This  function  sets  the  upper  and  lower  limits  for  alarm.  If  the  testing  results  exceed  the  preset  upper  or  lower 

limits, the PC will send out alarm with sound. 

Содержание MT8145

Страница 1: ...Benchtop Instrument 80000 Counts 4 7 8 Bench Digital Multimeter Operation Manual...

Страница 2: ...s read this operation manual carefully before using this meter and follow the following safety guidelines Before use check and make sure that the instrument s plastic chassis the test leads and the in...

Страница 3: ...2 2 PANEL INSTRUCTIONS Fig 2 1 Front panel Fig 2 2 Rear Panel...

Страница 4: ...s TIMER key to start the secondary display for counting time Press TIMER key again to turn off the counting time display When the secondary display is display counting time press key SELECT to enter B...

Страница 5: ...ppears on the LCD display The relative measuring function measures the difference between the testing value and the reference value The current readings on the secondary display are used as a relative...

Страница 6: ...C DC AC DC AC voltage or current 10 PH PH Peak Hold Peak Hold 11 A H Auto Hold 12 AVG Average reading 13 Auto Auto mode 14 APO Auto power off sign 15 RS232 Communication on annunciation 16 MAX MIN MAX...

Страница 7: ...alue on the primary display and on the secondary display c If the measuring value is between and upper and lower limit the LCD displays the measuring value on the primary display and on the secondary...

Страница 8: ...lly will automatically exit the HOLD or MAX MIN mode 3 Enter or exit mauran range mode Press RANGE button to select manual range mode Then every press on the RANGE button the meter steps to a higher r...

Страница 9: ...choose from 8 0000V 80 000V 750 00V Connect the black test lead to COM terminal and the read test lead to V Hz terminal Touch the test leads to the test points and read the display on both the primary...

Страница 10: ...mpt an in circuit current measurement when the fuse is blown or when the voltage between open circuit and the ground is 1000V To avoid damage to the meter check the meter s fuse before proceeding Befo...

Страница 11: ...rations apply the same as explained in section 4 4 Press SELECT Primary display Secondary display Press 2nd VIEW DCA DCA ACA ACA DCA ACA DC AC A ACA ACA Hz ACA Hz 4 6 Resistance Measurement WANRNING T...

Страница 12: ...ance Use the DC function to confirm that the capacitor is discharged NOTE Some capacitors have polarities In measuring polarities capacitors touch the red test lead to the positive polarity and the bl...

Страница 13: ...nd read the display Measurement mode Primary display Secondary display Press 2nd VIEW Hz Hz kHz MHz High frequency mode Hi Hz In Hi Hz mode the frequency testing range is 8MHz 1000MHz divided into fou...

Страница 14: ...Read the display 4 10 Diode and Continuity Check WANRNING To avoid damage to the meter or the testing equipments disconnect circuit power and discharge all high voltage capacitors before measuring Us...

Страница 15: ...software which allows easy connections to PC for PC control Software operating environment Windos9x NT 2000 XP Software version V1 0 5 1 Installation Plug the CD disk into the CD drive Start up the se...

Страница 16: ...es you an easier view 5 11 Push Button Panel Basically the functions of the buttons on this panel are the same as the buttons on the multimeter Double click on the function buttons is in the same way...

Страница 17: ...m part of the panel indicate the current status of the data recorder Battery indicates the power supply status of the multimeter If power supply is in good status it will display Battery High Otherwis...

Страница 18: ...20A 1mA Table 4 ACA True RMS Range Resolution Accuracy Remarks 80mA 1 A 50Hz 5kHz 0 2 rdg 10 Fuse F750Ma 250v F13A 250V Voltage drop 800mV Max input current 20A up to15 seconds 800mA 10 A 8A 0 1mA 50H...

Страница 19: ...nd ground 1000V RMS Continuity beeper Approx 3kHz Display dual display 80000 update 4 times Sec Bar graph 23 segments update 40 times Sec Electromagnetic compatibility For all ranges and functions exc...

Страница 20: ...ter 7 1 Fuse replacement NOTE Please select fuse of the same specification to replace it Power fuse 200mA 250V located in input power socket Fuse for measuring current 800mA 250V located in the curren...

Страница 21: ...oes not work properly take actions as described in this manual to check out if the meter is defective or not Once defective or malfunctioning is confirmed please contact your local distributor or the...

Отзывы: