


Last Updated: 8 November 2016
Page 2 of 4
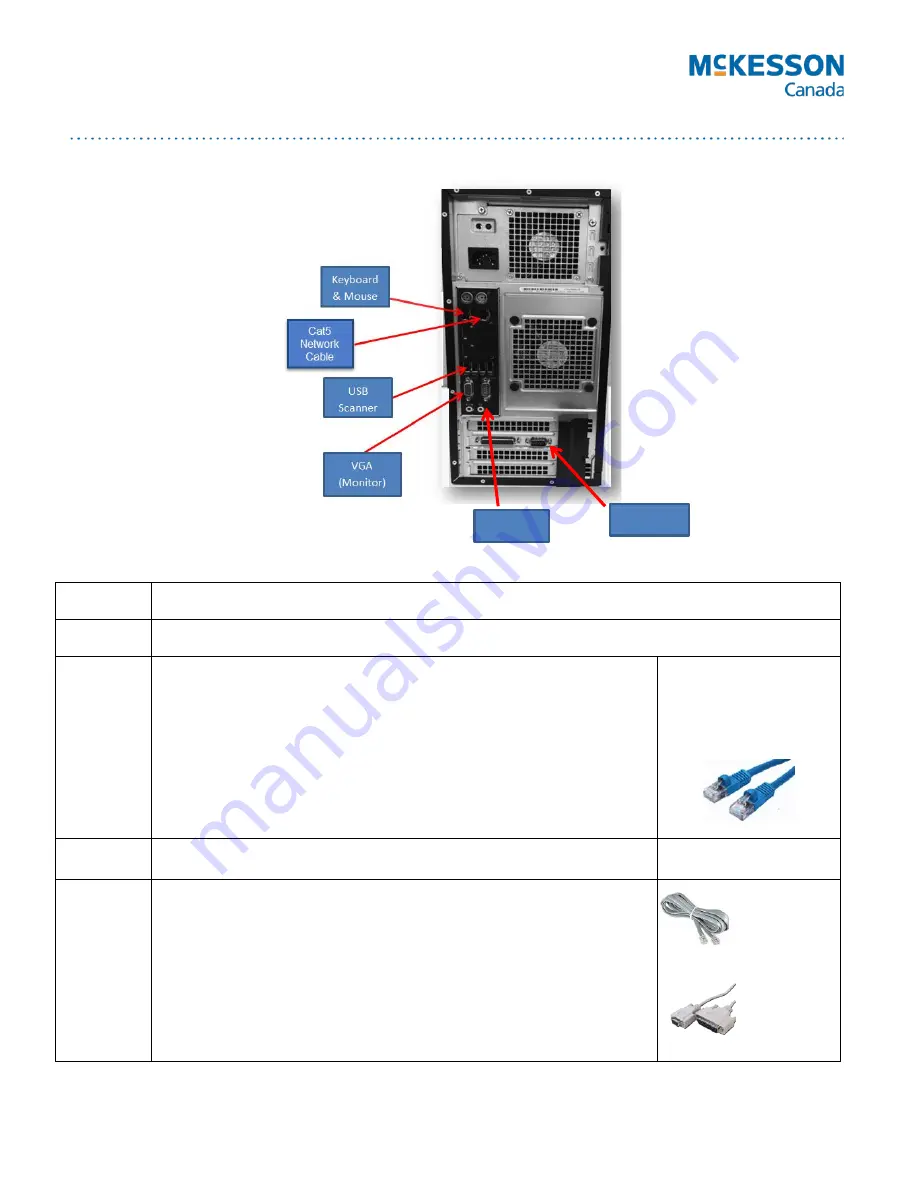
Rear View of the Till Computer (Reference for Till Setup)
PharmaClik POS ONE Till Installation and Setup Instructions
Section 1
Unpack Cash Drawer (Box 1) and place in prepared location.
Section 2
Unpack the Till Computer (Box 2)
a)
Place the Till computer into its location (preferably under the counter
and out of the way).
b)
Plug in the power cord into the Till computer and leave other end
unplugged for now.
c)
Connect the keyboard and mouse to the back of the Till computer.
d)
Connect the Till computer to the network switch using a Cat5 network
cable and insert one end into any port on the switch or to the wall
jack.
Section 3
Unpack the Receipt printer (Box 3)
a)
Connect the cash drawer to the Receipt printer using the cable shown.
It should already be connected to the cash drawer.
b)
Connect one end of the serial cable to COM1 port on the Till computer
and the other end to the Receipt printer. Hand-tighten screws.
c)
Press the light grey button on the top right of the printer to open the
cover and install the receipt paper (see video for details).
d)
Plug in the power cable to the printer. Leave the other end unplugged
for now.
Com 1
Com 3
Receipt
printer cable
Serial cable
Cat5 Cable


