background image

17

5. The Text Display 

Mode may be can-

celed by pressing the 

DSP/TIME Push-

button on the Remote 

Control. Refer to figure 16.

6. One of the Track Time Modes may also be dis-

played instead of the Track Number, by pressing 

the DSP/TIME Push-button on the Remote Con-

trol. Refer to figure 

13. For additional 

information on the 

Time Display Modes 

refer to “Display 

Modes” on page 19.

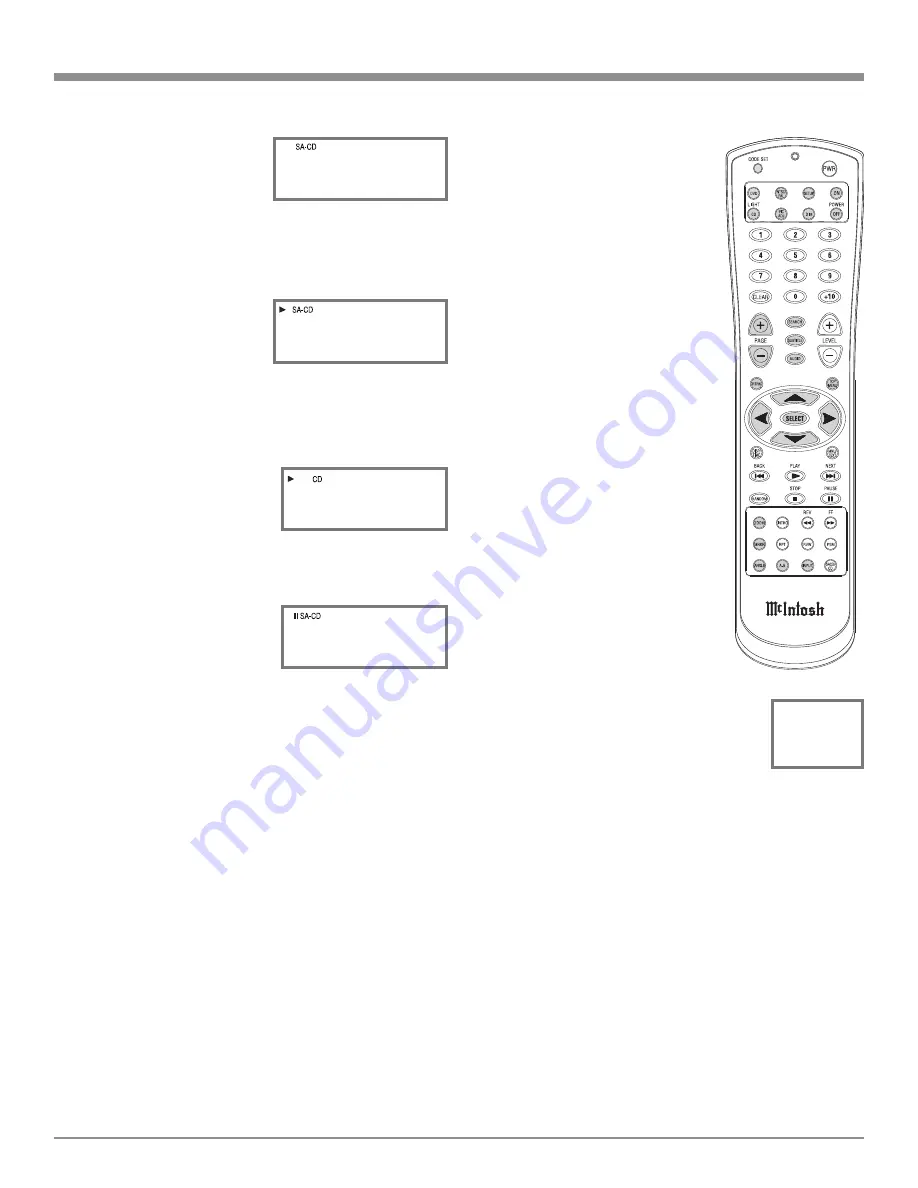
How to Play a CD Disc

With a disc already loaded into the MCD500, press the 

PLAY

„

 Push-button on the 

Front Panel of the MCD500 or 

Remote Control. Refer to figures 

6, 14 and 16.

How to Pause a Disc

This feature allows for the temporary stopping of disc 

playback. Refer to figures 6, 15 

and 16.

1. When playing a Disc, press 

the PAUSE

;

 Push-button to 

temporarily stop playback.

2. Press the PLAY

„

 Push-button to resume playing the 

disc.

Track Back

Return to the beginning of the Track currently playing 

by rotating the MCD500 Front Panel TRACK BACK 

Control counterclockwise and then releasing the control 

or momentarily pressing the BACK 

9

 Push-button on 

the Remote Control. Rotate and hold the TRACK BACK 

Control or press and hold the BACK 

9

 Push-button 

for rapid selection of the desired previous Tracks. Refer to 

figures 6 and 16.

Track Next

Advance to the next Track by rotating the MCD500 Front 

Panel TRACK NEXT 

Control clockwise and then re-

leasing the control or momentarily pressing the NEXT 

:


Push-button on the Remote Control. Rotate and hold the 

TRACK NEXT 

Control or press and hold the NEXT 

:

 Push-button for rapid selection of the next desired 

Track. Refer to figures 6 and 16.

How to Operate the MCD500

Fast Forward or Reverse

Using the Remote Control, press the 

FF (Fast Forward) 

8

 or REV (Re-

verse) 

7

 Push-button to search back 

and forth rapidly through a Track on 

a disc. To return to normal playback 

release the same FF (Fast Forward) 

8

 or REV (Reverse) 

7

 Push-button. 

Refer to figure 16.

Stop Mode

Press the STOP

<

 Push-button at 

any time to stop Playback. To listen 

to the disc again, press the PLAY

„


Push-button and playback will start 

from the beginning of the disc.

Volume Level

The MCD500 has both Fixed and 

Variable Output Level Connections. 

The Variable Output Level Connec-

tions (Rear Panel and Front Panel 

Headphone Jack) are controlled by 

the Front Panel Level Control and the 

LEVEL Push-buttons on the Remote 

Control. Refer to figures 6, 16 and 

17. The Front Panel Volume Level 

Information Display will indicate the 

Volume Level from 0 - 100%.

Note: When the Volume Level is 81%, the 

Rear Panel Variable Outputs will be 

at the same volume level as the Fixed 

Outputs.

Mute

Press the MUTE Push-button to mute the audio (-50dB 

down in level) at both the Fixed and Variable Output Con

-

nections on the Rear Panel. Refer to figure 6. The LED 

above the MUTE Push-button will illuminate. Pressing the 

MUTE Push-button a second time restores the audio at the 

output connections and the LED will no longer be illumi-

nated.

Note: The Headphone Jack is not affected by the Mute 

Function.

Direct Track Selection

The MCD500 Front Panel Display indicates the Disc Track 

currently playing. Use the Remote Control NUMERIC 

Push-button(s) to enter the desired Track Number. Refer 

to pages 14 and 15 for additional information using the 

Remote Control.

Figure 16

Figure 12

0 3 : S O  N I

Figure 13

   0 2 : 3 6

Figure 15

   0 2 : 4 6

Figure 17

  8 1 %

LEVEL

Figure 14

    0 2 : 1 3

Содержание MCD500

Страница 1: ...McIntosh Laboratory Inc 2 Chambers Street Binghamton New York 13903 2699 Phone 607 723 3512 FAX 607 724 0549 MCD500 Owner s Manual SACD CD Player...

Страница 2: ...FIED PERSONNEL To prevent the risk of electric shock do not remove cover or back No user serviceable parts inside CAUTION Invisible Laser Radiation when open DO NOT stare into the beam or view directl...

Страница 3: ...s specified by the manufacturer 12 Use only with the cart stand tripod bracket or table specified by the manufacturer or sold with the apparatus When a cart is used use caution when mov ing the cart a...

Страница 4: ...artment For assistance on factory repair return procedure contact the McIntosh Service Department at McIntosh Laboratory Inc 2 Chambers Street Binghamton New York 13903 Phone 607 723 3515 Fax 607 723...

Страница 5: ...MCD500 Refer to the diagram for connection PIN 1 Shield Ground PIN 2 Output PIN 3 Output Power Control Connector The MCD500 Power Control Input Output Jacks receive send Power On Off Signals when con...

Страница 6: ...ows varying the volume level of the music It can also be used for matching the volume level of the MCD500 with other components in the system Multi Function Front Panel Display The MCD500 Front Panel...

Страница 7: ...on the next page pertaining to installing the MCD500 into cabinets 3 17 1 2 44 45cm 4 5 8 11 75cm 6 15 24cm 14 1 2 36 83cm 15 7 8 40 32cm 3 16 0 48cm 4 13 16 12 22cm 10 1 2 26 67cm 13 1 4 33 65cm 17 4...

Страница 8: ...et in maintaining all the system components at the coolest possible oper ating tempera ture A custom cabi net installation should provide the follow ing minimum spacing dimen sions for cool operation...

Страница 9: ...r a decoder COAXIAL AND OPTICAL DIGITAL AUDIO INPUTs receives a Digital Signal1 from an external source component such as a Disc Player and uses the MCD500 internal D A Converter to decode the signal...

Страница 10: ...man ner as outlined in steps 1 thru 3 Data Control Connections 5 Connect a Control Cable from the Preamplifier or A V Control Center CD2 Data Port Jack to the McIntosh MCD500 SACD CD Player DATA IN Ja...

Страница 11: ...t jack to the external Disc Player Power Control In Jack 3 Optionally connect a Control Cable from the exter nal Disc Player Power Control Out jack to the Music Server PWR Power CTRL Control In Jack 4...

Страница 12: ...one track at a time Selects various playback times for indication on the display Selects the SACD or CD Audio Tracks from a hybrid disc Adjusts the listening volume level Connection for low imped anc...

Страница 13: ...Indicates the Programming or Program Play Mode is active Indicates the number of tracks on the Disc Programmed Tracks the current Track Time Remaining Track Time Total Disc Playing Time Text and vario...

Страница 14: ...cks from SACD and CD Discs Use to select one of various repeat modes Use to review the programmed tracks of the disc on the Front Panel Information Display while in the program mode Use to program the...

Страница 15: ...ed release the REV Reverse 7 or FF Fast Forward 8 Push button to resume normal playback Back and Next Press the NEXT Push button to move forward one track or the BACK 9 Push button to move back to the...

Страница 16: ...e from the default SACD Layer to CD Layer press the SACD CD Push button on the Front Panel or Remote Control once to see the current selection and a second time to change the selection Refer to figure...

Страница 17: ...and 16 How to Operate the MCD500 Fast Forward or Reverse Using the Remote Control press the FF Fast Forward 8 or REV Re verse 7 Push button to search back and forth rapidly through a Track on a disc T...

Страница 18: ...ode on a continuous basis Refer to figures 6 on page 16 and figure 36 1 With the disc playing Regular Program or Random Playback Modes press the RPT Repeat Push button once to activate the Track Repea...

Страница 19: ...he MCD500 has the ability of playing back MP3 and WMA encoded discs MP3 WMA allow more tracks on the Disc by using the technique of lossy compression ap plied to the original audio information The MP3...

Страница 20: ...t Digital Input Selection is playback of a disc in the MCD500 The Front Panel display will indicate the Volume Level 0 100 at the Variable Audio Outputs Re fer to figures 39 and 37 To select the Coxia...

Страница 21: ...Keypads can also be used to remotely control the basic transport functions of the MCD500 The labeling of Push buttons on some McIntosh Remote Controls and Keypads are different from the supplied MCD50...

Страница 22: ...ormat only Sampling Frequencies 44 1kHz PCM1 Transport Laser Type Twin Beam Laser Beam Wavelength 650nm SACD 790nm CD Laser Power CLASS IIa CLASS I Power Requirements 100 Volts 50 60Hz at 35 watts 110...

Страница 23: ...ping carton and interior parts only if they are all in good serviceable condition If a shipping carton or any of the interior part s are needed please call or write Customer Service Department of McIn...

Страница 24: ...cts is the policy of McIntosh Laboratory Incorporated who reserve the right to improve design without notice Printed in the U S A McIntosh Laboratory Inc 2 Chambers Street Binghamton NY 13903 www mcin...

Отзывы: