background image

12

Dolphin Bio Suction


|


User Instructions Manual

7.  USING THE REMOTE CONTROL

The remote control unit (RCU) offers two operation modes – Automatic mode and manual direction 
control mode.
In automatic mode, the cleaning parameters can be changed.
In manual direction mode, the robot’s motion can be controlled manually.

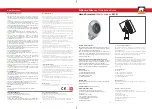
7.1.  The Control Panel 

Radio reception meter

When no black lines are showing, move 
closer to the power supply unit.

Battery level meter


When flashing, change the batteries.

Manual control indicator 

When flashing, you are in manual direction 
control mode

Cleaning cycle icons

Delay timer icons

Cleaning mode icons

ON/OFF button

Manual/automatic select button

Set/OK button

Direction control arrows

Bio_English_8151191.indd   12

1/12/12   6:27 PM

Dolphin Bio Suction


|


User Instructions Manual

9

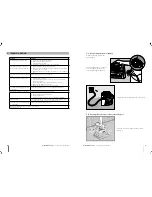
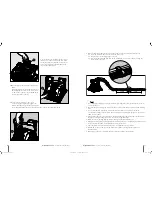
5.7.  Dismantling and cleaning the impeller

Unplug the power supply before cleaning.

Dismantle the impeller cover and clean around 
the impeller housing, then reassemble.
(Use Phillips head screwdriver).

5.8. Storage instructions

Coil the cable and store in a cool, dry place on 
the Caddy.

• 

Do NOT

 store the robot where it will be exposed to direct sunlight.

• 

Do NOT

 store the robot where it will be exposed to excessive heat.

• 

Do NOT

 store the robot where it will be exposed to frost.

6.  USING THE EXTERNAL SUCTION PIPE

1.  Open the filter covers and remove the 

cartridges from both sides of the robot.

2.  Insert the internal suction adaptor into the 
robot. It should be placed in the side of the 
robot that has the pipe connection door hatch 
on it (A). Press the adaptor against the right 
wall and lower it (see the direction arrow on the 
adaptor) until it reaches the suction inlet.

A

Bio_English_8151191.indd   9

1/12/12   6:27 PM

Содержание Dolphin Bio Suction

Страница 1: ...www maytronics com by Dolphin Bio Suction Bio_cover_English_8151191 indd 4 1 12 12 5 03 PM by 8151191 User Manual Instructions Dolphin Bio Suction Bio_cover_English_8151191 indd 1 1 12 12 5 03 PM...

Страница 2: ......

Страница 3: ...5 Removing the robot from the pool 5 6 Cleaning the lter cartridges 7 5 7 Dismantling and cleaning the impeller 9 5 8 Storage instructions 9 6 USING THE EXTERNAL SUCTION PIPE 9 7 USING THE REMOTE CON...

Страница 4: ...hours according to the pool s speci c cleaning requirements 2 SPECIFICATIONS Motor protection IP 68 Minimum pool depth 0 80m 2 6ft Maximum pool depth 5m 16 4ft Water temperature 6 34 C 43 93 F 3 WARN...

Страница 5: ...3 4 POOL CLEANER PARTS Dolphin Bio Suction Caddy Weekly timer Power Supply Internal suction adaptor Swivel to pipe connector Suction inlet plug Cable to pipe clip connector Remote Control Unit Pipe op...

Страница 6: ...h it out completely so that it has no kinks Adjusting the handle angle The handle angle can be adjusted to determine the speed at which the robot advances along the water line To adjust the handle ang...

Страница 7: ...he robot is disengaging from wall at water line If the robot climbs too high consult your Dolphin distributor Remote control unit is not working Check if the batteries need to be replaced Motor is not...

Страница 8: ...ECT button you can choose a pool cleaning schedule for the coming week Important The robot will always begin to work upon set up LED 1 The robot will automatically work every day for a full cycle 7 ti...

Страница 9: ...arrows To select the parameter settings use the right or left arrows 4 When you reach the required function press the Set OK button Bio_English_8151191 indd 14 1 12 12 6 27 PM Dolphin Bio Suction User...

Страница 10: ...cycle Fast 2 hour cycle Ef cient 3 hour cycle for everyday use default setting Heavy duty 4 hour cycle Delay time indicator This determines when the pool cleaner starts to work Delaying allows the dir...

Страница 11: ...hin Bio Suction User Instructions Manual 9 5 7 Dismantling and cleaning the impeller Unplug the power supply before cleaning Dismantle the impeller cover and clean around the impeller housing then rea...

Страница 12: ...ted connect clip connectors along the entire length of the pipe CAUTION Note 1 To avoid the pipe twisting use only the minimum pipe length necessary for the robot to reach all corners of the pool 2 Im...

Отзывы: