PAGE 11
FOR SERVICE TECHNICIAN’S USE ONLY
DO NOT REMOVE OR DES
TROY
4.
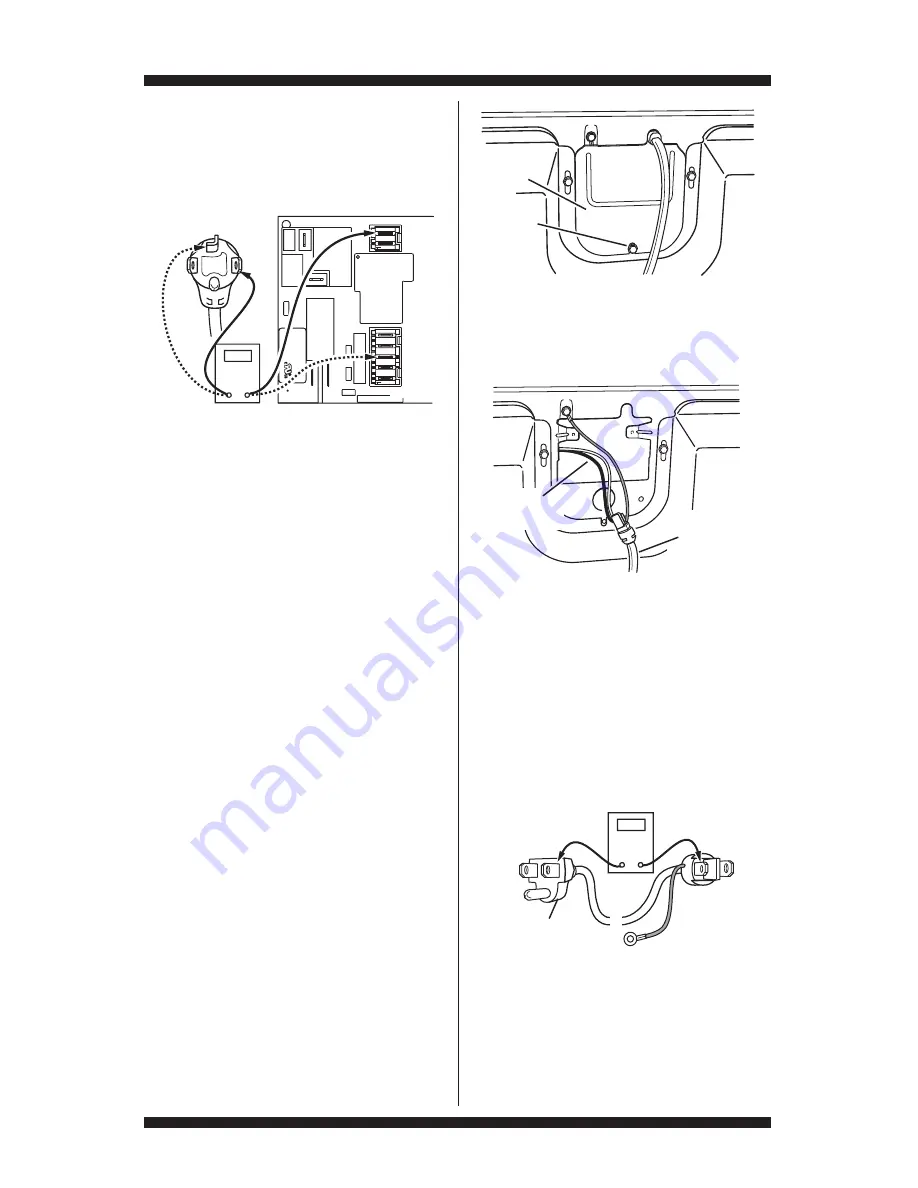
With an ohmmeter, check the continuity
from L1 and N plug terminals of the power
cord to the terminals for L1 and N on the
CCU. See Figure 4b.
If continuity exists for both connections,
go to step 6.
If an open circuit is found, check the integrity
of the connections of the power cord to the
harness in the dryer; harness to the CCU;
and the integrity of the power cord itself.
5.
If it is necessary to replace the power
cord, remove the retaining clip that secures
the cord to the back panel. Disconnect the
cord from the main harness and the ground
wire from the rear panel, then pull out the
power cord.
6.
Visually check that ALL connectors are
fully inserted into the CCU.
7.
Visually check that ALL connectors are
fully inserted into the UI.
8.
Reassemble all parts and panels.
9.
Plug in dryer or reconnect power.
10.
Perform steps under “Install Diagnostics”,
page 5, to verify repair.
GAS DRYER (U.S. and Canadian Installations):
1.
Unplug dryer or disconnect power.
2.
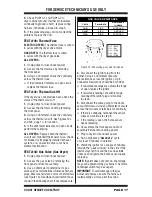
Remove the cover plate from the back
of the dryer. See Figure 5.
3.
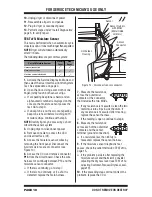
Check that the power cord is firmly
connected to the dryer’s wire harness.
See Figure 6.
4.
Access the machine electronics without
disconnecting any wiring to the CCU.
5.
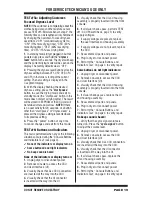
With an ohmmeter, check for continuity
between the neutral (N) terminal of the plug and
P8-3 (white wire) on the CCU. The left-hand
side of Figure 7 shows the position of the neutral
terminal (N) on the power cord plug. Also see
Figure 2, page 9.
COM
Neu
G
L1
L1
Masse
N
Neu
N
G
Masse
Figure 5 - Remove the cover plate (gas).
Figure 7 - Power cord terminals, gas dryer.
Power Cord
Plug
P9
1
5
1
P/N XXXXXX R
ev
X
Date Code YDDD
-xx
XXXX
-XXX
MADE IN CO
O
L1
COM
P8
L1
N Neu
N
Neu
Power Cord
Plug
CCU
Figure 4b - Plug-to-terminal connections
for electric dryer.
Remove
Screw
Cover Plate
Figure 6 - Power cord-to-wire harness
connection for gas dryer.
Power Cord
Wire Harness


