background image

Installation and Operational Instructions for ROBA

®

-diskstop

®


Type 894.5_ _._ _  Sizes 9 and 10


(B.8.4.5.EN)


27/08/2020 TK/TL/GC/SU


Chr. Mayr GmbH + Co. KG


Eichenstraße 1, D-87665 Mauerstetten, Germany


Phone: +49 8341 804-0, Fax: +49 8341 804-421


Page 12 of 17 

www.mayr.com

E-Mail: 

[email protected]


Adjustment 

The brakes are equipped manufacturer-side with 
the respective springs for the braking force 
stated on the Type tag. Adjustment is not 
necessary. Adaptions or modifications are not 
permitted as a rule. This rule also applies to the 

manufacturer-side adjusted noise damping.  
The microswitches are also adjusted manufacturer-side. 
Despite great care during the manufacturer-side adjustment, re-
adjustment might be necessary after installation due to 
transportation and handling. Furthermore, such switches 
cannot be considered fail-safe.  
Please observe the sections Release Monitoring and Wear 
Monitoring. 


Noise Damping (Item 11 / Fig. 1): 


The noise damping was set and adjusted 
manufacturer-side. However, this component is 
subject to ageing dependent on the application 
or operating conditions (torque adjustment, 
switching frequency, ambient conditions, 
system vibrations etc.). 
Replacing the damping element is only 
permitted at the 

mayr


®

 site of manufacture. 


Brake Installation (Figs. 1 

– 9) 

The brake is pre-assembled manufacturer-side. 

1.  Mechanically release the brake using an auxiliary device and 

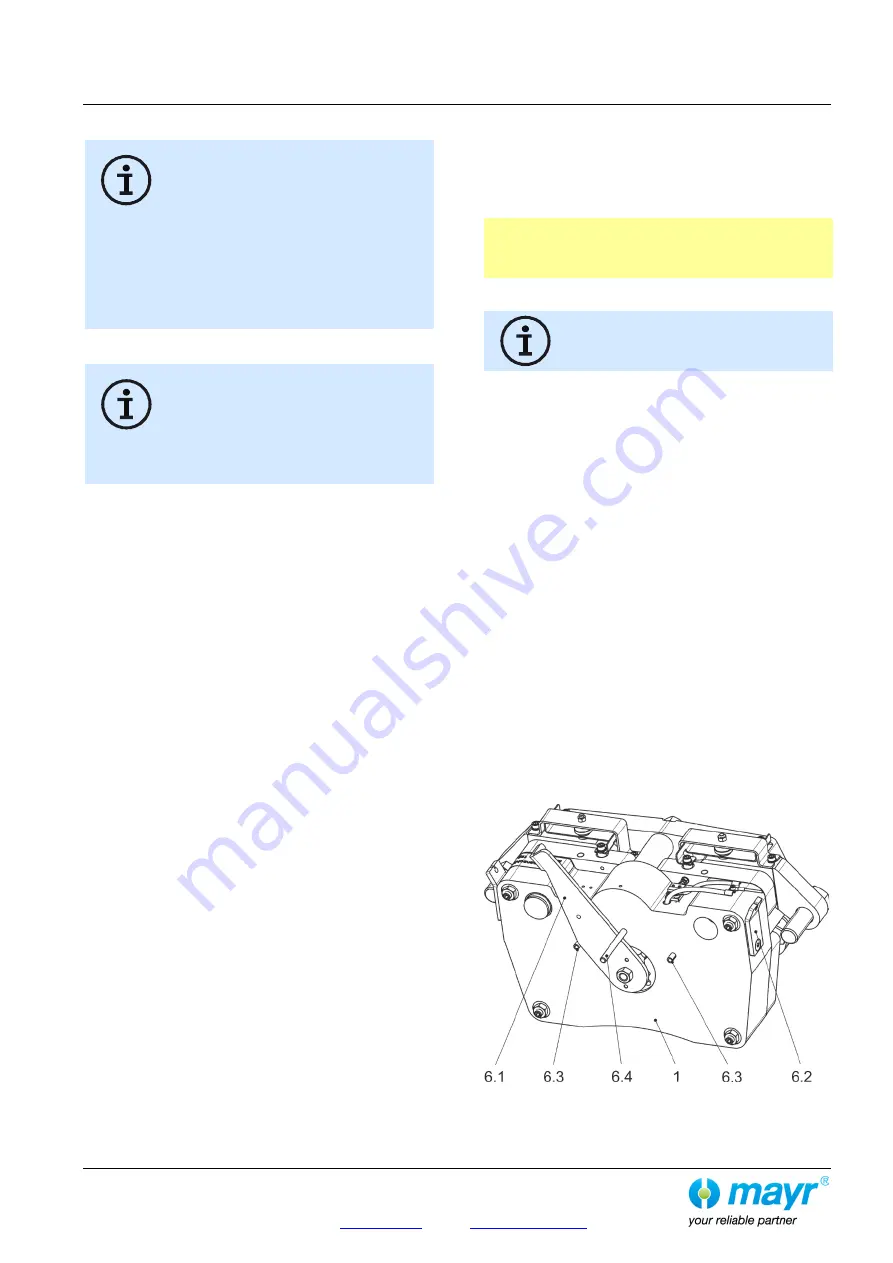
lock the hand release lever (6.1) via the bolt (Item 6.4 / 

mayr

 ®

 article no. 8277826), which is inserted into the bore 

10 on the back of the coil carrier (1) (Fig. 9).  

ATTENTION 

The hand release lever (6.1) may be locked for 
a maximum of 20 minutes, as otherwise the 
damping elements (11) will be damaged.


2.  Push the released brake over the brake disk and position it 

so that both screws (10) can be screwed in. 


While pushing the brake over the brake disk, 
please make sure that the friction linings are 
not damaged. 

3.  Screw in the screws (10) and tighten to a 

tightening torque 

of 710 Nm

4.  Remove the auxiliary device and the bolt (6.4 / 

mayr


®

 article 

number 8277826) for releasing the brake. 

5.  Switch the brake 3 - 4 times so that it aligns with the brake 

disk. 

6. 

Check that the brake moves axially on the pad (7). It 
must be possible to move the opened brake in the guide 
by hand. On an engaged brake, there must be a gap of at 
least 2 mm between the pad (7) and the counterplate (3) 
as well as between the pad (7) and the armature disk (2), 
see Fig. 7.


7. 

Check the air gaps "a" (Fig. 2) between the coil carrier 
(1) and the armature disk (2).


In new condition, the air gap "a" must be max. 1 mm on a 
de-energised brake. Measurements on both sides at friction 
pad (4) level 

– calculate the average. 

8.  On the de-energised brake, tighten the cap screws (17) with 

9 Nm. 

9.  Energise the brake. 

10.  Measure the effective air gap between the friction lining and 

the side of the brake disk facing away from the screw-on 
surface on the right and left-hand sides and calculate the 
difference between the measurement values. 
The 

differential dimension must 

be 

< 0.3 mm 

11.  Turn the brake disk. The brake disk must not rub against 

anything. 


Fig. 9 


Depicted in the released position, with inserted bolt (6.4) 


Содержание ROBA-diskstop 894.5 Series

Страница 1: ...mes Contents Page 1 Contents Page 2 Safety and Guideline Signs Certificates Guidelines on EU Directives Page 3 Safety Regulations Page 4 Safety Regulations Page 5 Safety Regulations Page 6 Brake Illus...

Страница 2: ...863 EU RoHS III from 22 July 2019 These restrict the use of certain hazardous substances in electrical and electronic devices as well as in products components category 11 the proper operation of whic...

Страница 3: ...ent switch on Guidelines for Electromagnetic Compatibility EMC In accordance with the EMC directive 2014 30 EU the individual components produce no emissions However functional components e g mains si...

Страница 4: ...intended for use in electrically operated elevators and goods elevators Furthermore this brake can also be used as a braking device acting on the traction sheave or the shaft of the traction sheave a...

Страница 5: ...5 EU RoHS II Directive 2015 863 EU RoHS III Directive CSA C22 2 No 14 2010 Industrial Control Equipment UL 508 Edition 17 Industrial Control Equipment 2014 33 EU Elevator Directive EN 81 20 Safety rul...

Страница 6: ...27 08 2020 TK TL GC SU Chr Mayr GmbH Co KG Eichenstra e 1 D 87665 Mauerstetten Germany Phone 49 8341 804 0 Fax 49 8341 804 421 Page 6 of 17 www mayr com E Mail public mayr mayr de Fig 1 Fig 2 Fig 3 Fi...

Страница 7: ...nd 10 B 8 4 5 EN 27 08 2020 TK TL GC SU Chr Mayr GmbH Co KG Eichenstra e 1 D 87665 Mauerstetten Germany Phone 49 8341 804 0 Fax 49 8341 804 421 Page 7 of 17 www mayr com E Mail public mayr mayr de Fig...

Страница 8: ...24 6 Hand release assembly 1 1 6 1 Hand release lever 1 1 6 2 Lock washer 1 1 6 3 Spring pin 2 2 6 4 Bolt 1 mayr article number 8277826 Fig 9 1 1 7 Carrier assembly 1 1 7 1 Guide bolt 1 1 1 7 2 Guide...

Страница 9: ...trical IP54 IP54 Protection mechanical IP10 IP10 Duty cycle with 180 switchings per hour 60 60 Electrical connection of the magnetic coil 2 x 0 88 mm2 2 x 0 88 mm2 Electrical connection of the microsw...

Страница 10: ...0 360 Drop out t 90 DC 2 from overexcitation 310 230 750 380 Drop out t 11 AC on request 450 on request 600 Drop out t 1 AC 3 on request 900 on request 1000 2 Referring to the nominal braking force 3...

Страница 11: ...reliably and safely in the event of a power switch off a power failure or an EMERGENCY STOP Scope of Delivery State of Delivery The brakes are manufacturer assembled ready for installation The release...

Страница 12: ...77826 which is inserted into the bore 10 on the back of the coil carrier 1 Fig 9 ATTENTION The hand release lever 6 1 may be locked for a maximum of 20 minutes as otherwise the damping elements 11 wil...

Страница 13: ...ncy Furthermore friction materials synthetic resin bonded rubber mixtures are subject to ageing which is also influenced among other things by higher temperatures and other ambient influences We recom...

Страница 14: ...causes the current to increase slowly as an exponential function Accordingly the build up of the magnetic field takes place more slowly and the braking torque drop curve 1 is also delayed Field Build...

Страница 15: ...Usage category acc IEC 60947 5 1 DC 12 resistance load DC 13 inductive load Wear Monitoring Item 13 Fig 5 Optional only for Size 10 The ROBA diskstop brakes are supplied optionally with manufacturer s...

Страница 16: ...ventilated using appropriate technology Additional information This friction lining asbestos free is not a dangerous product in terms of the EU Directive Cleaning the Brake Do not clean the brake usin...

Страница 17: ...ion Possible Causes Solutions Brake does not release Incorrect voltage on rectifier Rectifier failure Air gap too large worn friction lining Coil interrupted Incorrect rectifier e g normal rectifier w...

Отзывы:

Похожие инструкции для ROBA-diskstop 894.5 Series