background image

Installation and Operational Instructions for BRE250 and BRE400


ROBA-stop

®

-M brake Type 891.


0_ _._


Sizes 250 and 500


(E070 09 203 001 4 EN)


31/10/2019 TK/MW 

Chr. Mayr GmbH + Co. KG


Eichenstraße 1, D-87665 Mauerstetten, Germany


Phone: +49 8341 804-0, Fax: +49 8341 804-421


Page 16 of 20 

www.mayr.com

E-Mail

[email protected]


your reliable partner


Optional microswitch for brake monitoring 
(Items 13/14 / Figs. 3 and 7) 


If you require a release monitoring device or a 
wear monitoring device, please state this ex-
plicitly when ordering your brake. 


Microswitches cannot be guaranteed fail-safe. 
Therefore, please ensure appropriate access for 
replacement or adjustment. 
The switching contacts are designed so that they 
can be used for both small switching powers and 

medium ones. However, after switching a medium switching 
power, small switching powers are no longer reliably possible. 
In order to switch inductive, capacitive and non-linear loads, 
please use the appropriate protection circuit to protect against 
electric arcs and unpermitted loads! 


Microswitch Specification 

Characteristic values for 
measurement: 

250 V~ / 3 A 

Minimum switching power: 

12 V, 10 mA  DC-12 

Recommended switching 
power:


for maximum lifetime  
and reliability


24 V, 10...50 mA  
DC-12  
DC-13 with freewheeling di-
ode! 

Usage category acc. IEC 60947-5-1: 
DC-12 (resistance load), DC-13 (inductive load) 


If a replacement or new adjustment of a micro-
switch is required  
by the customer, separate adjustment instruc-
tions stating the article or serial number of the 
respective brake can be requested from the 
manufacturer. 


Release Monitoring (Item 13) 

The brakes are supplied optionally with manufacturer-side in-
stalled and adjusted release monitoring device. 
A microswitch emits a signal for every brake condition change: 
“brake opened” or “brake closed”. 
 

The customer is responsible for a signal evaluation of both 
conditions. 

From the point at which the brake is energised, a time span of 
three times the separation time must pass before the micro-
switch signal on the release monitoring is evaluated. 
 

Function 

When the magnetic coil is energised in the coil carrier (2), the ar-
mature disk (3) is attracted to the coil carrier (2), the microswitch 
emits a signal, the brake is released. 


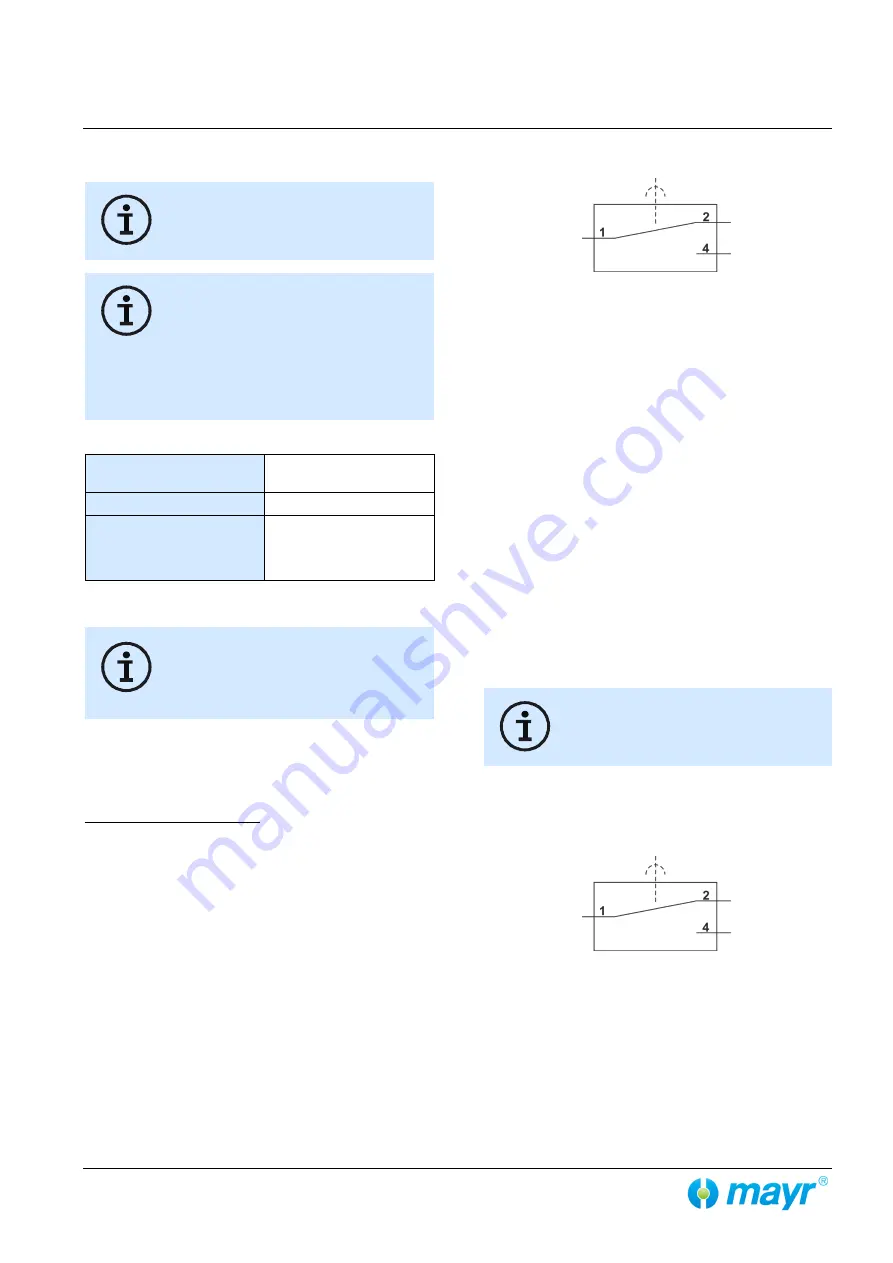
Wiring Diagram of the Microswitch for Release Moni-
toring 


Customer-side Inspection after Attachment  

Carry out a functional inspection before brake initial operation. 

for connection as NO contact: 

  Brake 

de-energised

: Inspection lamp must signal 

“OFF”

  Brake 

energised

: Inspection lamp must signal 

“ON”


for connection as NC contact: 

  Brake 

de-energised

: Inspection lamp must signal 

“ON”

  Brake 

energised

: Inspection lamp must signal 

“OFF”


Wear Monitoring (Item 14) 

The brakes are supplied optionally with manufacturer-side in-
stalled and adjusted wear monitoring device. 
 

Function 

Due to wear on the rotor (4), the air gap “a” between the coil car-
rier (2) and the armature disk (3) increases. 
Once the limit air gap of 

0.95 mm for Size 250

 or 

1.0 mm for 

size 500

 has been reached, the microswitch contact switches 

over and emits a signal. 
The rotor (4) must be replaced. 


Customer-side changes of the spring configura-
tion have an effect on the maximum permitted 
air gap. 


The customer is responsible for a signal evaluation. 


Wiring Diagram of the Microswitch for Wear Monitor-
ing  


COM contact 

Brown connection 

NC contact 
Black connection 
Connection when  
wear limit 
has been reached 

NO contact 
Blue connection 
Connection when  
wear limit 
has not yet been 
reached 

COM Contact 

Brown connection 

NC contact 
Black connection 
Connection when  
brake closed 

NO contact 
Blue connection 
Connection when  
brake released 

Содержание BRE250

Страница 1: ...5 IP66 Mayr ROBA stop M 250 500 Issue status 2019 10 Translation of the Original Operational Instructions Copyright by mayr power transmission All rights reserved Reprints and copies even extracts are...

Страница 2: ...delivery Please keep them handy and near to the brake at all times Contents Page 1 Front page Page 2 Contents Page 3 Safety and Guideline Signs Guidelines on EU Directives Page 4 Safety Regulations Pa...

Страница 3: ...863 EU RoHS III from 22 July 2019 These restrict the use of certain hazardous substances in electrical and electronic devices as well as in products compo nents category 11 the proper operation of whi...

Страница 4: ...e and secure the system against inadvertent switch on Guidelines for Electromagnetic Compatibility EMC In accordance with the EMC directive 2014 30 EU the individual components produce no emissions Ho...

Страница 5: ...components on the magnetic coils are manufac tured at least to class of insulation F 155 C Protection IP54 Type 891 0_ _ 0 Dust proof and protected against contact as well as against wa ter spray from...

Страница 6: ...on DIN EN 61000 6 2 Interference immunity Liability The information guidelines and technical data in these docu ments were up to date at the time of printing Demands on previ ously delivered brakes ar...

Страница 7: ...erstetten Germany Phone 49 8341 804 0 Fax 49 8341 804 421 Page 7 of 20 www mayr com E Mail info mayr com your reliable partner Brake Illustrations Size 250 Fig 1 Type 891 0_ _ 0 Fig 2 Type 891 0_ _ 0...

Страница 8: ...ten Germany Phone 49 8341 804 0 Fax 49 8341 804 421 Page 8 of 20 www mayr com E Mail info mayr com your reliable partner Brake Illustrations Size 500 Fig 5 Type 891 0_ _ 0 Fig 6 Type 891 0_ _ 0 337 Bi...

Страница 9: ...nsioning acc spring dimensioning 6 Cap screw M10 x 110 DIN EN ISO 4762 3 6 7 Sealing plug 2 D16 12 x 1 5 1 Screw plug M16 x 1 5 with O ring 1 8 Shoulder screw D18 x 44 2 2 9 Cone plug only on Type 891...

Страница 10: ...0 05 mm 0 40 0 2 mm Max permitted air gap a after wear Figs 2 4 6 8 1 0 95 mm 1 0 mm Minimal width of the counter friction surface 14 mm 19 mm Tightening torque Item 6 45 Nm 45 Nm Tightening torque It...

Страница 11: ...th ing of the rotor 4 and the hub 1 Electromagnetic function release Due to the magnetic force of the coil in the coil carrier 2 the ar mature disk 3 is attracted against the spring pressure to the co...

Страница 12: ...ain from using cleaning agents containing sol vents as they could affect the friction material Protect the rotor from rusting up seizing up against the bearing shield the flange plate customer side We...

Страница 13: ...tion of the system EMERGENCY STOP only after brake run in procedure Please carry out conditioning of the friction lining pairing through dynamic braking procedures of the system Recommendation Approx...

Страница 14: ...rrent does not immediately reach its nominal value The coil in ductivity causes the current to increase slowly as an exponential function Accordingly the build up of the magnetic field takes place mor...

Страница 15: ...For 60 Hz operation the max permitted friction work values must be reduced to 70 Friction power diagram for RSM 250 BRE 250 Friction power diagram for RSM 500 BRE 400 Permitted friction work at other...

Страница 16: ...microswitch emits a signal for every brake condition change brake opened or brake closed The customer is responsible for a signal evaluation of both conditions From the point at which the brake is ene...

Страница 17: ...ed by Checking the air gap see above Max permitted air gap see Table 1 Measuring the rotor thickness on the dismantled brake See Table 1 for the minimum rotor thickness We recommend the following regu...

Страница 18: ...ous property Attention H classification H372 Protective measures and rules of behaviour Do not inhale dusts Vacuum the dusts at the point of origin tested suction devices tested filters acc DIN EN 603...

Страница 19: ...o DC voltage Check voltage observe the wiring guidelines Defective electrical wiring Check electrical wiring Defective coil coil is electrically or thermally overloaded Check coil capacity check insul...

Страница 20: ...Check the spring configuration have the brake checked at the place of manufacture Drop in braking torque Excessive wear on the rotor Wear inspection Changes to the friction behaviour on the friction l...

Отзывы:

Похожие инструкции для BRE250