


Front panel user Interface > Menu structure
48
© 2012 MAYAH Communications
Operating Manual for FLASHMAN II
·
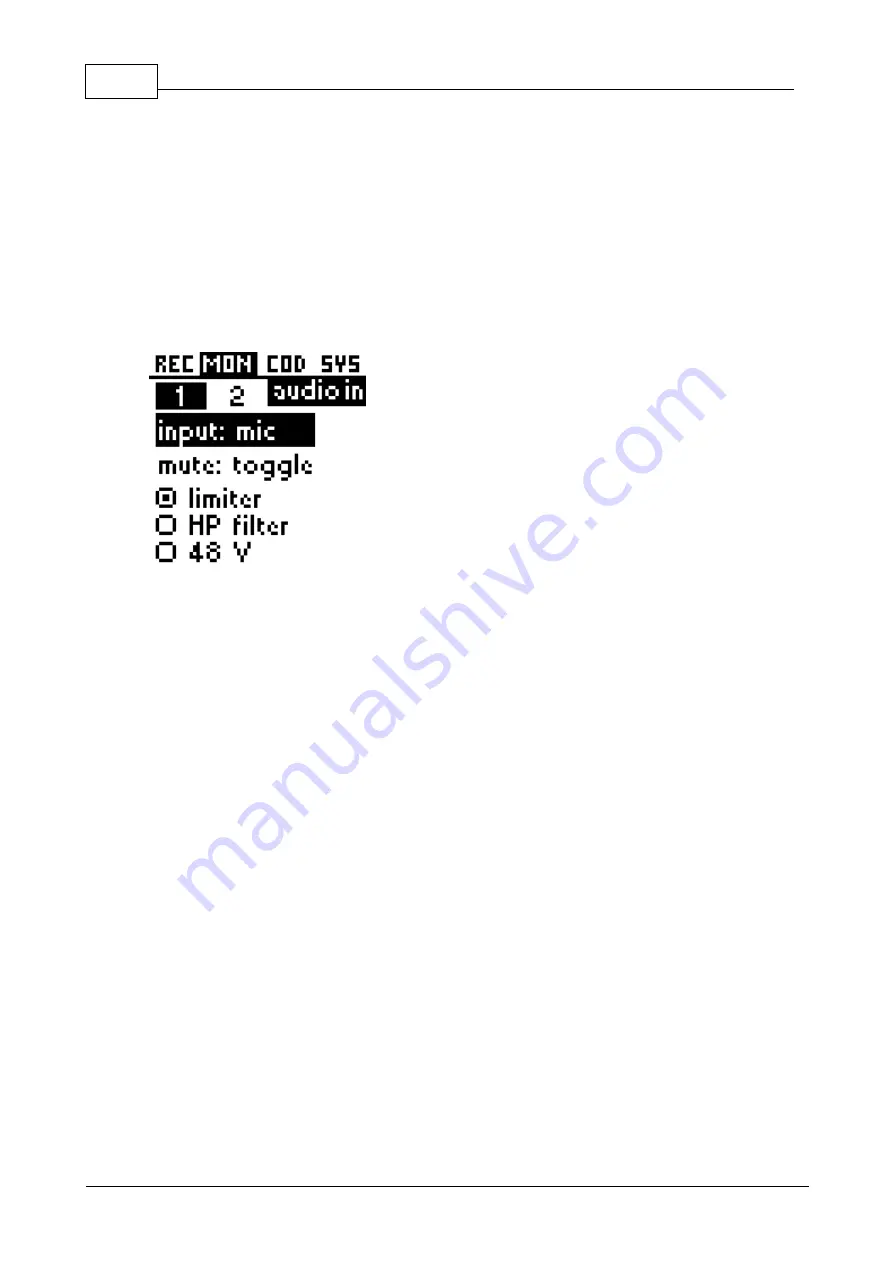
Mute Mode
Mute function can be set independently for audio inputs 1 and 2 to:
- Hold (default): mute when corresponding button is hold
- Toggle: mute can be switched 'on' and 'off' by pressing corresponding
button
·
Limiter
The limiter guarantees that too high audio input levels are not just cut off
(which caused big distortions) but softly clipped.
b) Mic level
·
Mute Mode
Mute function can be set independently for audio inputs 1 and 2 to:
- Hold (default): mute when corresponding button is hold
- Toggle: mute can be switched 'on' and 'off' by pressing corresponding
button
·
Limiter
The limiter guarantees that too high audio input levels are not just cut off
(which caused big distortions) but softly clipped.
·
HP filter
Just available for microphone input
This feature prevents that low frequencies at audio input damages audio
equipment.
·
48 V
Just available for microphone input
48 V phantom power enables to use FLASHMAN II with condenser
microphones
·
c) mic+ (analog, mic+ level)
Mic+ is made for higher microphone levels (e.g. loud neighbourhood in football
stadiums) or microphones with higher output voltages. Other settings are the
same as for mic
d) mic++ (analog, mic++ level)
Mic++ is made for very high microphone levels (e.g. very loud neighbourhood in
Содержание FLASHMAN II
Страница 1: ...2012 MAYAH Communications Operating Manual for FLASHMAN II...
Страница 5: ...Part I Introduction...
Страница 9: ...Part II First Start...
Страница 21: ...Part III Front panel user Interface...
Страница 79: ...Part IV How to use for...
Страница 83: ...Part V Technical specifications...
Страница 86: ......


