18
Cockpit
Before you start your first training session
After assembling your Speedbike and before starting with your first training session, please check if the cockpit
is receiving the signal correctly.
Insert two type AAA 1.5-volt batteries into the cockpit. Pedal for at least 2 minutes using the pedals. During this
time, make sure that the cockpit has a perfect connection to the sensor. As soon you have completed this test,
the cockpit will show the training data and you can now start with your training session.
Repeat this procedure each time you change the batteries.
Changing the Batteries
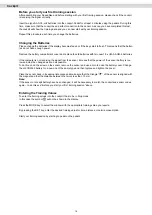
Please change the batteries if the display becomes faded or if the keys start to flash. This means that the batter
-
ies do not have enough power.
Remove the battery compartment cover and replace the old batteries with two new 1.5-volt AAA UM-4 batteries.
If the computer is not receiving the signal from the sensor, it means that the power of the sensor battery is too
low and must be changed as soon as possible.
To do this, undo the screw on the sensor, remove the sensor and use a coin to undo the battery cover. Change
the old CR2032 battery for a new one of the same type and then replace and tighten the cover.
Place the sensor back in its appropriate place and make sure that the triangle “ ” of the sensor is aligned with
the magnet and that the distance between the two is less than 10 mm.
Note:
If the sensor or cockpit battery have been changed, it will be necessary to match the cockpit and sensor codes
again – to do this see “Before you start your first training session” above.
Entering the Training Values
To enter the training values into the cockpit it has to be in Stop mode.
In this case the symbol will not be shown in the display.
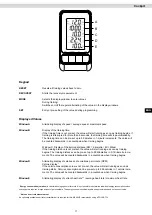
Press the MODE key to select the window with the appropriate training value you require.
By pressing the SET key, enter the desired training value for time, distance or calorie consumption.
Start your training session by starting to pedal on the pedals.

