8
ENGLISH
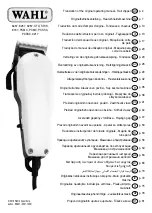
HAIR CLIPPER SET MW-2110 SR
The unit is intended for hair cutting.
DESCRIPTION
1.
Power adapter cord connection socket
2.
Power Battery On/ charging indicator
3.
Power switch «0/I»
4.
Unit body
5.
Adjustable (upper) blade
6.
Stationary (lower) blade
7.
3-6 mm Attachment
8.
9-12 mm Attachment
9.
Comb
10.
Power adapter
11.
Cleaning brush
12.
Lubricating oil
13.
Scissors
SAFETY MEASURES
Before using the unit, read this instruction manual
carefully and keep it for future reference. Use the
unit for intended purposes only, as specified in this
manual.
Mishandling the unit can lead to its breakage and
cause harm to the user or damage to his/her
property.
•
Before connecting the unit to the mains for bat-
tery charging for the first time, make sure that
your home mains voltage corresponds to the
power adapter operating voltage.
•
Use only the attachments and the power adapt-
er supplied with the unit.
•
Do not use the unit in places with high tempera-
ture and relative humidity more than 80%.
•
Charge the battery at the temperature from +5°C
to +35°C.
•
Never use the unit if the attachments or the
blades are damaged.
•
Do not use the unit to cut hair on pets.
•
Always keep the blades clean and lubricated.
•
After each use, clean the attachments with the
brush to remove the cut-off hair.
•
Never leave the unit unattended when it is oper-
ating or during battery charging
•
Switch the unit off during intervals in operation
or when you are not using it.
•
The power adapter cord must not:
–
touch hot objects and surfaces,
–
be immersed into water,
–
run over sharp edges of furniture,
–
be used as a handle for carrying the unit.
•
Never pull the power adapter cord, when dis-
connecting the unit from the mains, take the
power adapter and carefully remove it from the
mains socket.
•
Clean the unit regularly.
•
Do not immerse the unit body, the power adapt-
er or the power adapter cord into water or other
liquids.
•
Do not touch the power adapter body with wet
hands.
•
Do not leave children unattended to prevent
using the unit as a toy.
•
For children safety reasons, do not leave poly-
ethylene bags used as packaging unattended.
Attention! Do not allow children to play with poly-
ethylene bags or packaging film. Danger of suf-
focation!
•
Do not allow children to touch the power adapter
body during battery charging.
•
This unit is not intended for usage by children
under 8 years of age.
•
This unit is not intended for usage by people
(including children over 8) with physical, neural
and mental disorders or with insufficient experi-
ence or knowledge. Such persons may use this
unit only if they are under supervision of a per-
son who is responsible for their safety and if they
are given all the necessary and understandable
instructions concerning the safe usage of the
unit and information about danger that can be
caused by its improper usage.
•
Never use the unit if the power adapter or
the power adapter cord is damaged, if the
unit works improperly or after the unit was
dropped.
•
Do not disassemble the unit by yourself, if
any malfunction is detected or after it was
dropped, apply to the nearest authorized ser-
vice center.
•
Transport the unit in the original package only.
•
Keep the unit out of reach of children and dis-
abled persons.
THE UNIT IS INTENDED FOR HOUSEHOLD USAGE
ONLY
USING THE HAIR CLIPPER
After unit transportation or storage under win-
ter (cold) conditions, it is necessary to keep
it for at least two hours at room temperature.
Battery charging
A fully charged battery provides about 60 minutes of
continuous unit operation.
•
Make sure that the «0/I» power switch (3) is in
the «0» position.
•
Insert the power adapter (10) cord plug into the
socket (1).
•
Insert the power adapter into the mains socket,
the indicator (2) will light up.
•
Before the first usage of the unit, charge the
battery for 12 hours.
MW_2110.indd 8
25.04.2014 17:27:28
Содержание MW-2110 SR
Страница 1: ...MW 2110 SR 4 8 15 11 19 MW_2110 indd 1 25 04 2014 17 27 27...
Страница 2: ...MW_2110 indd 2 25 04 2014 17 27 27...
Страница 3: ...MW_2110 indd 3 25 04 2014 17 27 28...
Страница 15: ...15 MW 2110 SR 1 2 3 0 I 4 5 6 7 3 6 8 9 12 9 10 11 12 13 80 5 C 35 C 8 8 MW_2110 indd 15 25 04 2014 17 27 29...
Страница 19: ...19 MW 2110 SR 1 2 3 0 I 4 5 6 7 3 6 8 9 12 9 10 11 12 13 80 5 C 35 C 8 8 MW_2110 indd 19 25 04 2014 17 27 29...
Страница 24: ...2014 GOLDER ELECTRONICS LLC 2014 MW_2110 indd 24 25 04 2014 17 27 30...