background image


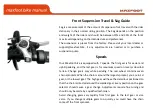
Hand Throttle Control 

 
When the pedal assist mode is set to “0”, the pedal assist function(s) 
do not engage. The throttle control still work. 
 
The throttle control is operated on the right hand side.   
 
You  control  the  throttle  by  twisting  it  from  its  resting  position.  The 
farther  the  throttle  switch  is  from  its  resting  position,  the  more 
power is delivered to the motor to accelerate the MaxFoot.   
 
When you want to slow down, you simply release the throttle and let 
it return to its resting position and simultaneously apply the brakes.   
 
The  MaxFoot  also  comes  with  a  Throttle  Override  function  which 
allows the throttle to work in pedal assist modes. 
 

NOTE: THE THROTTLE WITH A SWITCH 


Содержание MF-19

Страница 1: ......

Страница 2: ...s or to commute to work while saving money on gas and reducing your environmental impact on our world It also gives you an opportunity to pedal if you want to exercise along the way If you have any concerns questions or suggestions about the MaxFoot electric bikes please contact us at support maxfoot bike PLEASE NOTE THIS MANUAL IS NOT INTENDED TO BE A DETAILED SERVICE REPAIR OR MAINTENANCE MANUAL...

Страница 3: ...Register Your MaxFoot Electric Bikes to Join The MaxFoot Owners Group PLEASE REGISTER YOUR MAXFOOT ELECTRIC BIKES AT https www facebook com groups maxfootownersgroup ...

Страница 4: ...ts may react to wear or stress fatigue in different ways If the design life of a component has been exceeded it may suddenly fail possibly causing injuries to the rider Any form of crack scratches or change of coloring in highly stressed areas indicate that the life of the component has been reached and it should be replaced For replacement parts technical information and warranty assistance pleas...

Страница 5: ...6 Hand Throttle Control 12 About Charging 13 Battery Charging 14 Safety 15 Additional Safety 16 One Year Limited Warranty Battery Components 17 Terms of Limited Warranty 18 How To Use The LCD Display 25 Continual Mileage 27 The Wiring Diagram With LCD Display 29 Troubleshooting 31 ...

Страница 6: ...e box and gently rest it in place 2 Remove all of the inside cardboard protection and bubble wrap 3 Locate and set aside the kit box containing the battery charger pedals this user s manual headlight taillight and tool kit 4 Loosen the bolts on the front wheel install the front wheel by lining up the disc brake and place the fork of the bike onto the front wheel 5 Twist the bolts to tight the fron...

Страница 7: ...ut the handlebar onto the front fork where you removed the parts and protection from step 1 3 Align the front fork front wheel and handlebar 4 Put the long screw into the hole from the head tube underneath the latch and tighten it by hand then an Allen key clockwise 5 Lock up the latch and tighten the two small screws on the head tube Video https www youtube com watch v 2 fxSShk KwY ...

Страница 8: ... front brake to slow or stop at high speeds may result in the rider being ejected from the saddle and continuing forward over the handlebars It is best to apply even pressure to both brake levers when slowing or stopping Bicycles equipped with disc brakes will occasionally make a slight scraping noise when the wheels are turning without the brakes being applied This is normal WARNING Disc brake ro...

Страница 9: ...rakes Bed in Procedure New brakes will require a bed in procedure prior to your first ride which will ensure the most consistent and powerful braking feel 1 Find a safe riding area that will allow for moderate speed Remain seated during the entire procedure for optimal results Important Note Do not lock up the wheels at any point during the bed in procedure 2 Accelerate the bike to a moderate spee...

Страница 10: ...own to adjust it Move the clamp handle inward toward the seat post so it is held tight by the clamp This should require a fair amount of force to ensure the seat post is held tight Turning the bolt clockwise will increase the clamping force and counter clockwise will decrease the clamping force Make sure the seat is not set with the vertical maximum height marks above the clamp ...

Страница 11: ...tighten the pedals PLEASE NOTE The pedals are marked L for Left and R for Right The left pedal is attached by turning it counterclockwise and the right pedal is tightened by turning it clockwise Make sure the pedals are tightly attached to the crank arms to prevent stripping ...

Страница 12: ... 7 speeds The first gear is for easier and uphill pedaling and the last gear is for maximum speed on level or downhill terrain Change gears only while pedaling The rear wheel contains seven chain sprockets When the chain is around the largest sprocket you are in 1st gear or the lowest gear The high gear will have the derailleur positioned so that the chain is directed around the smallest gear Ever...

Страница 13: ...ironment It is also recommended to apply chain lube to the drivetrain of your bike when you clean it or wipe it down to keep it in good running condition Monthly clean your drivetrain and inspect chain for wear re apply lubricant to the chain and wipe off any excess with a rag Check wheels for loose spokes tighten if necessary Check the tightness of stationary and moving parts such as the crank ar...

Страница 14: ...rom its resting position The farther the throttle switch is from its resting position the more power is delivered to the motor to accelerate the MaxFoot When you want to slow down you simply release the throttle and let it return to its resting position and simultaneously apply the brakes The MaxFoot also comes with a Throttle Override function which allows the throttle to work in pedal assist mod...

Страница 15: ...ting fire or even explosion Recharging the Battery The MaxFoot battery may be charged while on the bike or removed and charged at a location away from the E bike The battery is easily removed by turning the key lock to the open unlock position folding the frame of the bike pulling out the battery from the frame To charge the battery plug the charger into an AC outlet The LED indication light shoul...

Страница 16: ...ty will decrease If you find that your battery does not hold a sufficient charge you should contact MaxFoot to order a replacement Please fully charge the battery at least once a month when the E bike is not in use Recharge battery after every use Do not disassemble or alter the battery or battery charger Do not place the battery near fire or corrosive substances Do not allow any liquids on or ins...

Страница 17: ...y ride Make sure no nuts bolts or accessories are loose with particular attention to the front axle and handlebar stem Make sure the tires are correctly inflated with the recommended air pressure that is located on the side wall of every tire Check the brakes for proper operation You must take your bike in to be serviced and checked by a qualified bike mechanic after 100 miles 160 kilometers of ri...

Страница 18: ... rear of the bike Weight Capacity MaxFoot Electric Bikes are designed with a maximum weight capacity of 300 pounds 136 kg for Tricycles and most models When bikes are equipped with fat tires the weight capacity increases to 350 pounds 158 kg Exceeding the maximum weight capacity can result in damage of the bike which can lead to serious injury Note We don t recommend to use MaxFoot E Bikes in the ...

Страница 19: ... an assumption of the risks involved in cycling cycling with cargo and cycling with a passenger Children are highly recommended not to ride on any of MaxFoot electric bicycles or tricycles It is very dangerous and high opportunity cause of serious injury Use Good Judgment Make sure no straps are dangling where they could get caught in the wheels No bags boxes or any items are in a position where t...

Страница 20: ...plicable taxes and any shipping or transportation costs incurred in returning the battery to MaxFoot Electric Bikes for evaluation THIS IS MaxFoot ELECTRIC BIKES EXCLUSIVE WARRANTY NO PARTY IS GRANTED EXPRESS OR IMPLIED AUTHORITY TO CHANGE OR ANNUL THIS WARRANTY IN ANY MANNER IMPLIED WARRANTIES INCLUDING THAT OF MERCHANTABILITY AND FITNESS FOR A PARTICULAR PURPOSE ARE EXPRESSLY LIMITED FOR THE DUR...

Страница 21: ...r warranties not expressly set forth herein whether express or implied by operation of law or otherwise including but not limited to any warranties of merchantability or fitness for a particular purpose In no event shall MaxFoot be liable for incidental consequential or punitive damages arising from use or unavailability of the Bicycle or component s in any manner including without limitation dama...

Страница 22: ...ry or region may not be transferred to another country or region where MaxFoot or its authorized service providers offer warranty service for the same product model number Warranty terms service availability and service response times may vary from country or region to country or region MaxFoot will not alter form fit or function of this MaxFoot product to make it operate in a country for which it...

Страница 23: ...downhill X Game or similar activities or any activity that is not consistent with the intended use of the bicycle Damages resulting from failure to follow Instructions for Use and Warnings as provided in the Owner s Manual for the Bicycle Damages resulting from improper care or use of the battery or charger Installation of components parts or accessories that are not originally intended for or com...

Страница 24: ... may also have other legal rights which vary from countries to state or province to province This warranty does not affect the statutory rights of the consumer Some countries and states do not allow the exclusion or limitation of incidental or consequential damages or warranties so some of the above limitations or exclusions may not apply to you If it is determined by a court of competent jurisdic...

Страница 25: ......

Страница 26: ...conds The LCD meter on your MaxFoot can be programmed to change various functions Hold UP Down for 3 seconds to enter the setup interface Single press Mode to cycle through the following modes SET 1 Set the Wheel size SET 2 Set the Max speed SET 3 Set the Display light SET 4 Set the Bike in either MPH or KPH ...

Страница 27: ...r off road Default max speed is 32 KMH and can be freely set between 12 and 40 KMH by using UP or DOWN confirm by pressing MODE 4 Back Light Brightness The third setting parameter regulates the back light brightness Press UP or DOWN to modify the brightness of the back light and confirm by pressing MODE 5 Measuring Unit The fourth setting parameter regulates the choice of the display s measuring u...

Страница 28: ...istance This function is convenient for users to check the riding distance TRIP and the total distance ODO Press mode and down button together to reset the trip meter to zero 12 Cruise Control Press DOWN for 3 5 seconds to get into constant speed mode In this mode the bike will automatically travel at a constant speed of 6Km h 13 Night Mode Hold both UP and MODE for 3 seconds to turn on the LCD ba...

Страница 29: ......

Страница 30: ... is not the vehicle will receive no power causing all of the electronics to not turn on For any additional troubleshooting help please contact Support maxfoot bike 21 Abnormal Current Check if the phase of motor is short circuiting 22 Abnormal Throttle Check whether the throttle is functioning properly 23 No Phase State Check if the phase wire is normal or check if the cable is firmly connected wi...

Страница 31: ...ou simply have fun with your bike purchased from us Please follow our facebook youtube also may some extra bonus if you pay attention to www maxfoot bike Welcome to join our Facebook Group MaxFoot OWNERS GROUP for share your treasure experience and comments Everyone who supports us with video and picture materials can get a present from us The size of the gift will be determined by the quality of ...

Страница 32: ......

Отзывы: