Manual CT35-IP & CT45IP Last update:December 2013
www.max-power.com
4
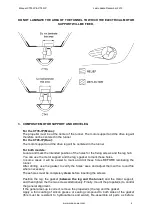
DO NOT LAMINATE THE AREA OF THE TUNNEL TO WHICH THE ELECTRICAL MOTOR
SUPPORT WILL BE FIXED.
3. COMPOSITE MOTOR SUPPORT AND DRIVE LEG
For the CT35-IP (Mono):
The propeller must be at the center of the tunnel. The motor support and the drive leg will
therefore not be centered in the tunnel.
For the CT45-IP (Duo):
The motor support and the drive leg will be centered in the tunnel.
For both models:
Locate and mark the intended position of the holes for the fixing screws and the leg hub.
You can use the motor support and the leg’s gasket to mark these holes.
In some cases it will be easier to mark and drill these holes BEFORE laminating the
tunnel.
After drilling, use the gasket to verify the holes’ axes and adjust them with a round file
where necessary.
These holes must be completely
clean
before inserting the screws.
Position the leg, the gasket (
between the leg and the tunnel
) and the motor support,
and then tighten the the two screws alternatively. Finally, mount the propeller(s) to control
the general alignment.
If the general set-up is correct, remove the propeller(s),the leg and the gasket.
Apply a thin coating of silicon grease or sealing compound to both sides of the gasket
(this must be resistant to hydrocarbons and water). Re-assemble all parts as before,
Содержание CT35-IP
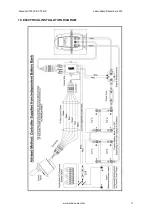
Страница 12: ...Manual CT35 IP CT45IP Last update December 2013 www max power com 11 19 ELECTRICAL INSTALLATION DIAGRAM ...
Страница 13: ...Manual CT35 IP CT45IP Last update December 2013 www max power com 12 20 RELAY AND CONTROL BOX CONNECTIONS ...
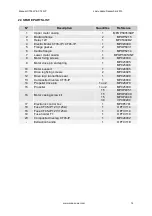
Страница 14: ...Manual CT35 IP CT45IP Last update December 2013 www max power com 13 21 SPARE PARTS DIAGRAM ...

