1 Introduction
1-3
Matsusada Precision
AK series
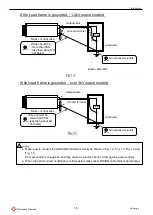
● Contact us for repair. The power supply should be repaired by us.
● In case the welding process is presence nearby the power supply, unplug all the connections
from the power supply.
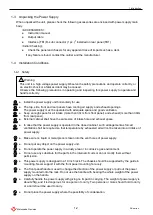
1-4-2 Connecting AC Line Input Cord
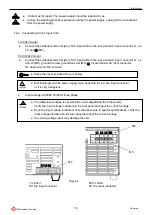
1 to 60kV model
●
Connect the solderless terminal (
φ4) of AC input cable to the rear panel AC input connector L1, L2,
L3, and (M4).
80 to 120kV model
●
Connect the solderless terminal (
φ6) of AC input cable to the rear panel AC input connector L1, L2
and L3 (M6), ground to screw ground terminal (M5) located below AC input connector.
Do not connect to NC terminal.
● Place the cover enclosed for your safety.
● Electrically ground the power supply main body with the AC line input connector,
or it is very dangerous.
●
Input voltage: AC208V 50/60Hz three phase
● The rated input voltage is set when the unit is dispatched from the factory.
Verify the input voltage indicated on the rear panel and input the correct voltage.
● Even the input voltage is different from the above due to special specifications, verify the
input voltage indicated on the rear panel and input the correct voltage
● Any wrong voltage input may damage the unit.
L3
L2
L1
NC
!
CAUTION
!
!
CAUTION
Must
1 to 60kV:
AC line input connector
L1 L2 L3
M4
80 to 120kV:
AC line input connector
M6
M5
Fig. 1.1
Содержание AK Series
Страница 1: ...Instruction Manual F RA 001 3R2 MODEL AK series 3kW 4kW B N 030 9 010 030 9 010 Rev 1 0 ...
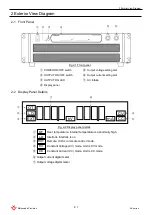
Страница 17: ...2 Exterior View Diagram 2 3 Matsusada Precision AK series 2 4 Dimensions 1 to 60kV ...
Страница 18: ...2 Exterior View Diagram 2 4 Matsusada Precision AK series 2 5 Dimensions 80 to 120kV Plastic foot ...
Страница 31: ...Matsusada Precision AK series ...
Страница 32: ......


