


22
23
Z13
C21
Z11
Z12
AC2
P02
P11
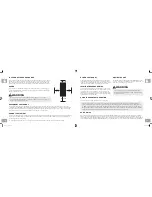
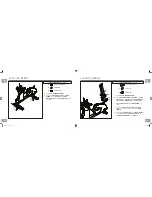
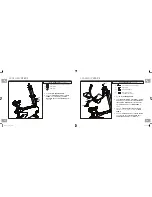
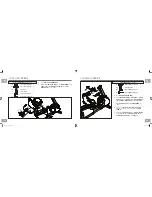
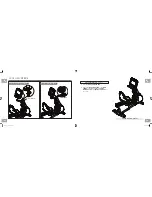
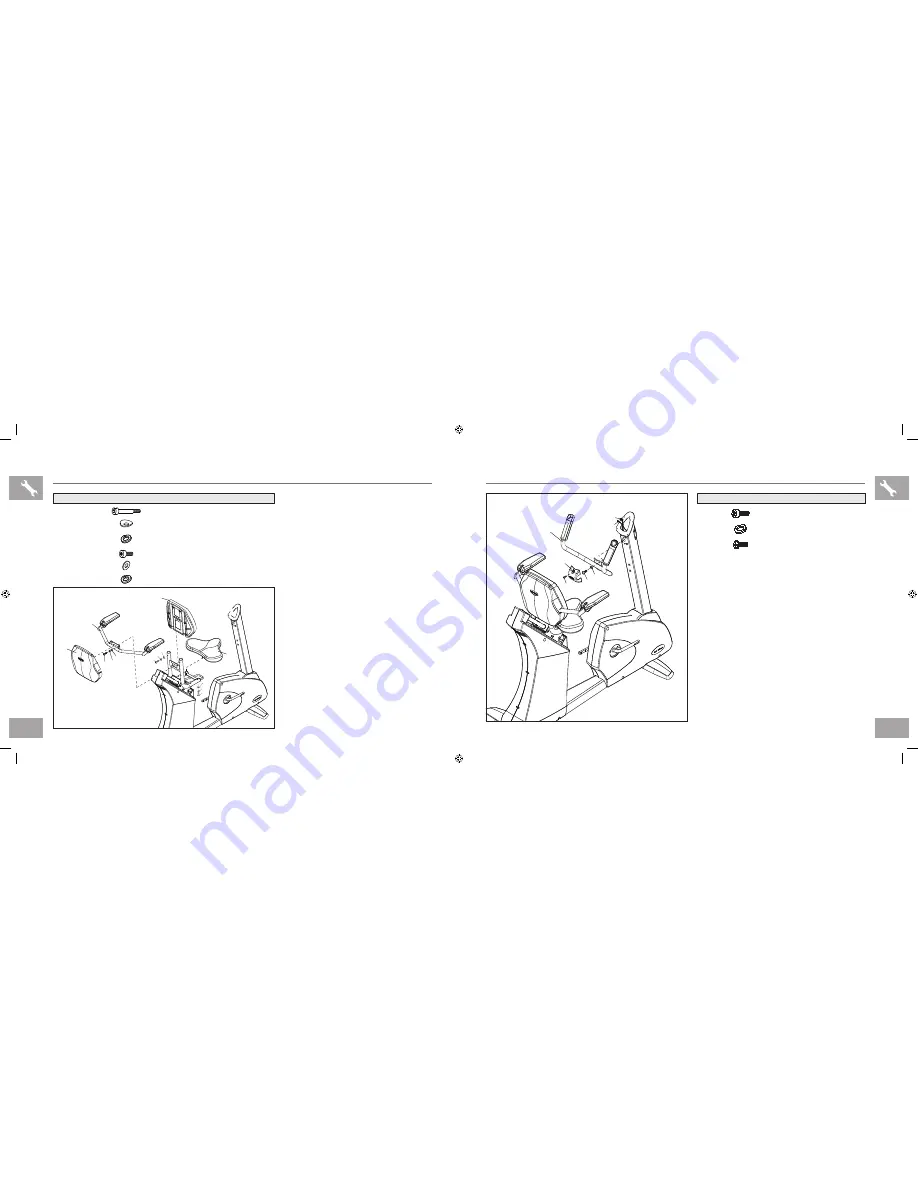
ASSEMBLY
STEP 4
A
Open
WHITE HARDWARE BAG
.
B
Carefully pull the
CONSOLE CABLE
through
the
CONSOLE MAST
using the twist tie located
inside the
CONSOLE MAST
.
C
Attach
CONSOLE MAST
to
MAIN FRAME
using
PRE-INSTALLED BOLTS AND
WASHERS
.
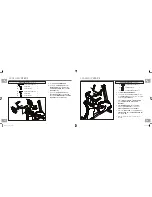
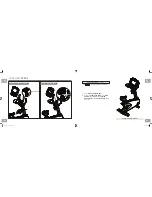
D
Slide
WAVY WASHER (L)
over
CRANK
followed by
PEDAL ARM
as shown. Rest
PEDAL ARM WHEEL
on
GUIDE RAIL
.
E
Attach the
PEDAL ARM
to the
CRANK
using 1
FLAT WASHER (K)
, 1
SPRING WASHER (B)
and 1
BOLT (M)
.
F
Repeat steps D–E on the opposite side of
the bike.
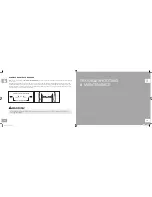
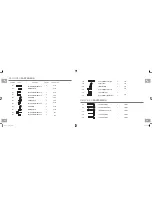
SPRING WASHER
BUTTON HEAD BOLT(M8x25L)
BUTTON HEAD BOLT(M5x10L)
Z11
Z12
Z13
4
2
4
WHITE HARDWARE BAG
CONTENTS :
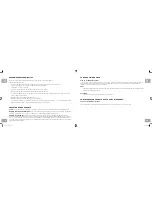
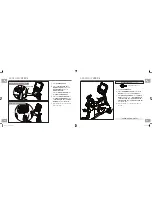
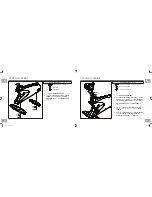
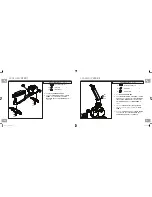
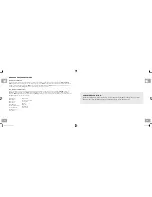
ASSEMBLY
STEP 3
A
Open
RED HARDWARE BAG
.
B
Attach the
GUIDE RAIL SET
to the
MAIN FRAME
using 4
BOLTS (F)
, 4
SPRING WASHERS (E)
and 4
FLAT
WASHERS (D)
.
C
Attach the
GUIDE RAIL SET
to the
INCLINE BRACKET
using 4
BOLTS
(G)
, 4
FLAT WASHERS (H)
, 4
SPRING
WASHERS (I)
and 4
NUTS (J)
.
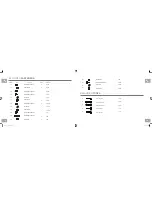
BUTTON HEAD BOLT(M8x15L)
SPRING WASHER
FLAT WASHER
Z53
Z51
Z52
4
4
4
8
ARC WASHER
Z42
BUTTON HEAD BOLT(M8x50L)
Z41
8
SPRING WASHER
Z43
8
RED HARDWARE BAG
CONTENTS
D43
Z42
Z53
Q07
Z51
AD4
Z52
Z41
Z43
Z42
Z41
Z42
Z43
bikes_om_r1.5.indd 22-23
9/9/11 8:19 AM


