background image

CHAPTER 1:  I

mportant


S

afety


I

nstructions

2

1.4 ELECTRICAL REqUIREMENTS

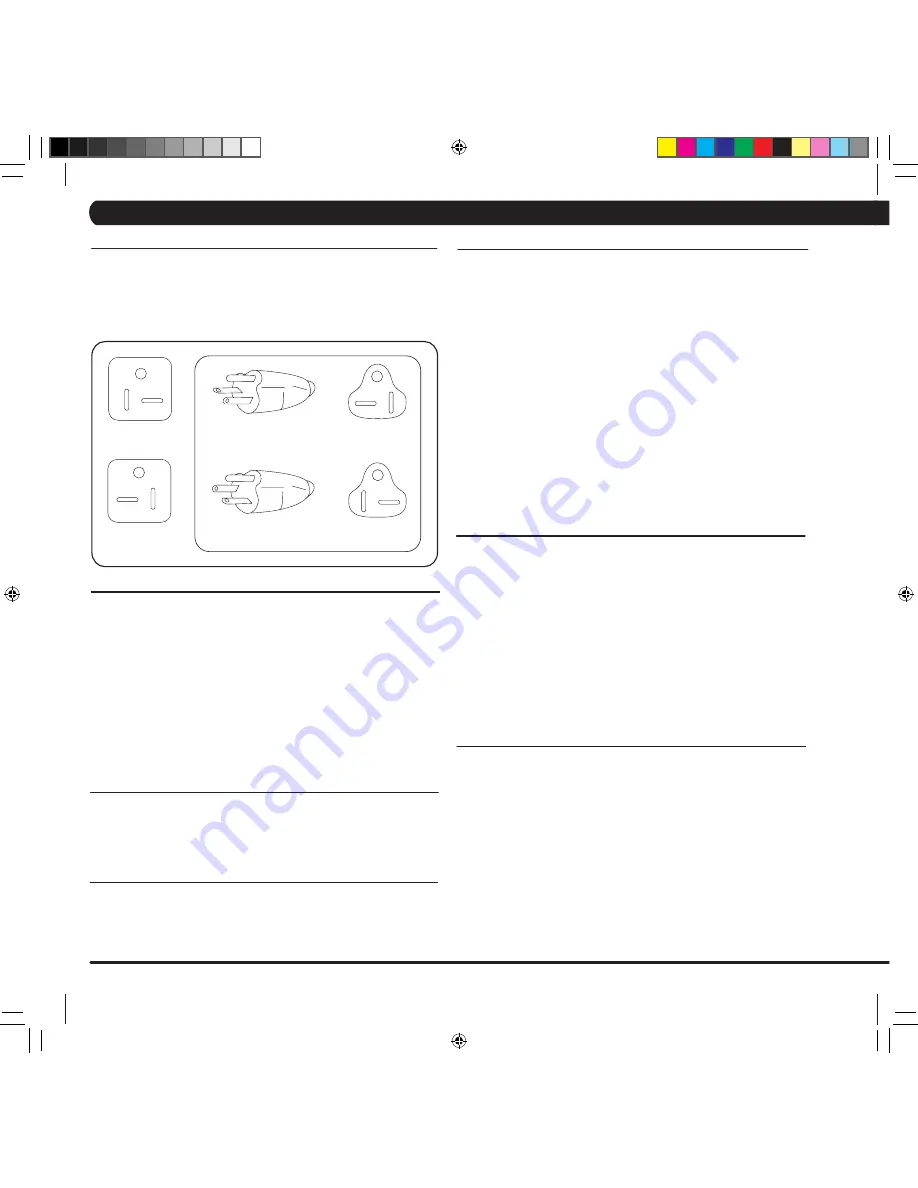
For your safety and treadmill performance, the ground on this circuit must be 
non-looped. Please refer to NEC article 210-21 and 210-23. Your Treadmill 
is provided with a power cord with a plug listed below and requires the listed 
outlet.  Any  alterations  of  this  power  cord  could  void  all  warranties  of  this 
product.

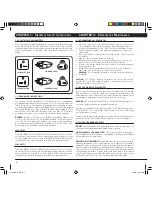
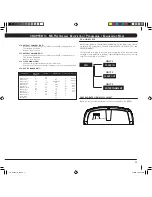
120 NEMA 5-20R

120 NEMA 5-20R

220 NEMA 6-20R

220 NEMA 6-20R

120v UNITS

The Matrix MX-T3x, MX-T3xi and MX-T5x 120 treadmill is for use on a nomi-
nal  120-volt  circuit  and  has  a  non-looped  grounding  plug.  Make  sure  that 
the 110V treadmill is connected to an outlet, NEMA 5-20R, having the same 
configuration as the plug. No adapter should be used with this product.

220v UNITS

The Matrix MX-T3x, MX-T3xi and MX-T5x 220 treadmill is for use on a nomi-
nal 220-volt circuit and has a non-looped grounding plug. Make sure that the 
220V  treadmill  is  connected  to  an  outlet,  NEMA  6-20R,  having  the  same 
configuration as the plug. No adapter should be used with this product.

1.5 GROUNDING INSTRUCTIONS

The  treadmill  must  be  grounded.  If  it  should  malfunction  or  breakdown, 
grounding provides a path of least resistance for electric current to reduce the 
risk of electric shock. The treadmill is equipped with a cord having an equip-
ment-grounding conductor and a grounding plug. The plug must be plugged 
into  an  appropriate  outlet  that  is  properly  installed  and  grounded  in  accor-
dance with all local codes and ordinances. If the user does not follow these 
grounding Instructions, the user could void the Matrix limited warranty.

DANGER:

  Improper  connection  of  the  equipment-grounding  conductor  can 

result in a risk of electric shock. Check with a qualified electrician or service-
man if the user is in doubt as to whether the product is properly grounded. 
Do not modify the plug provided with the product if it will not fit the outlet; 
have a proper outlet installed by a qualified technician.

2.1 RECOMMENDED CLEANING TIPS

1.  Use a soft, clean cotton cloth.  DO NOT use paper towels to clean surfaces  
     on the treadmill.  Paper towels are abrasive and can damage surfaces.
2.  Use a mild soap and damp cloth.  DO NOT use ammonia based cleaner.       
     This will cause discoloring of the aluminum and plastics it comes into 
     contact with.
3.  Do not pour water or cleaning solutions on any surface.  This could cause 
     electrocution.
4.  Wipe the console and side rails after every use.
5.  Brush away any wax deposits from the deck and belt area.  This is a com-
     mon occurrence until the wax is worked into the belt material.
6.  Be sure to remove any obstructions from the path of the elevation wheels 
     including power cords.
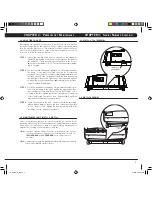
7.  Monthly, unplug the treadmill and remove the motor cover.  Check for 
     debris and clean with a dry cloth or small vacuum nozzle.  
     

WARNING

:  Do  not plug the treadmill in until the motor cover has been 

     reinstalled.

CAUTION:

    The  T3x/T3xi  weighs  350  pounds,  and  the  T5x  Weighs  450 

pounds.    Be  sure  to  have  proper  assistance  to  install  and  move  the  unit  in 
order to avoid injury to you or the unit.

2.2 DECK AND BELT REPLACEMENT

One of the most common wear and tear items on a treadmill is the Deck and 
Belt  combination.  If  these  two  items  are  not  properly  maintained  they  can 
cause damage to other components. This product has been provided with the 
most advanced maintenance free lubricating system on the market.

WARNING:

  Do not run the treadmill while cleaning the belt and deck. This 

can cause serious injury and can damage the machine.

Maintain the belt and deck by wiping the sides of the belt and deck with a 
clean  cloth.  The  user  can  also  wipe  under  the  belt  2  inches  on  both  sides 
removing any dust or debris.

The deck can be flipped and reinstalled or replaced by an authorized service 
technician.  Please contact Matrix Fitness Systems for more information.

2.3 CHECK FOR DAMAGED PARTS

DO NOT

 use any equipment that is damaged or has worn or broken parts. Use 

only replacement parts supplied by Matrix Fitness Systems.

MAINTAIN LABELS AND NAMEPLATES

. Do not remove labels for any reason. 

They contain important information. If unreadable or missing, contact Matrix 
Fitness Systems for a replacement.

MAINTAIN ALL EqUIPMENT

 Preventative maintenance is the key to smooth 

operating  equipment,  as  well  as  keeping  the  users  liability  to  a  minimum. 
Equipment needs to be inspected at regular intervals. Defective components 
must be replaced immediately. Improperly working equipment must be kept 
out of use until it is repaired. Ensure that any person(s) making adjustments 
or performing maintenance or repair of any kind is qualified to do so. Matrix 
Fitness Systems will provide service and maintenance training at our corporate 
facility upon request or in the field if proper arrangements are made.

CHAPTER 2:  P

reventative

 m

aintenance

06'_Treadmills_M.indd   6

7/18/06   4:00:03 PM

Содержание COMMERCIAL SERIES TREADMILL

Страница 1: ...COMMERCIAL SERIES TREADMILL O W N E R S M A N U A L 06 _Treadmills_M indd 1 7 18 06 4 00 02 PM...

Страница 2: ...06 _Treadmills_M indd 2 7 18 06 4 00 02 PM...

Страница 3: ...eering Mode 4 7 MX T3x Manager Screen Descriptions Details 4 8 MX T3xi Manager Screen Descriptions Details 4 9 Using CSAFE CHAPTER 5 MX T5x OVERLAY DESCRIPTION ENGINEERING MODE 5 1 T5x Console Descrip...

Страница 4: ...06 _Treadmills_M indd 4 7 18 06 4 00 02 PM...

Страница 5: ...should always be followed including the following DANGER To reduce the risk of electric shock Always unplug this equipment from the electrical outlet immediately after using and before cleaning warnin...

Страница 6: ...cleaning solutions on any surface This could cause electrocution 4 Wipe the console and side rails after every use 5 Brush away any wax deposits from the deck and belt area This is a com mon occurrenc...

Страница 7: ...g to the right tighten the right bolt by turn ing it clockwise turn and loosen the left bolt turn If it is moving to the left tighten the left bolt by turning it clockwise turn and loosen the right tu...

Страница 8: ...The MATRIX treadmill is inspected before it is packaged It is shipped in four pieces the base the upright console supports the handlebar and the console Carefully unpack the unit and dispose of the b...

Страница 9: ...the LEVEL using SPEED then press SELECT 3 Choose the TIME using SPEED then press SELECT 4 Choose WEIGHT using SPEED then press SELECT 5 Press START 5K Run 1 Choose the 5K program using the program QUI...

Страница 10: ...T TEST allows you to measure your fitness based on a program designed specifically for your Matrix Treadmill The test takes 5 minutes and is based on your heart rate User should keep hands on contact...

Страница 11: ...e speed learn mode edit This variable controls the middle limit for the speed of the treadmill HIGH speed learn mode edit This variable controls the high limit for the speed of the treadmill low eleva...

Страница 12: ...each engineering screens low speed learn mode edit This variable controls the low limit for the speed of the treadmill HIGH speed learn mode edit This variable controls the hight limit for the speed...

Страница 13: ...Wait 5 seconds Select START will start program Select WEIGHT by using the UP or DOWN arrow keys Press START or Select to begin workout Display tIME Starting 3 Starting 2 Starting 1 Step 1 Step 2 Step...

Страница 14: ...will be used to control the users heart rate Press start heart rate safety protocols polar target heart rate zone chart is on pg 11 When the users heart rate exceeds the target heart rate by the value...

Страница 15: ...y TIME Starting 3 Starting 2 Starting 1 STEP 6 Display will read HOLD THE HANDGRIP SENSORS FORDETECTINGHR ifnoheartrateisfoundafter4 20 Displaywill read HR TO LOW RETRY THE TEST if score is over 80 ST...

Страница 16: ...lay only Holding the start key resets the accumulated distance p7 Software version Active variable displayed in the time seven segment display Accumulated distance is not editable for display only p8...

Страница 17: ...Channel Default Volume Speed Mode Out of Order minimum default 5 5 1 80 15 0 5 2 T4 OFF 1 1 maximum 95 NV max time 20 400 100 2 12 T5 ON 30 30 step size 5 5 1 5 1 0 1 0 1 1 1 1 1 units minutes minutes...

Страница 18: ...5 Speed Max 12 Motor Type 3 2 HP DC Controller Cooling Fan Yes Electrical Receptacle 120 NEMA 5 20R Electrical Plug 120 NEMA 5 20P Electrical Receptacle 220 NEMA 6 20R Electrical Plug 220 NEMA 6 20R E...

Страница 19: ...ired fasteners Assembley Tools 08 Z51 SOCKET HEAD CAP SCREW M10 x 25 01 8mm ALLEN WRENCH 01 10mm ALLEN WRENCH 02 Z52 BUTTON HEAD MACHINE SCREW M5 x 12L 08 Z50 FLAT WASHER 30x2 0L QTY PART SKETCH DESCR...

Страница 20: ...Do not stand on the belt when performing the auto check function ASSEMBLY INSTRUCTIONS Please make sure that the power plug is not plugged into the wall outlet while completing the following procedur...

Страница 21: ...INEERING MODE is shown onto the console Press the incline UP button to find the AUTO CHECK screen Press the incline START button and then the treadmill will run the auto check function automatically T...

Страница 22: ...60 Incline Range 0 15 Speed Min 0 5 Speed Max 12 Motor Type AC Motor Size 5hp AC Controller Cooling Fan Yes Electrical Receptacle 110 NEMA 5 20R Electrical Plug 110 NEMA 5 20P Electrical Receptacle 2...

Страница 23: ...T HEAD MACHINE SCREW M8 x 25L 01 5mm ALLEN WRENCH 01 ALLEN WRENCH 8 x 168 04 C24 BUTTON HEAD MACHINE SCREW M5 x 10L 02 Q28 END CAP 12 7 08 C10 FLAT HEAD MACHINE SCREW M8 x 20L QTY PART SKETCH DESCRIPT...

Страница 24: ...ICK START CLEAR 1 2 3 4 5 6 7 8 9 0 TIME ELEV ATIO N DIST ANC E SPEE D PAUSE SELECT HOLD TO RESET KEYPAD MANUAL ROLLING INTERVA LS RANDO M FIT TEST TARGET HR QUICK START CLEAR 1 2 3 4 5 6 7 8 9 0 TIME...

Страница 25: ...AR 1 2 3 4 5 6 7 8 9 0 TIME ELEV ATIO N DIST ANC E SPEE D PAUSE SELECT HOLD TO RESET KEYPAD MANUAL ROLLING INTERVA LS RANDO M FIT TEST TARGET HR QUICK START CLEAR 1 2 3 4 5 6 7 8 9 0 TIME ELEV ATIO N...

Страница 26: ...06 _Treadmills_M indd 26 7 18 06 4 00 10 PM...

Страница 27: ...MATrix Fitness systems corp 1610 Landmark Drive Cottage Grove wi 53527 USA TOLL FREE 866 693 4863 www matrixfitness com FAX 608 839 8687 REV 02 06 _Treadmills_M indd 27 7 18 06 4 00 11 PM...

Отзывы: