


52
CONTENTS
9.1.1.2.1
Record Mode
It is also possible to record image sequences using wxPropView.
1. For this, you have to set the size of the recorder in
"System Settings -
>
RequestCount"
e.g. to
100
.
This will save the last 100 requests in the request queue of the driver, i.e. the image data including the request
info like frame number, time stamp, etc.
2. Afterwards you can start the recording by clicking the
Rec
. button.
3. With the
Next
and
Prev
. buttons you can display the single images.
If you switched on the request info overlay (righ-click on the display area and select the entry to activate this
feature), these information will be displayed on the image, too. With the timestamp you can see the interval of the
single frames in microseconds.
9.1.1.2.2
Hard Disk Recording
You can save acquired images to the hard disk the following way:
1. In the "Menu Bar" click on
"Capture -
>
Recording -
>
Setup Hard Disk Recording"
.
2. Confirm with
"Yes"
.
3. Afterwards select the target folder for the images.
4. Finally, choose the file format of the acquired images.
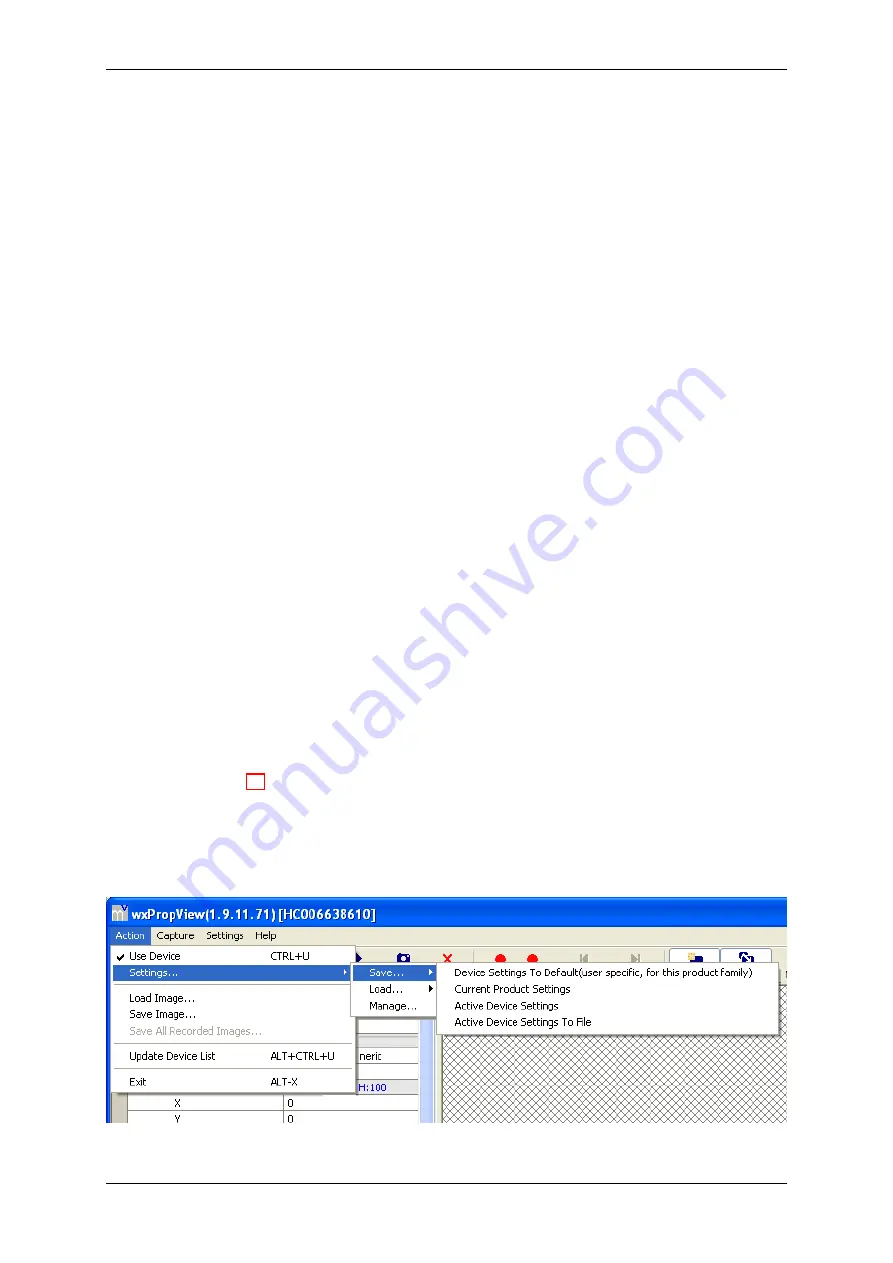
9.1.1.3
Storing and restoring settings
When
wxPropView
(p. 48) is started for the first time, the values of properties set to their default values will be
displayed in green to indicate that these values have not been modified by the user so far. Modified properties (even
if the value is the same as the default) will be displayed in black.
Figure 6: wxPropView - Storing settings
MATRIX VISION GmbH
Содержание mvHYPERION-32R16
Страница 1: ...mvHYPERION Series Technical Manual...
Страница 16: ...12 CONTENTS MATRIX VISION GmbH...
Страница 17: ...5 1 European Union Declaration of Conformity statement 13 MATRIX VISION GmbH...
Страница 38: ...34 CONTENTS 8 1 2 9 Digital I Os Figure 10 Trigger In mvHYPERION CLx MATRIX VISION GmbH...


