6
546565.A.3 - May 2019
ASSEMBLY INSTRUCTIONS FOR BBQ
Product Description
Carton Identification
Product Part Number
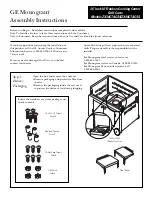
Open the carton by removing the
shipping straps then slitting along both
ends. Cut the tape only by a small
amount in the middle, finish by lifting
the carton flaps with your hand.
Unpack the entire carton, this carton
will be used as a surface protector as
the cabinet is being built. Open the
carton as shown and place where the
BBQ will be assembled
NOTE:
Letters in the bracket after every screw, helps you identify the item number from the parts list on page 6, from the fastener kit.
Tools needed for assembly:
Crosshead screwdriver, 10mm A/F Spanner
Before commencing assembly, open the cartons and lay all of the components on the floor. Familarise them against the parts list on page
21, as some of these instructions refer to this parts list.
NOTE:
When assembling the barbecue, ensure it is sitting on a flat surface.
STEP 1. ATTACH CASTORS.
Use four M6*16mm screws (A), four M6 flat washers (D) and four M6 spring washers (E) to attach each castor onto the underside of the
Bottom panel (6)
(two castors without lock (23) at the front and two castors with lock (24) at the back).
ASSEMBLY INSTRUCTIONS
Step 1 Attach Castors.
Use four M6*16mm screws (A), four M6 flat washers (D) and four M6 spring
washers (E) to attach each castor onto the underside of the Bottom panel (6)
(two castors without lock (23) at the front and two castors with lock (24) at the
back).
Step
2 Attach the Cart Side Panel.
Use two M6*12mm screws (B) to attach cabinet left side panel (7) and two more
screws to attach cabinet right side panel (8) both to the Bottom panel (2).
Note: Door hinge brackets should be at the front.
Содержание Barbecues
Страница 27: ...27 546565 A 3 May 2019 ...


