WPM System
USER GUIDE
WPM
User Guide v1.0
Page 54
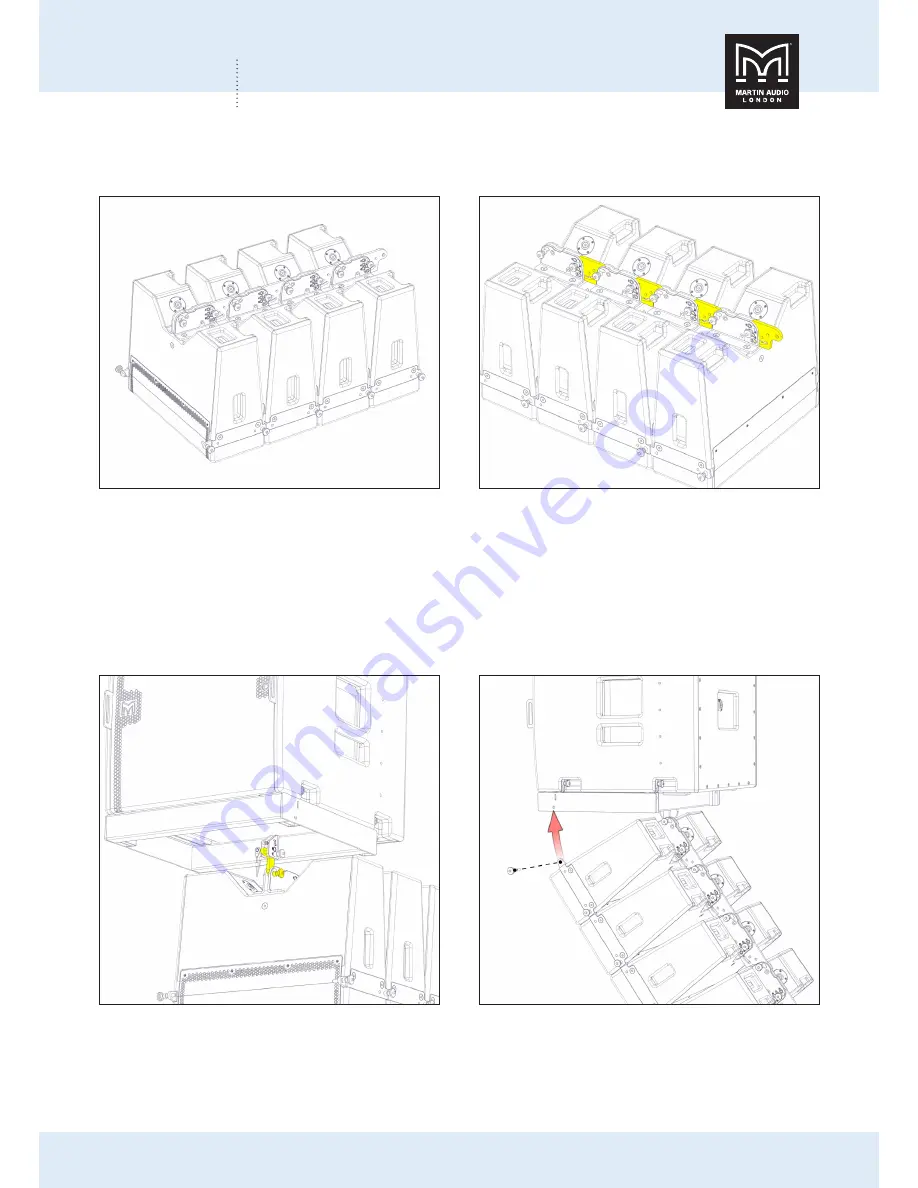
Assemble the first block of four WPM cabinets face down on their flightcase base. Pre-select inter-cabinet angles as
predicted by the DISPLAY software.
Fig.64 - assemble four cabinets
Fig.65 - preselect angles
Attach the Transition Frame to the upper WPM cabinet. Connect the frame at the rear, where the swinging arm can mate
with the upper section of the cabinet rear bracket in three positions to produce an angle between the Transition Frame and
the WPM of 0°, 2.5° or 5°. Set the angle defined by the DISPLAY software. Secure with a Rigging Pin.
Gradually raise the chain hoist; this will swing the four WPMs up and free of the flightcase base. As the array ascends,
steady the array until it is completely free of the flight case. Rotate the array forwards until the front rigging positions on the
upper cabinet are aligned with the WPM pickup points on the Transition Frame. Secure with Rigging Pins at each side.
Fig.66 - attach first four cabinets
Fig.67 - rotate array
Содержание MSX Passive
Страница 1: ...User Guide WPM Optimised Line Array...
Страница 39: ...WPM System USER GUIDE WPM User Guide v1 0 Page 39 Fig 18 insert rigging pin Fig 19 insert rigging pin...
Страница 44: ...WPM System USER GUIDE WPM User Guide v1 0 Page 44 Fig 32 attach sixth cabinet Fig 33 complete ground stack...
Страница 56: ...WPM System USER GUIDE WPM User Guide v1 0 Page 56 Fig 70 complete array Fig 71 complete array...


