6
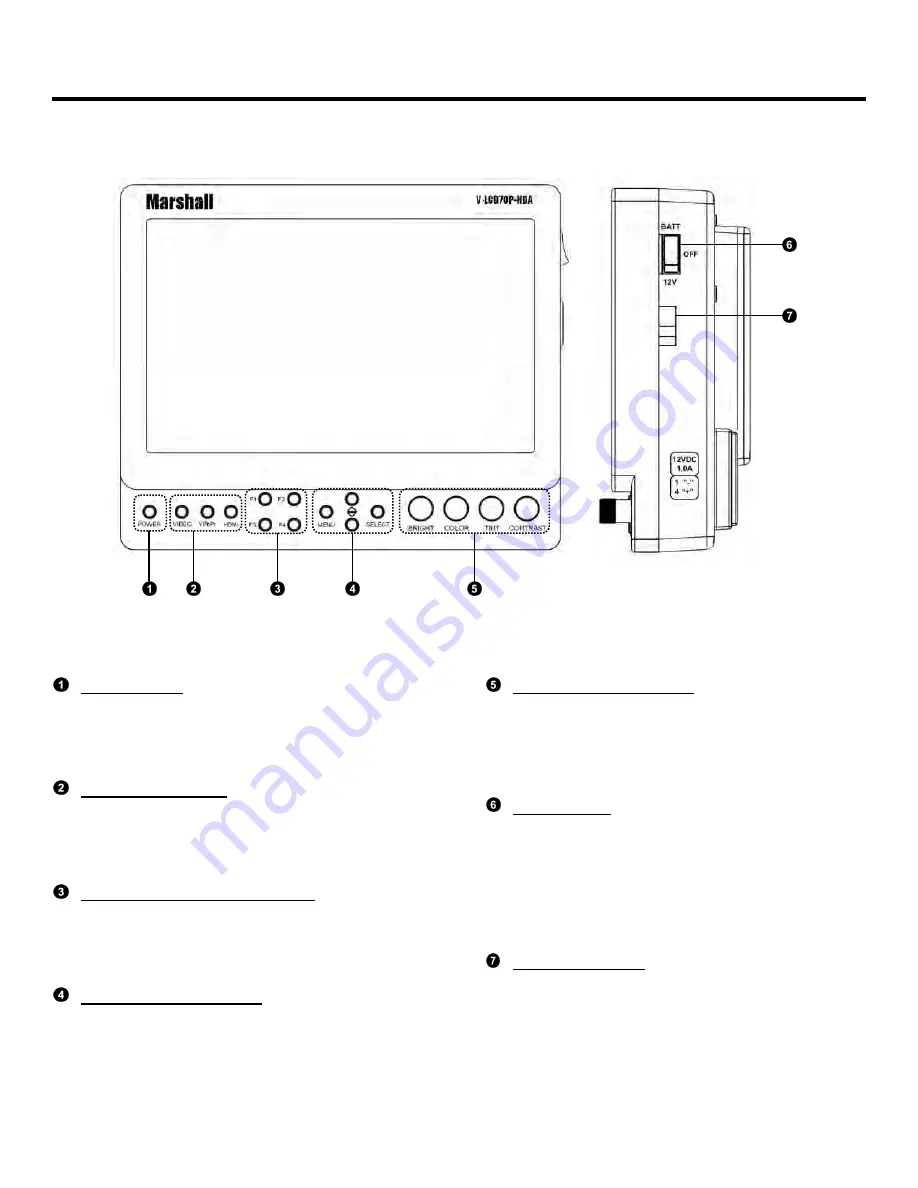
Front and Side Panel Features
Power Button
Use the power button to toggle between ON and
STANDBY modes. In the STANDBY state, the LED
on the button will illuminate bright green. In the ON
state, the LED will dimly illuminate green.
Input Select Buttons
Use the VIDEO, YPbPr, and HDMI buttons to select
the corresponding analog or digital input. Video
standards (NTSC/PAL, etc.) are automatically
detected.
User-Definable Function Buttons
Four user-definable function buttons can be used for
direct access to various settings. Functions are
assigned using the on-screen menu (See User-
Definable Function Buttons – Page 17).
Menu Navigation Buttons
Use the Menu,
▲
,
▼
, and Select buttons to display
and navigate the on-screen menu (See Main Menu
and Navigation – Page 9).
Image Adjustment Knobs
Use the image adjustment knobs to adjust color
saturation, brightness and contrast of the image.
The status of each image adjustment parameter is
shown on the bottom left of the screen, with values
ranging from 0 to 100. Default value is 50.
Power Switch
Use the hard power switch to supply power to the
monitor, and choose the input from which the
monitor draws power. The upper switch position
uses the battery adapter, the lower switch position
uses the XLR input, and the center position is OFF.
Battery life can be preserved by setting this switch to
the OFF position when the monitor is not in use.
Service Connector
This connector is for factory and future use.


