8
Connecting to the NCB-2010
Overview
The NCB-2010 can be operated by any computer with a web browser, via a TCP/IP network connection. No additional
software is needed. The NCB-2010 may be connected directly to a single computer, or connected to a local area network
and accessed by multiple computers. The NCB-2010 is shipped with the default IP address 10.0.0.254.
The following procedures describe the two ways to connect to the NCB-2010.
Connecting the NCB-2010 to a Single Computer
To use the NCB-2010 for the first time, you will most likely need to connect the NCB-2010 directly to a single computer.
After this connection is made, you can change the unit’s IP address to be suitable for your network.
1. Connect the NCB-2010 to a Windows-based computer using a cross-over ethernet cable.
2. Supply power to the NCB-2010 with the included power supply. Set the rocker switch on the front of the unit to
ON (
|
).
3. In Windows, open the Network Connections control panel. (Start > Control Panel > Network Connections)
4. A Local Area Connection should be listed. Right-Click on Local Area Connection, and select Properties.
5. Scroll down the list in the Local Area Connection Properties, click on Internet Protocol (TCP/IP), and click the
Properties button. Before making any changes to your Internet Protocol properties, contact your IT
department for guidance.
6. The computer attached, either directly or indirectly, to the NCB-2010 will have to be setup with an IP Address
10.0.0.xxx, where xxx could be any number from 2 to 253 and Subnet mask 255.255.255.0, as shown in the
image below:
7. If your IP address is not obtained automatically, please note down your settings before making any changes.
Contact your IT department for assistance.
25
o
Hardware version – Provides the current Hardware version of the NCB-2010.
Device Info
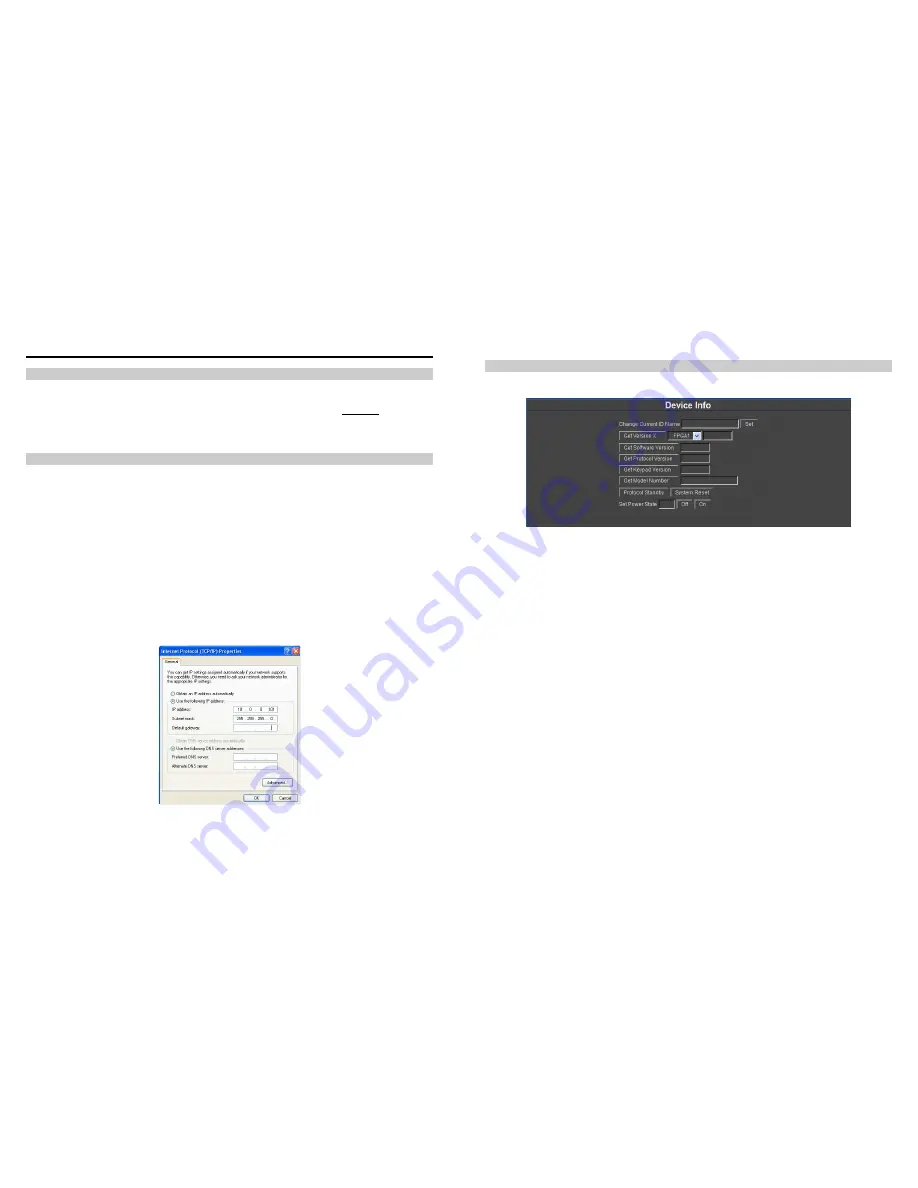
The Device Info page is shown below:
The Message Box shows the current status of commands being sent and acknowledged, as well as any error messages.
o
Change Current ID Name –Allows you to set a name to a particular monitor ID on the NCB-2010 target monitor
pull down menu by typing a name in the text field. Only one ID Name can be changed at one time. The monitor
selected in the target monitor pull down menu will be changed when the Set button is pressed.
o
Get Version X – Retrieves the Software, Keypad, FPGA1 or FPGA2 versions of the monitor ID selected in the
target monitor pull down menu. This information can only be retrieved from one monitor at a time. If your monitor
does not have a second FPGA, the NCB-2010 will respond with an error.
o
Get Protocol Version – Retrieve the Protocol version of the monitor ID selected in the target monitor pull down
menu. This section applies to the Marshall Electronics protocol version embedded in your Marshall Electronics
monitor.
o
Get Keypad Version – Retrieve the Keypad version of the monitor ID selected in the target monitor pull down
menu.
o
Get Model Number – Retrieve the monitor Model number of the monitor ID selected in the target monitor pull
down menu.
o
Protocol Standby – This sets the monitor selected in the target monitor pull down menu on Protocol Standby, or
RS-422 Ignore mode. This will render your Marshall Electronics monitor unable to respond to any RS-485 / 422
command. A message will appear on your monitor screen indicating Protocol Standby. The monitor must be
physically reset in order to return normal operation.
o
System Reset – Resets the monitor selected in the target monitor pull down menu.
o
Set Power State – Sets the Power state, Off or On, of the monitor selected in the target monitor pull down menu.


