background image

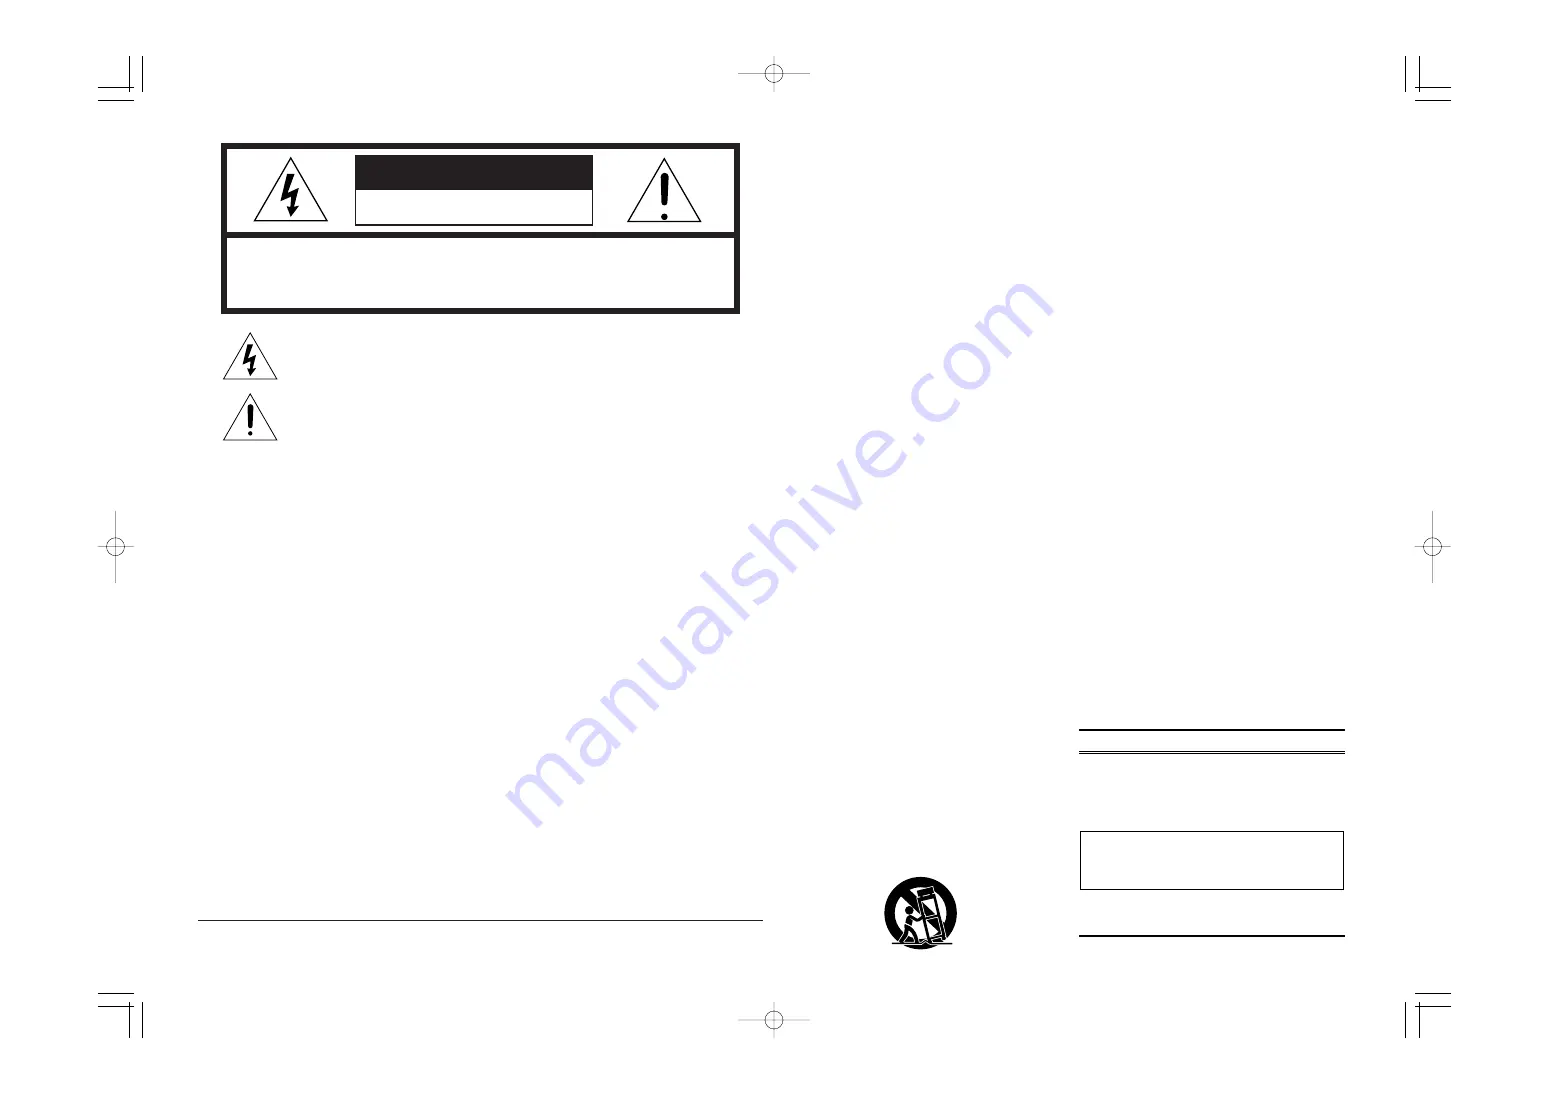
The lightning flash with arrowhead symbol within an equilateral triangle is
intended to alert the user to the presence of uninsulated “dangerous voltage”
within the product’s enclosure that may be of sufficient magnitude to constitute a
risk of electric shock to persons.

The exclamation point within an equilateral triangle is intended to alert the user
to the presence of important operating and maintenance (servicing) instructions
in the literature accompanying the product.

CAUTION

RISK OF ELECTRIC SHOCK

DO NOT OPEN

CAUTION: TO REDUCE THE RISK OF ELECTRIC SHOCK,

DO NOT REMOVE COVER (OR BACK)

NO USER-SERVICEABLE PARTS  INSIDE

REFER SERVICING TO QUALIFIED SERVICE PERSONNEL

WARNING

TO REDUCE THE RISK OF FIRE OR ELECTRIC SHOCK,
DO NOT EXPOSE THIS PRODUCT TO RAIN OR MOISTURE.

CAUTION:

TO PREVENT ELECTRIC SHOCK, MATCH WIDE BLADE OF

PLUG TO WIDE SLOT, FULLY INSERT.

ATTENTION:

POUR ÉVITER LES CHOC ÉLECTRIQUES, INTRODUIRE

LA LAME LA PLUS LARGE DE LA FICHE DANS LA BORNE
CORRESPONDANTE DE LA PRISE ET POUSSER JUSQU’AU FOND.

IMPORTANT SAFETY

INSTRUCTIONS

READ BEFORE OPERATING EQUIPMENT

This product was designed and manufactured to
meet strict quality and safety standards. There are,
however, some installation and operation precautions
which you should be particularly aware of.

1.

Read these instructions.

2.

Keep these instructions.

3.

Heed all warnings.

4.

Follow all instructions.

5.

Do not use this apparatus near water.

6.

Clean only with dry cloth.

7.

Do not block any ventilation openings. Install
in accordance with the manufacture's
instructions.

8.

Do not install near any heat sources such as
radiators, heat registers, stoves, or other
apparatus (including amplifiers) that produce
heat.

9.

Do not defeat the safety purpose of the
polarized or grounding-type plug. A polarized
plug has two blades with one wider than the
other. A grounding type plug has two blades
and a third grounding prong. The wide blade
or the third prong are provided for your
safety. If the provided plug does not fit into
your outlet, consult an electrician for
replacement of the obsolete outlet.

10.

Protect the power cord from being walked on
or pinched particularly at plugs, convenience
receptacles, and the point where they exit
from the apparatus.

11.

Only use attachments/accessories specified
by the manufacturer.

12.

Use only with the cart, stand, tripod, bracket,
or table specified by the manufacturer, or
sold with the apparatus. When a cart is used,
use caution when moving the cart/apparatus
combination to avoid injury from tip-over.

NOTE:

This equipment has been tested and found to
comply with the limits for a Class B digital device,
pursuant to Part 15 of the FCC Rules. These limits
are designed to provide reasonable protection
against harmful interference in a residential
installation. This equipment generates, uses and can
radiate radio frequency energy and, if not installed
and used in accordance with the instructions, may
cause harmful interference to radio communications.
However, there is no guarantee that interference will
not occur in a particular installation. If this equipment
does cause harmful interference to radio or
television reception, which can be determined by
turning the equipment off and on, the user is
encouraged to try to correct the interference by one
or more of the following measures:

- Reorient or relocate the receiving antenna.

- Increase the separation between the

equipment and receiver.

- Connect the equipment into an outlet on a

circuit different from that to which the receiver
is connected.

- Consult the dealer or an experienced radio/TV

technician for help.

NOTE:

Changes or modifications not expressly approved
by the party responsible for compliance could void
the user’s authority to operate the equipment.

This Class B digital apparatus complies with
Canadian ICES-003.

Cet appareil numérique de la Classe B est
conforme à la norme NMB-003 du Canada.

13.

Unplug this apparatus during lightning
storms or when unused for long periods of
time.

14.

Refer all servicing to qualified service
personnel. Servicing is required when the
apparatus has been damaged in any way,
such as power-supply cord or plug is
damaged, liquid has been spilled or objects
have fallen into the apparatus, the apparatus
has been exposed to rain or moisture, does
not operate normally, or has been dropped.

Additional Safety Information!

• This product should not be placed in a

built-in installation such as a bookcase or
rack unless proper ventilation is provided
or the manufacturer’s instructions have
been adhered to.

•  Apparatus shall not be exposed to

dripping or splashing and that no objects
filled as vases, shall be placed on the
apparatus.

•  When the switch is in the OFF position,

the apparatus isn’t completely switched-off
from the MAINS.

DECLARATION OF CONFORMITY

U.S. Responsible Party: Marantz America, Inc.

100 Corporate Drive,
Mahwah, NJ, 07430, U.S.A.
TEL: 630-741-0300

Type of Product:

Model:

DLP Projector

VP-11S2

This device complies with Part 15 of the FCC rules. 
Operation is subject to the following conditions: (1) This 
device may not cause harmful interference, and (2) this 
device must accept any interference received, including 
interference that may cause undesired operation. 

VP-11S2̲U̲cover  07.8.27  10:43 AM  ページ2

Содержание VP-11S2

Страница 1: ...Model VP 11S2 User Guide DLP Projector VP 11S2 U cover MIS用 07 8 27 11 23 AM ページ1 ...

Страница 2: ...er NOTE This equipment has been tested and found to comply with the limits for a Class B digital device pursuant to Part 15 of the FCC Rules These limits are designed to provide reasonable protection against harmful interference in a residential installation This equipment generates uses and can radiate radio frequency energy and if not installed and used in accordance with the instructions may ca...

Страница 3: ...ately and stay away for at least 30 minutes and ventilate the room so as not to inhale the mercury vapor If you inhale the mercury vapor see a physician immediately and follow his instructions ENGLISH FOREWORD This section must be read carefully before any connection is made to the mains supply WARRANTY For warranty information contact your local Marantz distributor RETAIN YOUR PURCHASE RECEIPT Yo...

Страница 4: ... projecteur La durée de service d une lampe varie aussi en fonction de la lampe certaines se cassant ou ne s allumant pas aussitôt qu elles sont utilisées pour la première fois Si la lampe se casse des fragments de verre peuvent se répandre à l intérieur de l unité lampe et du projecteur et le gaz à l intérieur de l ampoule de la lampe qui contient de la vapeur de mercure peut être émis par l orif...

Страница 5: ...utorizado de desechos industriales o devuélvala al lugar donde la compró No rompa la lámpara ni la deseche en la basura normal Si la lámpara se rompe abandone la zona inmediatamente y permanezca alejado durante al menos 30 minutos ventilando la habitación con objeto de no inhalar el vapor de mercurio Si inhala vapor de mercurio consulte inmediatamente a su médico y siga sus instrucciones ESPAÑOL P...

Страница 6: ...nuseada incorrectamente durante a substituição ou devido à temperatura ambiente onde se encontra o projector A vida útil da lâmpada também varia conforme a lâmpada com casos de quebra ou falha em acender na primeira vez que a lâmpada é utilizada Se a lâmpada quebrar estilhaços de vidro podem cair dentro do compartimento da lâmpada e do projector e o gás de dentro da lâmpada que contém vapor de mer...

Страница 7: ...zerbrechen oder nicht leuchten Falls eine Lampe zerbricht können die Scherben in der Lampeneinheit und im Projektor verstreut werden außerdem kann das durch das Zerbrechen der Lampe freigesetzte Gas das Quecksilberdampf enthält durch die Entlüftungsöffnungen des Projektors ausströmen Lesen Sie die Bedienungsanleitung des Projektors und die Anleitungen zum Austauschen der Lampe vor der ersten Inbet...

Страница 8: ...da SHP di vetro a vapori di mercurio ad alta tensione Potrebbe rompersi o guastarsi se non viene maneggiata correttamente durante la sostituzione o se il proiettore è soggetto a una temperatura eccessiva La durata delle lampade è variabile ed alcune potrebbero addirittura rompersi o non accendersi la prima volta che vengono utilizzate Se la lampada si rompe le schegge di vetro potrebbero venire sp...

Страница 9: ...n VP 11S2L 17 BASIC OPERATIONS 18 Turning on the Power 18 Selecting the Input Signal Source 18 Selecting the Aspect Mode 18 The Screen Images in a 16 9 screen 19 The Screen Images in a 4 3 screen 20 To Turn off the Power 20 OPERATIONS 21 Menu Structure 21 Functions by Signal 22 Picture Mode 24 How to Operate Menus 24 Picture Adjust 25 Fine Menu 1 26 Fine Menu 2 26 Input Signal 27 RGB HD Adjust 27 ...

Страница 10: ...DER 60 MINUTES AVANT DE CHANGER LAMPE WARNING THIS COVER IS PROVIDED WITH INTERLOCK TO REDUCE THE RISK OF EXCESSIVE ULTRAVIOLET RADIATION DO NOT DEFEAT ITS PORPOSE OR ATTEMPT TO SERVICE WITHOUT REMOVING COVER COMPLETELY CAUTION HOT UNPLUG THE POWER CORD AND WAIT 60 MINUTES BEFORE CHANGING THE LAMP ATTENTION CHAUD DEBRANCER LE CORD ON D ALIMENTION ET ATENDER 60 MINUTES AVANT DE CHANGER LAMPE WARNUN...

Страница 11: ...jection modes for functional hanging and rear projection Remote controller with all back lit keys Equipped with RS 232C port and 12V trigger terminal for custom installation Marantz system bus port Low operating noise thanks to a die cast silent duct hermetically sealed color wheel motor and fan speed control Highly rigid die cast chassis to minimize radiating noise 2000 hr long life 200W SHP lamp...

Страница 12: ...ologies for consumer products The lamp made by high precision technology however some lamps might be failing before it reaches its life And projector s brightness is getting darker along with accumulated lamp usage hours We are trying our best to control the quality in order to reduce lamp failures It is almost impossible to have zero failure even using the most advanced technology This is not a p...

Страница 13: ... the SR9500 SR8500 be sure to connect the REMOTE CONTROL IN jack of this projector to the REMOTE CONTROL OUT jack of the component with the remote sensor Note For connections use the control adaptor cable Mini jack to RCA TRIG 2 TRIGGER 2 Select ON or OFF at each aspect mode such as Full Normal Zoom V Stretch and Through to control screen aspect ratio with powered up down dual aspect ratio screen ...

Страница 14: ...amic picture mode Dynamic mode is good for visually dynamic pictures Every time the button is pressed the selection rotates in the order of Dynamic 1 Dynamic 2 Dynamic 3 Default 8 B1 button P 29 Selects Blanking Memory 1 9 B2 button P 29 Selects Blanking Memory 2 0 B3 button P 29 Selects Blanking Memory 3 1 OFF button P 29 Turns the blanking mode off 2 V MUTE button Turn the picture into black Pre...

Страница 15: ...ONENT 2 S VIDEO VIDEO RGB HDMI 1 HDMI 2 8 BLACK LEVEL button P 26 Sets the black level During analog signal input 0 IRE 7 5 IRE During HDMI signal input Expand Normal 9 PATTERN button P 11 Projects a focus pattern on the screen 0 ZOOM button P 18 Sets aspect ratio to zoom mode 1 THROUGH button P 18 Sets aspect ratio to through mode VP 11S2 U 01 ENG 07 8 27 10 47 AM ページ7 ...

Страница 16: ...ler If the remote control unit does not operate from close to the main unit replace the batteries with new ones even if less then a year has passed The included battery is only for verifying operation Replace it with a new battery as soon as possible When inserting the batteries be careful to do so in the proper direction following the and marks in the remote control unit s battery compartment To ...

Страница 17: ...lable You can connect this projector to a VCR DVD player and other video equipment Connecting a video source using S VIDEO IN and VIDEO IN terminals 1 Connect one of the S video cable to the S VIDEO IN terminal or one end of the video cable to the VIDEO IN terminal on the projector 2 Connect the other end of the S video cable or the video cable to the S video output terminal or video output termin...

Страница 18: ... image may corrupt For the details of the HDMI terminal on the device connected with the unit see the instruction manual of the device Connection with a HD Video DVD Player Satellite Cable Tuner or PC RGB OUT or DVI D out RGB OUT or DVI D out RGB D Sub monitor cable commercially available HD Video Satellite Cable Tuner DVD Player Monitor output IBM VGA or Compatible PC RGB OUT or DVI A OUT DVI D O...

Страница 19: ... adjustment Adjust the focus for the sharpest image possible to obtain using focus pattern 3 Press the PATTERN button again to hide the focus pattern This completes fine focusing Note Focus Pattern Color by Lens Shift Position P 16 The focus pattern changes color depending on the lens position There are two colors and they can be used for checking the quality of the projected image The white focus...

Страница 20: ... projector turn the adjuster lever to the left or right then carefully set the projector down When the projecting image is a trapezoid correct it in Keystone and in the Display Menu See Display P 28 When using the keystone feature to correct a trapezoidal image picture contours can look like staircases because of image correction Keystone Electronic keystone correction Keystone Correction Adjustin...

Страница 21: ... Screen size vertical Screen upper end Range from light axis to upper end Light axis center Height from installing level to light axis Screen lower end Projection distance lens head Lens shift range Screen Screen upper end Range from light axis to upper end Light axis center Height from installing level to light axis Installing level Screen size vertical Screen lower end Projection distance lens h...

Страница 22: ...ent unit inch Minimum 1 9 16 x Screen Size 2 2 16 Maximum 2 5 16 x Screen Size 1 15 16 Note When installing the projector consider 5 tolerance for the Projection Distance in the above table 4 3 Screen Size 1 33 1 Aspect Ratio Projection Distance 16 9 Screen In case of displaying the 16 9 picture on the whole of the 16 9 screen 4 3 Screen In case of displaying the 16 9 picture on the whole of the 4...

Страница 23: ...easurement unit inch Minimum 3 7 16 x Screen Size 2 9 16 Maximum 2 5 16 x Screen Size 2 9 16 Note When installing the projector consider 5 tolerance for the Projection Distance in the above table 4 3 Screen Size 1 33 1 Aspect Ratio Projection Distance 16 9 Screen In case of displaying the 16 9 picture on the whole of the 16 9 screen 4 3 Screen In case of displaying the 16 9 picture on the whole of...

Страница 24: ...us pattern color White Focus pattern color Green VP 11S2 VP 11S2 Standard condition From 85 to 100 Extended mounting condition From 100 to 165 Lens shift position VP 11S2 CAUTION In the expanded mounting condition green focus pattern the corners of the picture may appear dark or distorted VP 11S2 U 01 ENG 07 8 27 10 47 AM ページ16 ...

Страница 25: ...ISH Screen Height 1H 165 85 Focus pattern color White 0 8 H Up 0 4H Down VP 11S2L Screen Positon 0 Center Standard condition From 85 to 165 Lens shift position VP 11S2L VP 11S2 U 01 ENG 07 8 27 10 47 AM ページ17 ...

Страница 26: ... DYN I M A G4 THTR COMP 1 COMP 2 S VIDEO USER HDMI 1 HDMI 2 VIDEO AUX 1 BLANKING AUX 2 IRIS LAMP C TEMP GAMMA B1 OFF B3 B2 Selecting the Input Signal Source C1 C2 S G1 H1 H2 V G2 A1 A2 RGB G3 STD DYN G4 THTR COMP 1 COMP 2 S VIDEO USER HDMI 1 HDMI 2 VIDEO AUX 1 AUX 2 ON STANDBY IRIS LAMP C TEMP GAMMA Turning on the Power You can select 5 kinds of ASPECT mode using remote controller Pressing the ASP...

Страница 27: ...Original Source Image Full mode The 16 9 squeezed image is displayed with the correct aspect Normal mode Zoom mode A 2 35 1 image is displayed in the entire screen This function is best used when a 480i 480p 576i or 576p squeezed image is input 16 9 video source The 4 3 image is enlarged horizontally The picture in normal ratio 4 3 is displayed 4 3 video source Through mode Images are shown at the...

Страница 28: ...or flashes a blue color and buttons on the projector and remote control are irresponsive to touch Once the fan stops the ON indicator goes out and the STANDBY indicator lights up a green color to indicate the projector is on standby Notes Do not pull out the AC power cord until the projector turns in standby mode Do not pull out the power cord suddenly in the state of POWER ON It can cause a break...

Страница 29: ...Blanking Right 0 100 100 0 100 0 0 100 0 100 Language English Deutsch Français Español Top L Top Top R Installation Front Rear F Ceiling R Ceiling Color Wheel x 6 x 5 x 4 Auto Memory1 Memory2 Memory3 P 29 P 27 CSC HDMI 1 Deep Color HDMI 2 Auto RGB YPBPR 4 4 4 YPBPR 4 2 2 YCBCR 4 4 4 YCBCR 4 2 2 Auto 8bit 10bit 12bit HDMI CSC HDMI 2 Auto RGB YPBPR 4 4 4 YPBPR 4 2 2 YCBCR 4 4 4 YCBCR 4 2 2 Deep Colo...

Страница 30: ...9 Lamp Mode 9 9 9 9 9 9 9 9 9 Iris 9 9 9 9 9 9 9 9 9 Fine Menu 1 Noise Reduction 9 9 9 9 9 9 9 9 9 R Gain 9 9 9 9 9 9 9 9 9 G Gain 9 9 9 9 9 9 9 9 9 B Gain 9 9 9 9 9 9 9 9 9 R Bias 9 9 9 9 9 9 9 9 9 G Bias 9 9 9 9 9 9 9 9 9 B Bias 9 9 9 9 9 9 9 9 9 Luminance Gain 9 9 9 Chroma Delay 9 9 9 Fine Menu 2 Aspect Cinema 2 2 2 VCR Mode Black Level 10 FRC CEC 3 3 3 Picture Shift V 4 4 4 4 4 4 4 4 4 Oversca...

Страница 31: ...ontrol Reset Lamp Life Reset All 1 Can be selected only when User is selected for the Picture Mode 2 On only when interlaced signals are input Off for progressive signals 3 On only when 1035i 1080i signals are input 4 On when Aspect is set to V Stretch for HD signals For other signals On when Aspect is set to Zoom or V Stretch 5 On when the RGB HD Adjust mode is set to Memory 6 On when the RGB HD ...

Страница 32: ...and Dynamic modes three indexes for memorizing picture quality adjustments Similarly the User mode has nine making a total of 18 indexes available for use Theater Reproduces the black suited for movie software Standard Suited for normal movie software Dynamic Suited for visually dynamic image software User 1 9 Enable the user to adjust the gamma curve as preferred P 25 Picture mode selection There...

Страница 33: ...ed for RGB input For details see Functions by Signal P 22 23 The settings made in Picture Adjust are saved in the currently selected Picture Mode index A B C D E Theater Dynamic Picture quality in each of the picture modes can be adjusted to your liking and those adjustments can be saved in memory User 1 Picture Adjust Fine Menu 1 Fine Menu 2 Input Signal RGB HD Adjust Display OSD Blanking Config ...

Страница 34: ...ust according to input signal The settings made in Fine Menu 2 are saved in each currently selected input signal source Standard 1 Cinema VCR Mode Black Level Auto On 0 IRE FRC Auto 1 0 Picture Shift V Picture Adjust Fine Menu 1 Fine Menu 2 Input Signal RGB HD Adjust Display OSD Blanking Config CEC Off HDMI Overscan Enable Aspect Full Fine Menu 2 By adjusting this Fine Menu you can make fine pictu...

Страница 35: ...of the input signal H adjusts the horizontal position of the input signal V adjusts the vertical position of the input signal Phase Adjust the phase of the DMD dots and the computer signal input from the RGB IN Adjust the picture to where it looks clearest Clamp Position Width Adjusts the clamp position and width used in RGB HD input Standard 1 Mode Readjust Resolution H Resolution V Position H Po...

Страница 36: ...from behind the screen Standard 1 Keystone Scale Width Position H Position V Installation 0 0 0 0 0 Front Color Wheel x5 Picture Adjust Fine Menu 1 Fine Menu 2 Input Signal RGB HD Adjust Display OSD Blanking Config HDMI Display Keystone Electronic vertical keystone correction Scale Width Installation Item Adjustments 100 0 25 25 0 Min Min Position H Position V Color Wheel 50 50 0 Left Right Defaul...

Страница 37: ...ck bands To use this mode or change the setting select from Memory 1 to 3 Off Turns the blanking mode off No masking occurs Memory 1 3 Memorize the blanking width of the top bottom left and right masks set with the below features Up to three settings can be memorized Standard 1 Menu Position Language Status Info Power OFF Confirm Blanking Memory Blanking Top Top L English Enable Disable Memory 1 0...

Страница 38: ...On Off Trigger 2 Zoom On Off Trigger 2 V stretch On Off Trigger 2 Through On Off Remote Control Wireless Wired Reset Lamp Life Yes No Reset All Yes No Remote Control Wireless Set to use the included remote controller Wired Set to control the projector from either Marantz s AV components connected to the REMOTE CONTROL IN OUT terminals or a PC or other device connected to the RS 232C terminal of th...

Страница 39: ... A Aspect Normal Lamp Mode Economy Iris 1 Lamp Life 921 Hours Total Time 3653 Hours Lamp Life and Replace Lamp When the lamp life becomes less than 100 hours and the unit is still on the remaining lamp life is displayed on the screen automatically When the lamp life becomes less than 5 hours the remaining lamp life is displayed on the screen To clear the warning press the MENU button Approximately...

Страница 40: ...NG COVER COMPLETELY M CAUTION HIGH PRESSURE LAMP MAY EXPLODED IF IMPROPERLY HANDLED REFER SERVICING TO QUALIFIED SERVICE PERSONNEL ATTENTION LA LAMPE SOUS HAUTE PRESSION PEUT EXPLOSER SI ELLE N EST PAS MANIPULEE CORRECTEMENT CONFIER L OPERATION A UN PERSONNEL D ENTRETIEN QUALIFIE VORSICHT BEI FALSCHER HANDHABUNG KANN DIE HOCHDRUCKLAMPE EXPLODIEREN UBERLASSEN SIE WARTUNGSARBEITEN NUR FACHPERSONAL C...

Страница 41: ...center Use only replacement parts specified by Marantz Unauthorized substitutions may result in fire electric shock or other hazards And the warranty may not be guaranteed Replacement Parts Cleaning the Lens Lamp Unit LU 12VPS3 Ceiling Mount kit MOUNT 20 This kit is specially designed to mount the unit on ceiling Extension Pole EXT 10 This tool is to adjust height with the Ceiling Mount Kit MOUNT ...

Страница 42: ...ble back in press the I button on the projector or the ON button on the remote control and check operation AC power cord is not connected correctly Lamp cover is not closed correctly A signal cable is not connected correctly Selected input is incorrect The picture mute is active Picture is not adjusted properly Lamp life is running out Contrast or brightness is not adjusted properly Picture is out...

Страница 43: ...proper signal feed to the projector Properly connect the cables Replace the lamp and reset lamp life Adjust resolution V Hz refresh rate of the equipment referring to the Timing Chart Meaning Message Remedy Use the list below to check the message displayed on the screen ON SCREEN MESSAGE Aspect ratio Width and height ratio of an image The normal aspect ratio of a computer and video image is 4 3 Th...

Страница 44: ... 640x350 640x350 640x400 640x400 640x480 640x480 640x480 640x480 800x600 800x600 800x600 800x600 800x600 1024x768 1024x768 1024x768 1024x768 1280x1024 1600x1200 59 94 60 59 94 60 50 59 94 60 50 59 94 60 50 59 94 60 59 94 60 50 48 50 59 94 60 23 98 24 25 29 97 30 50 59 94 60 59 94 60 50 59 94 60 23 98 24 25 29 97 30 23 98 24 25 29 97 30 50 59 94 60 70 85 70 85 60 72 75 85 56 60 72 75 85 60 70 75 85...

Страница 45: ...0 3 11 16 93 5 7 5 16 185 25 12 16 19 75 18 1 4 18 5 16 488 5 489 5 8 12 16 222 0 7 3 16 182 5 3 1 4 82 6 9 16 2 7 16 15 0 61 8 6 12 16 171 0 5 5 8 143 0 3 3 9 16 76 0 91 0 5 3 16 132 0 4 11 16 119 0 4 1 8 105 0 2 5 16 58 0 1 10 16 42 0 6 1 16 153 5 5 3 4 145 75 12 16 19 75 11 11 16 296 5 10 5 16 262 0 14 6 16 346 5 5 9 16 5 5 8 142 143 4 11 16 110 0 3 11 16 93 5 7 5 16 185 25 6 4 2 8 1 6 DIMENSIO...

Страница 46: ...Note VP 11S2 U 07 Note 07 8 27 10 44 AM ページ1 ...

Страница 47: ...www marantz com You can find your nearest authorized distributor or dealer on our website is a registered trademark Printed in Japan 09 2007 00M28AV851250 mzh g VP 11S2 U cover 07 8 27 10 43 AM ページ9 ...

Отзывы: