background image

The Outlaws’ Guide to the Marantz SR5004 

Marantz SR5004 

  7

_


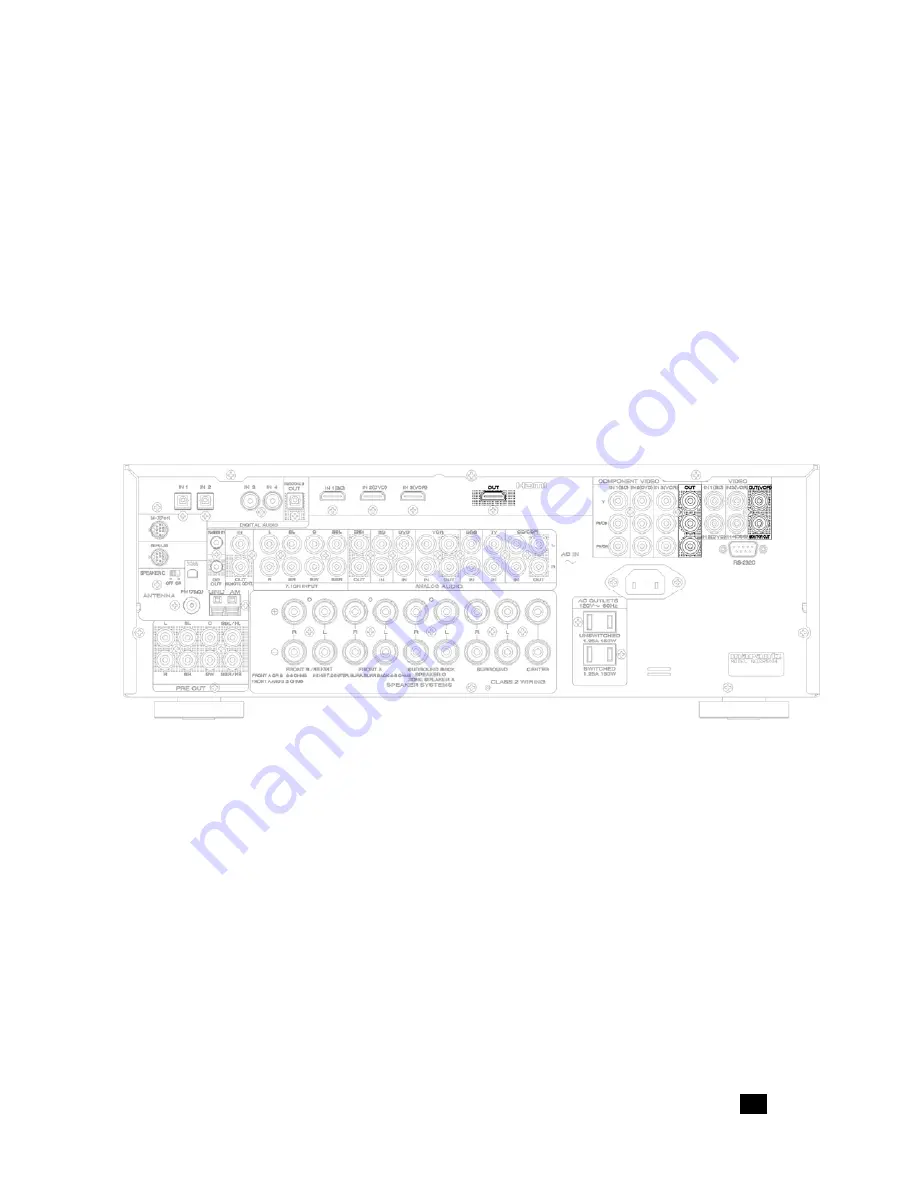
several possible connections available. The preferred connection is component video, 
although because the display is not capable of supporting HD resolutions we have a 
separate category for this connection option: 

Video Display Tier SD-Component

. The 

next best video connections are S-video and composite video. Because the SR5004 
lacks S-video switching, systems that have a TV with S-video or composite video inputs 
will be combined in the 

Video Display Tier Composite

 
Identify which of the five Video Display Tiers described above applies to your display. 
The five are summarized below for your convenience: 
 

Video Display Tiers 
HDMI

: HDTV with at least one HDMI input or DVI with HDCP input. 

DVI (no HDCP)

: HDTV with at least one DVI input but no HDCP. 

HD-Component

: HDTV with component video input but no HDMI or DVI inputs. 

SD-Component

: Standard TV with component video input. 

Composite

: Standard TV with composite video input but no component input. 


Video Output Connections 


HDMI Video Display Tier 

The 

HDMI


Video Display Tier 

is the case for which the SR5004 was optimized. It is also 

in many ways the simplest to connect, both for the output and for the video and audio 
inputs that we will be looking at shortly. Connect an HDMI cable from the SR5004’s 
HDMI output to the TV’s HDMI input. If the TV’s input is DVI with HDCP support, use an 
HDMI-to-DVI cable or an HDMI cable with an HDMI-to-DVI adapter to connect the 
SR5004’s HDMI output to the TV’s DVI input. 
 

DVI (no HDCP) Video Display Tier 

Some older displays and most data monitors include DVI inputs that lack HDCP, and 
this condition creates a unique case. The video output connection itself is 
straightforward. As with the DVI with HDCP output described in 

HDMI Video Display 

Tier

, an HDMI-to-DVI cable or HDMI cable with HDMI-to-DVI adapter can be used to 

connect the SR5004’s HDMI output to the display’s DVI input. We will address the video 
input limitations imposed by the lack of HDCP in the next section. 

Содержание SR5004

Страница 1: ...e Outlaws Guide to the Marantz SR5004 Marantz SR5004 7 1 Channel Receiver Version 1 02 Marantz is a registered trademark of D M Holdings Outlaw and cowboy logo are registered trademarks of Outlaw Audio LLC ...

Страница 2: ...s of the two channel audio world ready to make the move into surround and home theater Still others are entirely new to the hobby The home theater gurus will likely be able to fend for themselves although we think there could still be a few useful tidbits here for them For many a surround receiver like the SR5004 can be a daunting challenge for which a 96 page manual offers little reassurance Our ...

Страница 3: ... Other Connections Connection Summary Sheet 16 17 19 22 23 25 26 Quick Setup Guide Input Setup Speaker Setup Surround Setup Video Setup Preference Acoustic EQ 27 27 29 Audio Formats and Listening Modes Know Your Inputs The Listening Mode Toolbox 33 33 35 38 41 41 44 A Roadmap To The Setup Menus Input Setup Speaker Setup Surround Setup Video Setup Preference Acoustic EQ 47 Tips and Tricks 50 Troubl...

Страница 4: ...nput Support 192kHz 24 bit Digital to Analog Converters Audyssey MultEQ Room Correction Audyssey DynamicEQ Loudness Correction Audyssey Dynamic Volume Manual EQ User adjustable 9 band EQ s for each of nine full range channels 3 HDMI Inputs and 1 HDMI Output Each of the three HDMI inputs is assignable and all are HDMI version 1 3a This includes support for bitstream input of Dolby Digital Plus Dolb...

Страница 5: ...Zone A Zone B Audio from any analog source can be routed to Zone A and any digital source can be routed to Zone B RS 232 port The RS 232 port serves as control interface allowing automation systems to connect to and control the processor AM FM XM Ready and SIRIUS Connect In addition to AM and FM radio reception and 60 radio presets the SR5004 includes provisions for both XM and SIRIUS Satellite Ra...

Страница 6: ... your system we will define a series of five Video Display Tiers that will be used when connecting video inputs Most SR5004 owners will be connecting the receiver to a high definition video display so we will begin with the optimal video output connection for such a case We call that case Video Display Tier HDMI which applies to two situations displays with an HDMI input and those that use DVI wit...

Страница 7: ... component video input Composite Standard TV with composite video input but no component input Video Output Connections HDMI Video Display Tier The HDMI Video Display Tier is the case for which the SR5004 was optimized It is also in many ways the simplest to connect both for the output and for the video and audio inputs that we will be looking at shortly Connect an HDMI cable from the SR5004 s HDM...

Страница 8: ... In this case connect the SR5004 s composite video monitor output to the TV s composite input We will address the video input limitations associated with this case in the next section VCR Record Video Output The SR5004 offers an additional composite video output for recording the VCR record output Connecting a recording device to the composite video record output may require additional video input...

Страница 9: ...play Tier The DVI no HDCP scenario is similar to the HDMI with one difference Sources that are HDMI offering either an HDMI output or a DVI HDCP output cannot be connected using that output because they will not provide a video signal without being connected to an HDCP equipped display Sources such as this must instead use the next best video output Typically that will be a component video output ...

Страница 10: ... main display output but will be used by the record output Audio Inputs As video is only half of home theater completing the video connections brings us roughly half way through our wiring The next step is audio We have four possible options for delivering audio to the SR5004 HDMI coaxial optical digital multichannel analog and stereo analog Audio Input Connections Digital and Analog For the HDMI ...

Страница 11: ...HDMI v1 2 but without an HDMI v1 2 output or an HDMI v1 1 player that can decode SACD s to multichannel PCM you will need to connect the player s 7 1 channel analog output to the SR5004 For 5 1 analog outputs connect the surround left and right to the surround left and right channels of the multichannel analog input leaving the surround back inputs empty See page 19 to configure the 7 1 channel an...

Страница 12: ...nal amps or with an external amplifier the two following options cannot be used The second option for these outputs is Speaker C speaker connections which is intended for use in bi amping front speakers To bi amp front speakers using these connections the Speaker C switch on the rear panel must be set to On Lastly these outputs can be used to power Zone A speakers If these outputs are used for Zon...

Страница 13: ...hey can only be used with inputs that have stereo analog connections made These outputs can be used to connect to a separate power amplifier that powers speakers in Zone A allowing Zone A to be used even if the main zone has surround back speakers Other Connections Additional rear panel connections include a 12V trigger IR input an RS 232 port an assortment of radio antennas or satellite radio mod...

Страница 14: ...om kits and IR distribution systems such as those made by Niles and Xantech Connect a mono mini plug from an IR sensor or IR connecting block to the rear panel IR input to allow the SR5004 to receiver IR signals from other rooms This can also be used for the main zone when the SR5004 is located out of the line of sight inside a piece of furniture or in a remote equipment rack The RS 232 port provi...

Страница 15: ...3 Composite Optical 1 2 Coaxial 3 4 Stereo Analog Source _____________ HDMI IN1 IN2 IN3 Component IN1 IN2 IN3 Optical 1 2 Coaxial 3 4 Stereo Analog AUX Input 7 1CH Input Zone A Output Source _____________ HDMI IN1 IN2 IN3 Component IN1 IN2 IN3 Multichannel Analog Zone _______________ Stereo Analog Out Surr Back Speakers Monitor Output Zone B Output Source _____________ HDMI IN1 IN2 IN3 Component I...

Страница 16: ...n Standby mode pressing this button when already in Standby mode will do nothing The other controls needed for the setup process are the navigation pad at the center of the remote and the two buttons directly beneath it Menu and Exit The navigation pad provides navigation through the menus and to scroll through menu entries and to adjust settings and the Enter button to selected highlighted items ...

Страница 17: ...equired for initial setup of the SR5004 Input Setup In this section we will define which digital and analog connections the SR5004 uses with the different Inputs available to it From this point forward an Input refers to one of the eight inputs listed on the Connection Summary Sheet BD DVD VCR DSS TV CD CD R AUX and 7 1CH If we refer to any of the cables plugged into the SR5004 we will identify th...

Страница 18: ...ptions for that entry Press ENTER again to save the selected setting Function Input Setup sub menu First is the Mode column which determines what digital audio connection the input will use The default value of Auto will automatically determine which digital audio connection is available and if none is available it will use analog audio If Mode is set to HDMI for an input then that input will use ...

Страница 19: ... the Function Input Setup sub menu scroll down to Return and press ENTER to return to the Input Setup menu If you will be using the 7 1 Channel analog input scroll down one spot to the 7 1Ch Input Setup sub menu and press ENTER to select it The first item on this sub menu is Video in which allows the 7 1ch Input to be assigned to a specific input BD DVD etc or set to use whatever video input was a...

Страница 20: ... locations to determine speaker distance channel trim and bass management settings and to apply equalization to all channels to correct for room effects Pages 27 through 30 of the SR5004 User Manual provide a detailed description of the process of running the Audyssey MultEQ setup Here we will offer a quick overview of the process First plug the included microphone into the front panel SETUP MIC p...

Страница 21: ...a second microphone position You may want to take a moment to check that Audyssey properly identified all of the speakers that are connected to the SR5004 in which case you may select Check to see the speaker results Audyssey MultEQ Setup Check Results If any speakers are missing you should cancel setup and verify wiring and power connections at speakers and amplifiers before re starting Audyssey ...

Страница 22: ...At this point the Audyssey setup process is complete Some users may way to make adjustments to settings such as the crossover frequency speaker size or even channel levels For example Audyssey will have set the speaker channel trim levels to achieve equal output levels for all of the connected speakers but users who prefer to use elevated channel trim settings for certain speakers such as the cent...

Страница 23: ...o signal is converted and output from the SR5004 s HDMI component and composite video outputs Video Convert Sub Menu Each input can be adjusted independently and each has three options Analog HDMI Analog Only and Off The options are described below Analog HDMI Any analog signal component video composite video and the front panel S video is up converted and or down converted so that it is available...

Страница 24: ...setting only affects analog video inputs composite video and component video HDMI video inputs are passed through to the HDMI output without processing Auto The SR5004 will select an output resolution based on information provided by your HDTV over the HDMI connection Through The SR5004 will apply no video processing to incoming signals Analog video signals will be converted to 480i 576i digital a...

Страница 25: ...e 12V DC trigger and several other functions Most of these will be discussed later in the Roadmap to the Setup Menu but some users will need to verify that the 12V DC trigger is set properly during the quick setup process Preference Menu The third option in the Preference menu is the DC Trigger sub menu Select this sub menu with the and buttons then press ENTER to view the sub menu DC Trigger Sub ...

Страница 26: ...d using HDMI or component video and coaxial or optical digital audio we recommend using the switched 120V output in place of the 12VDC trigger output An AC adapter with a DC output that is matched with your amplifier s trigger input can be plugged into the switched 120V output and used as a trigger signal See your amplifier s manual for details on the appropriate AC adapter Acoustic EQ The Audysse...

Страница 27: ...i for example The second is digital connections with stereo PCM signals including sources such as CD s and some digital cable channels The first case stereo analog is converted to stereo PCM by an analog to digital converter ADC so both inputs may be handled by the digital signal processor DSP Dolby Digital Dolby Digital was first called AC 3 when it appeared in the 1990 s on LaserDisc and it was ...

Страница 28: ... and at one point tried to make it the standard audio format for DVD Dolby Digital won that battle but DTS was included in the DVD specifications as an option As with Dolby Digital the only DTS tracks affected by this setting are those with three or more channels of audio being used DTS HD High Resolution DTS responded to Dolby Digital Plus with DTS HD High Resolution Like DD DTS HD HR supports 7 ...

Страница 29: ...ditional audio channels Sometimes surround processing can even include reducing the number of channels as when a system lacks a center channel and the data in that channel must be re distributed to other channels Post Processing Once decoding and processing tasks have been completed and a final set of audio channels are in place there are a number of other processes that may be carried out These i...

Страница 30: ...y the surround processor that Dolby Digital EX is available Unlike Pro Logic IIx it produces a mono surround back signal Shortly after Dolby Digital EX appeared DTS introduced a variation of DTS called DTS ES A DTS ES source includes six discrete audio channels with the sixth being a rear surround signal Dolby Pro Logic II Dolby Pro Logic is a matrix surround processing technology that has been av...

Страница 31: ...ema mode is similar to Pro Logic II Movie and Neo 6 Music is similar to Pro Logic II Music See page 40 for Neo 6 Music settings Unlike Pro Logic II Neo 6 supports six discrete channels of audio left right center surround left surround right and a mono surround back Due to this sixth audio channel Neo 6 can also be used with 5 1 channel sources such as Dolby Digital and DTS to generate a mono surro...

Страница 32: ...s only minimal processing of the original signal it is particularly popular for piping music throughout a room for a party You will get consistent sound all the way around the room Neural Surround This processing mode is intended for use with XM Radio or other stereo music sources and produces surround sound using psychoacoustic frequency domain processing Dolby Headphone When headphones are conne...

Страница 33: ...ell as page number references from the SR5004 User Manual for each menu and sub menu SR5004 Main Setup Menu Input Setup The Quick Setup Guide covered this menu in great detail except for the Function Rename sub menu that we will discuss below We recommend using that section and the pages from the SR5004 User Manual referenced below to locate any information you might need about the settings they c...

Страница 34: ...an input name begin by highlighting Function with the and buttons and select the desired input using the and buttons Once the desired input is selected use the navigation buttons to select the first character to edit and then press the button to move to the keyboard Use the navigation buttons to highlight the desired character and press ENTER to select it Repeat the process for each character Once...

Страница 35: ...aker Setup Menu Auto Setup Pages 27 30 Manual Setup Pages 31 32 In the Quick Setup section we discussed the Auto Setup using Audyssey MultEQ and the included calibration microphone We did not discuss the Manual Setup sub menu at that time so we will discuss it below Manual Setup Sub Menu The Manual Setup sub menu has three separate menus The first is Speakers Size which sets the bass management fo...

Страница 36: ... general a speaker should be considered to be small unless the low frequency limit is near or below 30Hz We recommend finding out what the lower limit is for each of your speakers as it is useful for several settings in this sub menu Each set of speakers Front Front Height Center Surround and Surround Back can be set to Large or Small and all of the speakers except for the Fronts can be set to Non...

Страница 37: ...gnal separately so that all channels sound reaches the listening position at the same time As with speaker size the speaker distance settings can be determined automatically using the Audyssey MultEQ setup process but it can also be set manually using the Speakers Distance sub menu To make these settings manually use a tape measure to measure the distance from the listening position to each speake...

Страница 38: ...z SR5004 User Manual If the Audyssey MultEQ automatic calibration is not used we recommend performing this manual calibration using an SPL sound power level meter SPL meters are available at Radio Shack or online for under 50 Surround Setup The Surround Setup menu provides an assortment of audio related controls such as Pro Logic IIx and Neo 6 settings The SR5004 User Manual provides information o...

Страница 39: ... not enabled in the Speakers Size sub menu will not be listed in Channel Level If a source is active the Surround Mode listed will be the mode currently in use and changing Surround Mode will change the active mode Changes made here will also affect the settings in Speakers Level sub menu Channel Level Sub Menu The Music mode for Pro Logic IIx incorporates three settings that allow user adjustment...

Страница 40: ... A Center Width of 7 will redirect all center channel data to the left and right channels The default value is 3 CS II Parameter Sub Menu NEO 6 Parameter Sub Menu Circle Surround II CS II offers two adjustments The first is Trubass which can be set from 0 to 6 in increments of 1 Settings above 0 will produce extra bass information at the lowest octave bands and a higher setting will produce more b...

Страница 41: ...DAX to the active audio source with High providing a stronger effect In addition to the menu setting found here M DAX can be controlled from the remote control using the M DAX button Video Setup The Video Setup menu options are described in both the Quick Setup Guide starting on page 23 and the SR5004 User Manual see page references below Video Setup Menu Video Convert Page 35 OSD Information Page...

Страница 42: ...ed audio playback These two zones Zone A and Zone B are controlled in the Preference menu and each has a sub menu for that control Zone A Setup Zone A is the more flexible of the two zones so the Zone A Setup sub menu is the more extensive of the two sub menus The desired source can be selected in this menu and if Zone A is turned on the sleep timer may be set in this menu Additionally the pre amp...

Страница 43: ...in the Preference menu must be changed from the default Rec setting to Zone B Once that is done Zone B can be used in conjunction with any digital audio input coaxial or optical There is no volume control for Zone B That must be provided by the component at the other end of the optical cable As with Zone A the sleep timer can be turned on for Zone B when Zone B is engaged Both Zone A and Zone B ca...

Страница 44: ...onnection If the SR5004 is connected to an HDMI v1 3a display HDMI Lip Sync can be set to Enable to allow the SR5004 to automatically determine the audio delay required to compensate for delays in the video signal caused by video processing Acoustic EQ The Acoustic EQ menu provides control over both Audyssey calculated and manually adjusted EQ curves as well as two Audyssey features The menu is de...

Страница 45: ...calculations to correct for the sound characteristics of the listening room User Equalization is applied to all speakers based on user defined equalization curves set in the Adjust User EQ sub menu In addition to the Acoustic EQ menu the EQ mode can be changed using the EQ button on the remote control Pressing the EQ button multiple times will scroll through the options in the order listed above A...

Страница 46: ...udyssey Dynamic EQ is turned on the Audyssey Dynamic EQ Adjust setting can be changed from 0dB the default value to 5dB 10dB or 15dB Marantz recommends 5dB for sources with a very wide dynamic range such as classical music They recommend 10dB for musical sources such as jazz which also have a wide dynamic range and for TV content The 15dB setting is recommended for pop rock music or other material...

Страница 47: ...n audio only input such as CD a specific video input can still be viewed by selecting the video input before selecting the CD input the video switching will remain in its previous state Maximizing Video Inputs by using Front Input AUX Some users may find that they start to run out of rear panel connections if their system includes many sources Between DVD Blu ray HD DVD cable satellite and a game ...

Страница 48: ...thout entering the setup menu To make these changes select the CH SEL button The bottom line of the front panel display will list the speaker and its channel trim setting Scroll through the available speakers using the and buttons and use the and buttons to adjust the setting for each speaker Press CH SEL again when finished Audyssey Dynamic Volume Function Audyssey Dynamic Volume is an excellent ...

Страница 49: ...s Menu reference sheet to record your settings before a reset You will also need to re run the Audyssey MultEQ system and restore tuner memories after a reset Locking the Setup Menus Once you have set up the SR5004 and everything is just the way you like it you may want to prevent accidental changes Each of the SR5004 s main setup menus Input Setup Speaker Setup etc may be locked separately such t...

Страница 50: ...igger is enabled in setup see pages 25 and 26 Verify that correct input is selected and that input is set to use correct analog or digital audio connection see page 18 Verify that speaker A output is engaged If front panel does not show SP A on upper left portion of display press the SPKR A B button on the remote control until it does show SP A Verify that headphones are not plugged in Verify that...

Страница 51: ...listening mode is not active Pure direct will disable video record output Remote Control Does Not Work Press the AMP button to control the SR5004 Verify that the SR5004 s remote sensor window is not obstructed Check batteries and replace if needed Cannot Find 7 1ch Input or Cannot Change Inputs after Selecting 7 1ch Input The 7 1ch input is not available using the input and buttons Press the 7 1 b...

Страница 52: ...The Outlaws Guide to the Marantz SR5004 Marantz SR5004 52_ Notes ...

Страница 53: ...k owned by Neural Audio Corporation HDMI and the HDMI logo are trademarks or registered trademarks of HDMI Licensing LLC XM Ready is a trademark of XM Satellite Radio Inc Hardware and monthly service subscription sold separately SIRIUS and SiriusConnect are trademarks of SIRIUS Satellite Radio Inc Available only in the contiguous United States excluding Alaska and Hawaii and Canada HD Radio is a t...

Отзывы: