


System Overview
Chapter 4
Zetasizer Nano Basic Guide
Page 4-13
Installation options
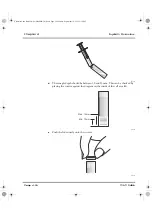
If purge air is required connect to the purge air port at the base of the rear panel
.
If the instrument is fitted with the 532nm ‘green’ laser option connect the laser
PSU to the PSU input on the rear panel
.
If accessories are used connect these to the appropriate ports as described in
their respective user manuals
. Follow any further in their respective user
manuals
If the instrument is connected to an external detector and the flow-mode
facility is used; connect the input signal cable to this connection
.
Changing the computer
If, at some point in the future, the computer used with the instrument is changed,
the following actions will be required.
Consult the software update notification supplied with the software.
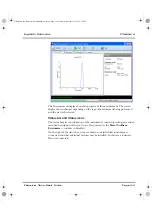
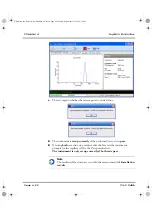
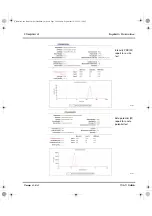
Installing the software
1.
Insert the
Zetasizer
software CD into the CD drive.
2.
If
Autorun
is enabled on the computer, the software will start to install auto-
matically. Follow all on-screen instructions to complete the installation.
3.
If Autorun is not enabled, select
Start-Run-Setup
and follow the on-screen
instructions.
Note
If the software is subsequently updated with a new version, any custom
reports, parameter settings, SOPs, etc will be preserved.
Power on
If it is not already switched on, turn on the instrument and start the software, as
described in the previous chapter. Remember that the instrument
must be pow-
ered up for 30 minutes before a measurement is made
.
Zetaszier Nano Basic Guide (Man0486-1.0).book Page 13 Monday, September 10, 2012 2:19 PM