2-20
Clock/Hour Display
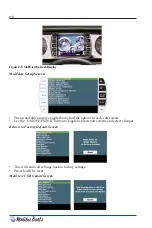
Press the E to display the setup screen “Clock/Hour Display.” The month, day and year
will be displayed. Set month first, press enter “E (Enter)” to move to the next selection; to
set the day, press “E (Enter)”, then completed hour, day, then “E (Enter)”. Once the year
is set, the selection will continue to set the time. Set each minute second; to move to the
next screen, press “E (Enter)” up
↑
arrow. The next display panel will be shown.
Temperature
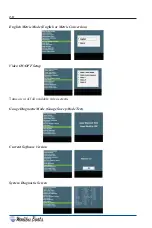
The air and water temperatures are shown on the display panel. Temperature can be
displayed in either Fahrenheit or Celsius. See English/Metric operation in the SETUP
menu to change view.
Depth
The depth meter will display lake depth, and can be set for shallow water alarm. To set
the shallow water settings, press the “E (Enter)” on the display panel. The display will be
flashing. Scroll through the settings until the desired water depth is set. The system is set
to default at 2 ft. Once this is completed, press “E (Enter)” to return to main menu.
Notice:
The Depth graphical display only displays the bottom of the
lake up to 20 feet of depth.
For boats equipped with optional depth finders, the depth system may lose its lock on the
bottom if speeds exceed 20 MPH. This is normal. The depth system should reacquire the
bottom once the boat has slowed to under 20 MPH.
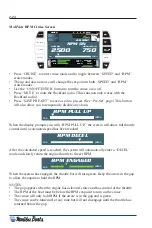
MPH/RPM
Your dash display can also be set to display boat running speeds and RPM. If your
speedometer needs correction due to changes in the system, it can be done using the
MPH mode screen (see
Speed Calibration
).
Speed Calibration
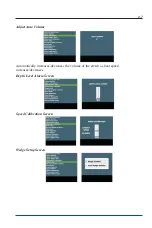
The speed can be calibrated manually when the boat speed is between 15 and 36 MPH.
To calibrate, scroll through the display menu to MPH/RPM. Press and hold “E (Enter)” to
enter. Highlight MPH and use arrow buttons to adjust speed UP or DOWN. Press “E
(Enter)” to exit. The MPH mode is all that can be recalibrated.
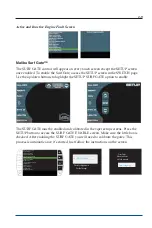
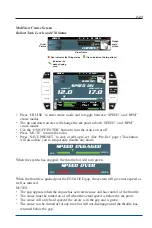
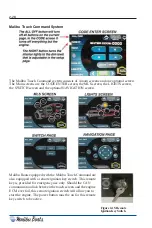
Malibu Cruise Control
Figure 2-9. Cruise Control
cruise
cruise
Содержание Boat 2014
Страница 2: ...2 Notes...
Страница 4: ...ii Notes...
Страница 8: ...vi Notes...
Страница 19: ...1 9 Figure 1 5 Carbon Monoxide Hazards KC 0461M...
Страница 24: ...1 14 Notes...
Страница 83: ...2 59 Fosgate USB DRIVE Radio Screens...
Страница 84: ...2 60 SIRIUS Radio Screens...
Страница 85: ...2 61 Fosgate IPOD Radio Screens...
Страница 93: ...2 69 Select Course Creating a New Course...
Страница 95: ...2 71 Select Auto Course Creating a New Auto Course...
Страница 108: ...2 84 Exit Setup Highlighting the EXIT SETUP and pressing ENTER will bring the display back to the MENU screen...
Страница 114: ...2 90 Notes...
Страница 119: ...Warning Label Locations Refer to the diagrams below for the location of each label 3 5...
Страница 164: ...Notes W 10...

