4/11
©
PHANTOS
®
Distributed in Australia by PHANTOS www.phantos.com.au
2. SET UP
2.1 Mounting
This unit may be free standing, or clamp mounted. If the unit is to be
mounted using the bracket, avoid suspending the unit such that snow is
emitted directly toward any one’s face. Whatever installation method
you choose, do not allow the unit to have more than a 15 degree angle
of inclination.
IMPORTANT!!! Safety cables must always be used for overhead
mounting. The safety cable must be capable of holding 10 times
the weight of the fixture.
2.2 Fixture Linking
To run your show of one or more fixtures using a DMX-512 controller or to
run synchronized shows on two or more fixtures in master/slave
operating mode, you need DMX cables to link the units from DMX IN to
DMX OUT.
Only use standard 110-120 Ohm shielded cable. These are 2
core-screened cables, with each core having at least a 0.5mm
diameter. Do not use the ground lug on the XLR connector. Do not
connect the cable
’
s shield conductor to the ground lug or allow the
shield conductor to come in contact with the XLR’s outer casing.
Grounding the shield could cause a short circuit and erratic
behavior.
5/11
©
PHANTOS
®
Distributed in Australia by PHANTOS www.phantos.com.au
2.2.1 Line Termination
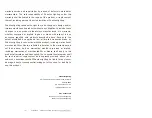
In DMX Mode, at the last fixture in the chain, the DMX output has to
be connected with a DMX terminator. This prevents electrical noise
from disturbing and corrupting the DMX control signals. The DMX
terminator is simply an XLR connector with a 120
(ohm) resistor
connected across pins 2 and 3, which is then plugged into the
output socket on the last projector in the chain. The connections are
illustrated below.
2.3 AC Power
This product has an auto-ranging power supply that can work with
an input voltage range of 100~240 VAC, 50/60 Hz.
Warning!!! All fixtures must be connected to circuits
with a suitable Earth Ground.


