22 ENGLISH
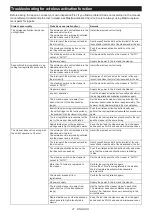
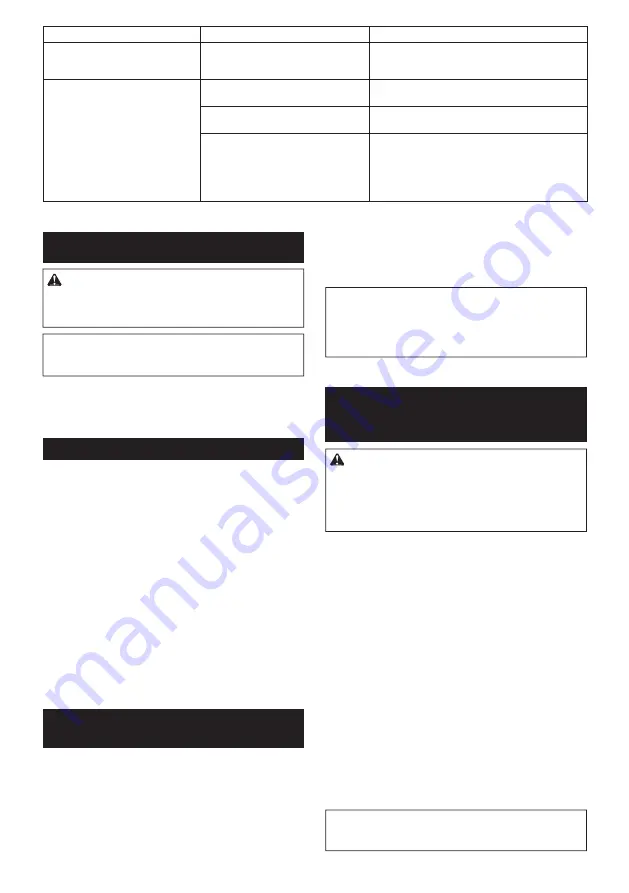
State of abnormality
Probable cause (malfunction)
Remedy
The cleaner runs while the tool's
switch trigger is not pulled.
Other users are using the wireless acti
-
vation of the cleaner with their tools.
Turn off the wireless activation button of the other
tools or cancel the tool registration of the other
tools.
Cannot erase all tool registrations in
the cleaner.
Pressing the wireless button on the tool. Press the wireless button on the cleaner for erasing
all tool registrations.
The stand-by switch on the cleaner is
not set to "AUTO".
Set the stand-by switch on the cleaner to "AUTO".
The wireless activation button is not
held down correctly.
Hold down the wireless activation button for more
than 6 seconds and then release it when the wire-
less activation lamp blinks in red. Hold down the
wireless activation button for more than 6 seconds
again until the wireless activation button rapidly
blinks in red and then release the button.
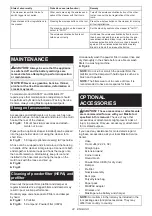
MAINTENANCE
CAUTION:
Always be sure that the appliance
is switched off and the battery cartridges are
removed before attempting to perform inspection
or maintenance.
NOTICE:
Never use gasoline, benzine, thinner,
alcohol or the like. Discoloration, deformation or
cracks may result.
To maintain product SAFETY and RELIABILITY,
repairs, any other maintenance or adjustment should
be performed by Makita Authorized or Factory Service
Centers, always using Makita replacement parts.
Storage of accessories
Accessories and attachments not in use, such as noz
-
zles and brushes, can be hooked and stored in the multi
hook at the rear of the cleaner.
►
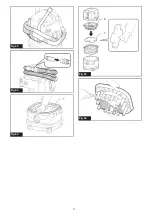
Fig.40:
1.
Multi hook
2.
Accessories and attach
-
ments not in use
Pipes (with an optional stopper installed) can be placed
into the pipe holder when not using the cleaner for a
short time.
►
Fig.41:
1.
Stopper (optional accessory)
2.
Pipe holder
A hose can be wrapped and stored around the housing
or handle of the cleaner in large loops. Connect its both
ends together to make loops and hook the loops onto
the handle raised up. Alternatively, keep its root end
installed in the hose inlet and hang the loops on the
multi hook with the loose end tied up.
►
Fig.42
►
Fig.43
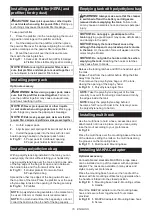
Cleaning of powder filter (HEPA) and
prefilter
Clean out the powder filter, prefilter and damper at
regular intervals since clogged filters and damper may
result in poor suction performance.
Routinely wipe and shake dust off filters and damper
by hand.
►
Fig.44:
1.
Prefilter
►
Fig.45:
1.
Damper
2.
Powder filter (HEPA)
Occasionally wash the powder filter in water, rinse and
dry thoroughly in the shade before use. Never wash
filters in a washing machine.
►
Fig.46
NOTE:
Do not rub or scratch the powder filter, the
prefilter and the damper with hard objects such as a
brush and a paddle.
NOTE:
The filters wear out in course of time. It is
recommended to have some spares for them.
OPTIONAL
ACCESSORIES
CAUTION:
These accessories or attachments
are recommended for use with your Makita tool
specified in this manual.
The use of any other
accessories or attachments might present a risk of
injury to persons. Only use accessory or attachment
for its stated purpose.
If you need any assistance for more details regard
-
ing these accessories, ask your local Makita Service
Center.
•
Hose
•
Front cuffs (22, 24, 38)
•
Straight pipe
•
Extension wand
•
Corner nozzle
•
Round brush
•
Powder filter, HEPA (for dry dust)
•
Damper
•
Prefilter
•
Nozzle assembly
•
Bent pipe
•
Polyethylene bag
•
Paper pack
•
MAKPAC adapter
•
Wireless unit
•
Makita genuine battery and charger
NOTE:
Some items in the list may be included in the
tool package as standard accessories. They may
differ from country to country.
Содержание VC002GL
Страница 2: ...1 2 3 4 5 Fig 1 2 1 Fig 2 1 2 Fig 3 1 2 Fig 4 1 2 Fig 5 1 1 2 Fig 6 Fig 7 2 ...
Страница 3: ...1 3 2 Fig 8 1 2 3 4 Fig 9 Fig 10 1 2 3 4 5 6 6 6 Fig 11 1 4 2 3 Fig 12 1 2 3 Fig 13 3 ...
Страница 4: ...1 Fig 14 1 2 Fig 15 Fig 16 1 2 Fig 17 1 2 3 Fig 18 2 3 1 Fig 19 1 2 Fig 20 4 ...
Страница 5: ...1 2 Fig 21 1 2 3 4 Fig 22 Fig 23 1 3 2 Fig 24 1 2 3 Fig 25 2 1 Fig 26 Fig 27 1 Fig 28 5 ...
Страница 6: ...1 2 3 4 Fig 29 1 2 3 Fig 30 1 Fig 31 2 1 2 1 Fig 32 Fig 33 1 Fig 34 6 ...
Страница 7: ...2 1 Fig 35 1 Fig 36 2 1 2 1 Fig 37 3 2 1 Fig 38 2 1 Fig 39 1 2 2 Fig 40 1 2 Fig 41 7 ...
Страница 8: ...Fig 42 Fig 43 1 Fig 44 1 2 Fig 45 Fig 46 8 ...
Страница 163: ...163 ...
Страница 171: ...7 ...

