


34 ESPAÑOL
2.
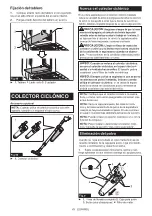
Siga los procedimientos a continuación depen-
diendo del tipo de tubo de extensión:
NOTA:
El tubo de extensión de tipo corredera y el
tubo de extensión de tipo anillo no son compatibles
entre sí. Si desea cambiar el tubo de extensión de
tipo corredera por el tubo de extensión de tipo anillo o
viceversa, cambie todo el conjunto de tubo curvo.
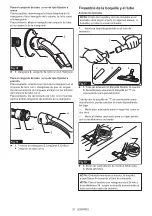
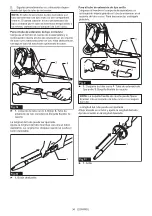
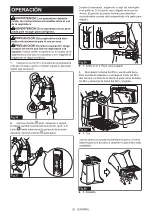
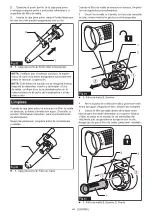
Para el tubo de extensión de tipo corredera
Cárguese al hombro el cuerpo de la aspiradora y a
continuación inserte el tubo de extensión en el conjunto
de tubo curvo hasta escuchar un clic. Para desconectar,
extraiga el tubo de extensión oprimiendo el botón.
1
2
3
4
Fig.19
►
1.
Conjunto de tubo curvo
2.
Botón
3.
Tubo de
extensión de tipo corredera
4.
Boquilla flexible de
caucho
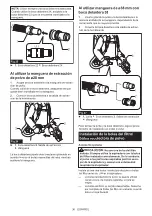
La longitud del tubo puede ser ajustada.
Ajuste la longitud del tubo mientras presiona el botón
deslizable. La longitud se bloquea cuando se suelta el
botón deslizable.
1
Fig.20
►
1.
Botón deslizable
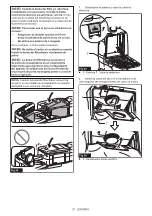
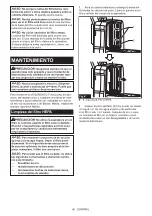
Para el tubo de extensión de tipo anillo
Cárguese al hombro el cuerpo de la aspiradora y a
continuación inserte girando el tubo de extensión en el
conjunto de tubo curvo. Para desconectar, extráigalo
girándolo.
1
2
3
3
Fig.21
►
1.
Conjunto de tubo curvo
2.
Tubo de extensión de
tipo anillo
3.
Boquilla flexible de caucho
NOTA:
La boquilla flexible de caucho puede fijarse
directamente al conjunto de tubo curvo sin el seguro
del tubo.
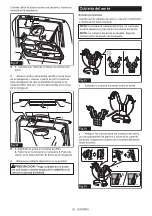
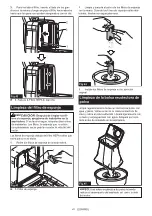
La longitud del tubo puede ser ajustada.
Afloje el anillo en el tubo y ajuste la longitud del tubo.
Apriete el anillo en la longitud deseada.
1
Fig.22
►
1.
Anillo